* For those who use images and paragraphs from this write-up, please acknowledge that you got it from this website. There are those who did not acknowledge the use of various images and graphs and still want their write up or request is approved; rest be assured it will be marked as spam or as trash as it is very disrespectful.
The animation production process, as with any other projects is divided into three parts, namely the pre-production, production, and post-production process.
Under the pre-production process for animation is the script, storyboarding, audio recording, animatic, character, prop and location design, color styling, and color model sheet. The pre-production sets the tone for the animation production process, if it is not well conceived and done, there will be a lot of retakes and corrections to be done in the production process and it will be very costly in terms of time, effort and money.
In our case, we just did the production without really thinking through the concept of the animation, so there were some corrections and realignments in the latter stages of the production. But because of the delays in the production process, we were able to fix our problems without over hauling the story and designs. We kind of just added, changed and fixed up just a few things to improve the animation. But for major changes, such as redesigning the character models completely; we were not able to do so, as it would be too costly and time-consuming.
Under the production process is the background layout and posting, animation, line test, digital background, clean-up-inbetween, scanning, ink and paint, compositing and export rendering. If the artists are not good, there will be a lot of retakes in the clean-up in-betweening stage, as experienced in our case. Compositing also takes a long time, as errors are found out and corrected before the final rendering.
Under the post-production process are the musical scoring, sound effects, editing and output to media.
Traditional Workflow Chart
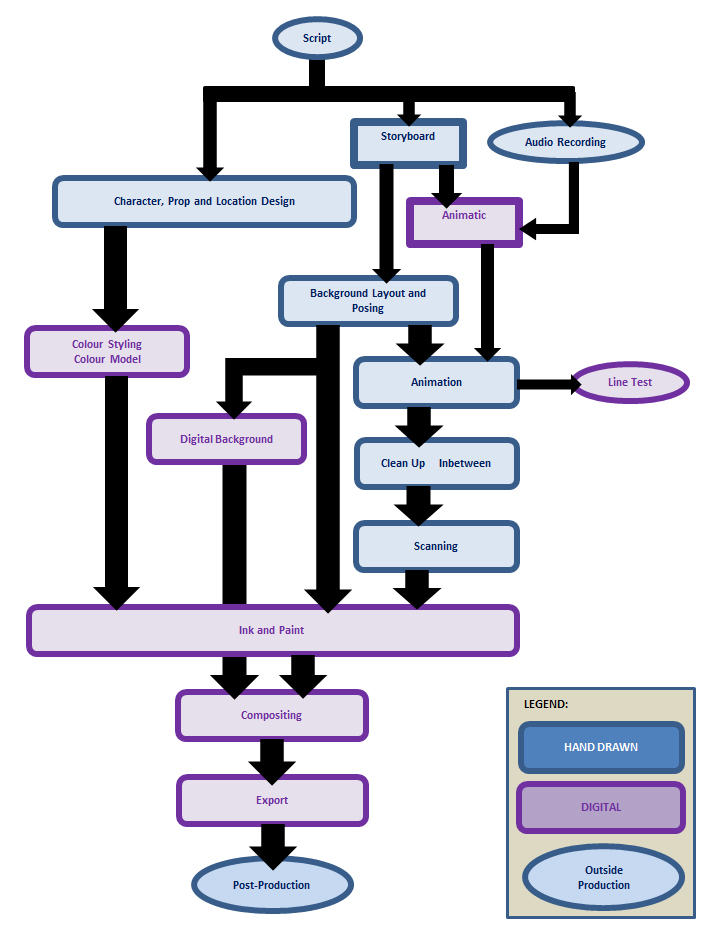
Pre-Production
The Script
Every project starts with a script or synopsis. The script is the written version of the project. It is the source of all the upcoming steps. The script usually contains the storyline, location descriptions, actions, dialogue, description of sound effects, etc. It contains all the information necessary for the artists to illustrate and animate the series or movie. The script is needed in order to transform the project into a storyboard. The same script is used as a dialogue for the audio recording. Finally, characters, props, and locations will be designed from all of the descriptions contained in the script.
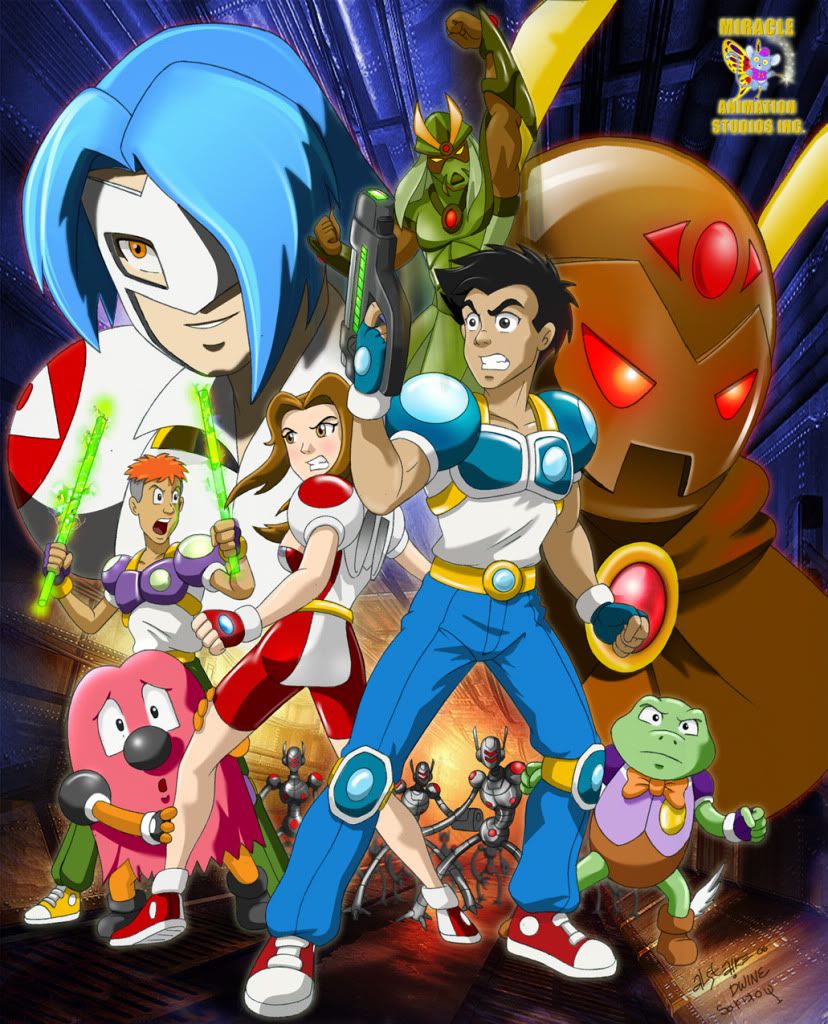
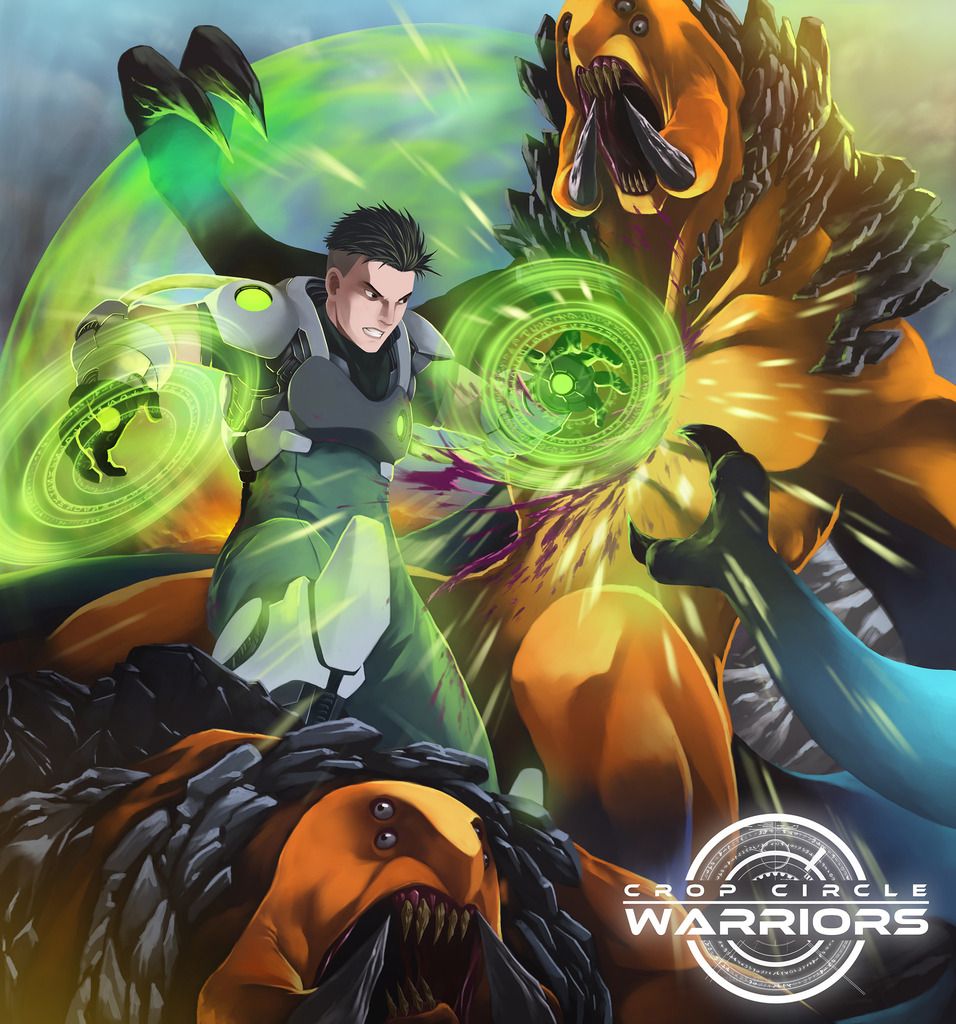
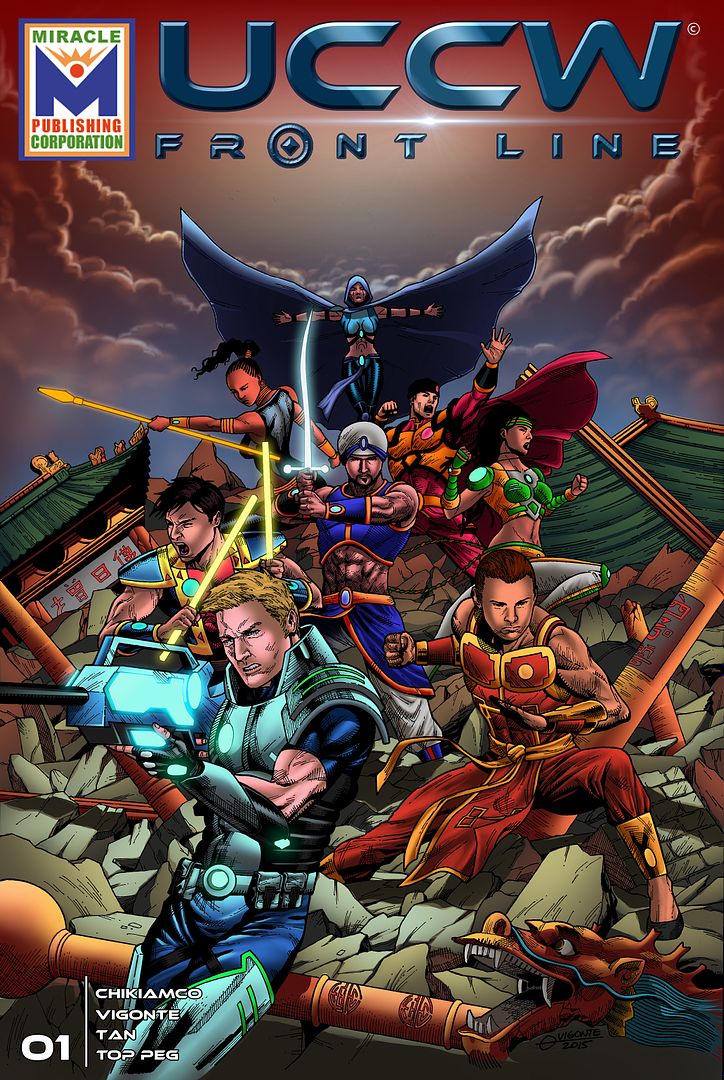
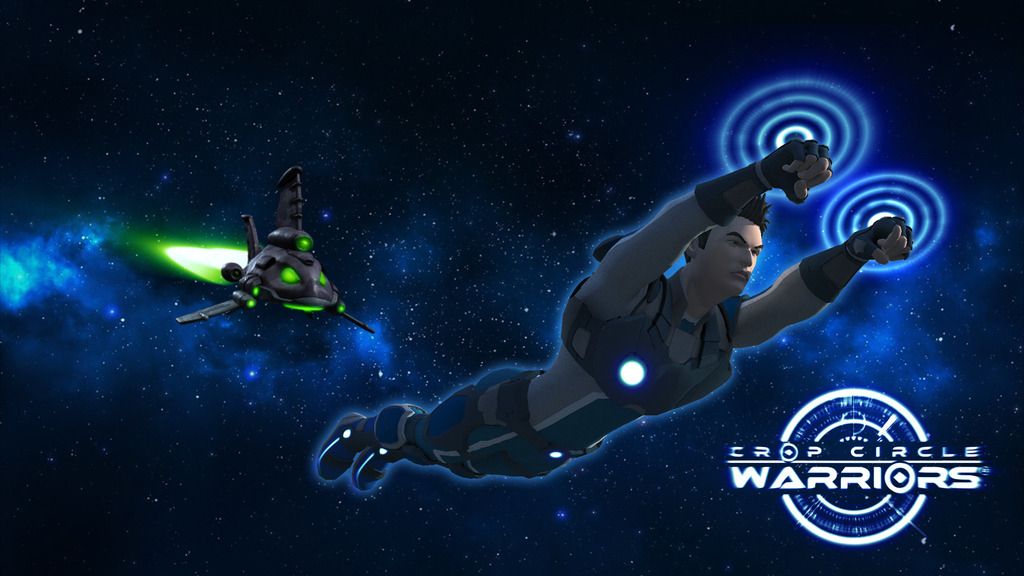
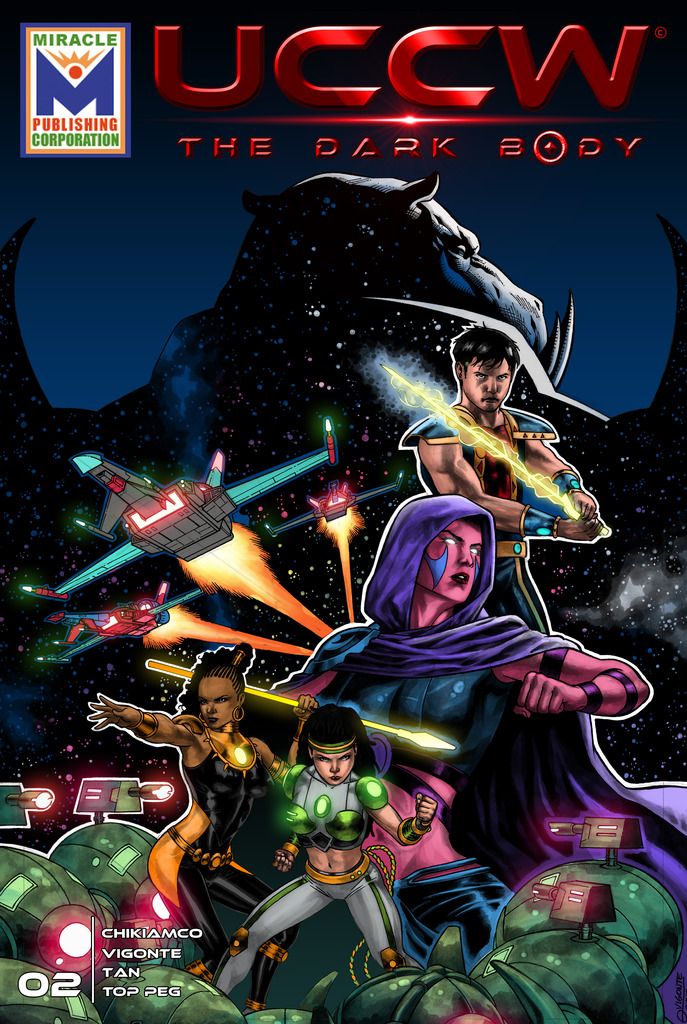
In the case of Jobert and the Crop Circle Warriors, the scriptwriter is also an artist but not an animator, and he told each episode’s story like a rough comic book for Season 1 based on the comic book series Jobert at Iba Pang Super Pinoys. Our challenge was these stories were too short for a 20-minute episode and lacked dynamic camera angles, pans, and tilts. So we had to expand the story without straying off too much from the material. For Season 2, the same scriptwriter found it easier just to do the script in all words from the dialogues to the character descriptions, backgrounds etc. He says its less time consuming but we have no plans to convert it storyboard yet, as it depends if Season 1 will be shown and Season 2 will get any green light for production.
Sample of Script for the Project
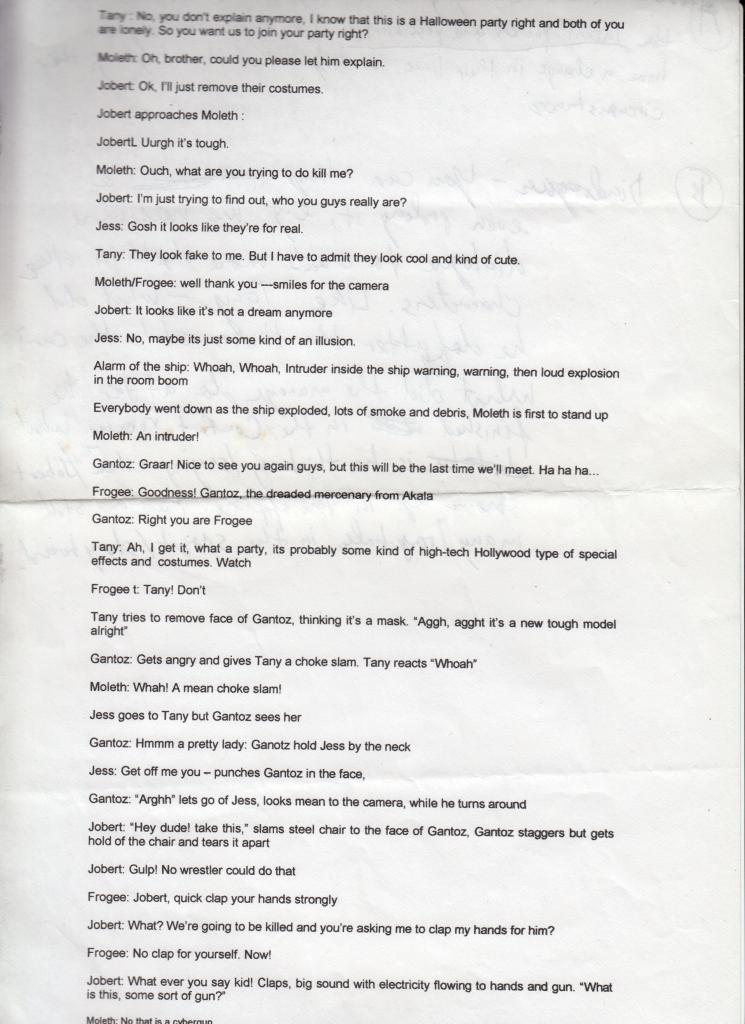
Some Season 1 Dialogue Script
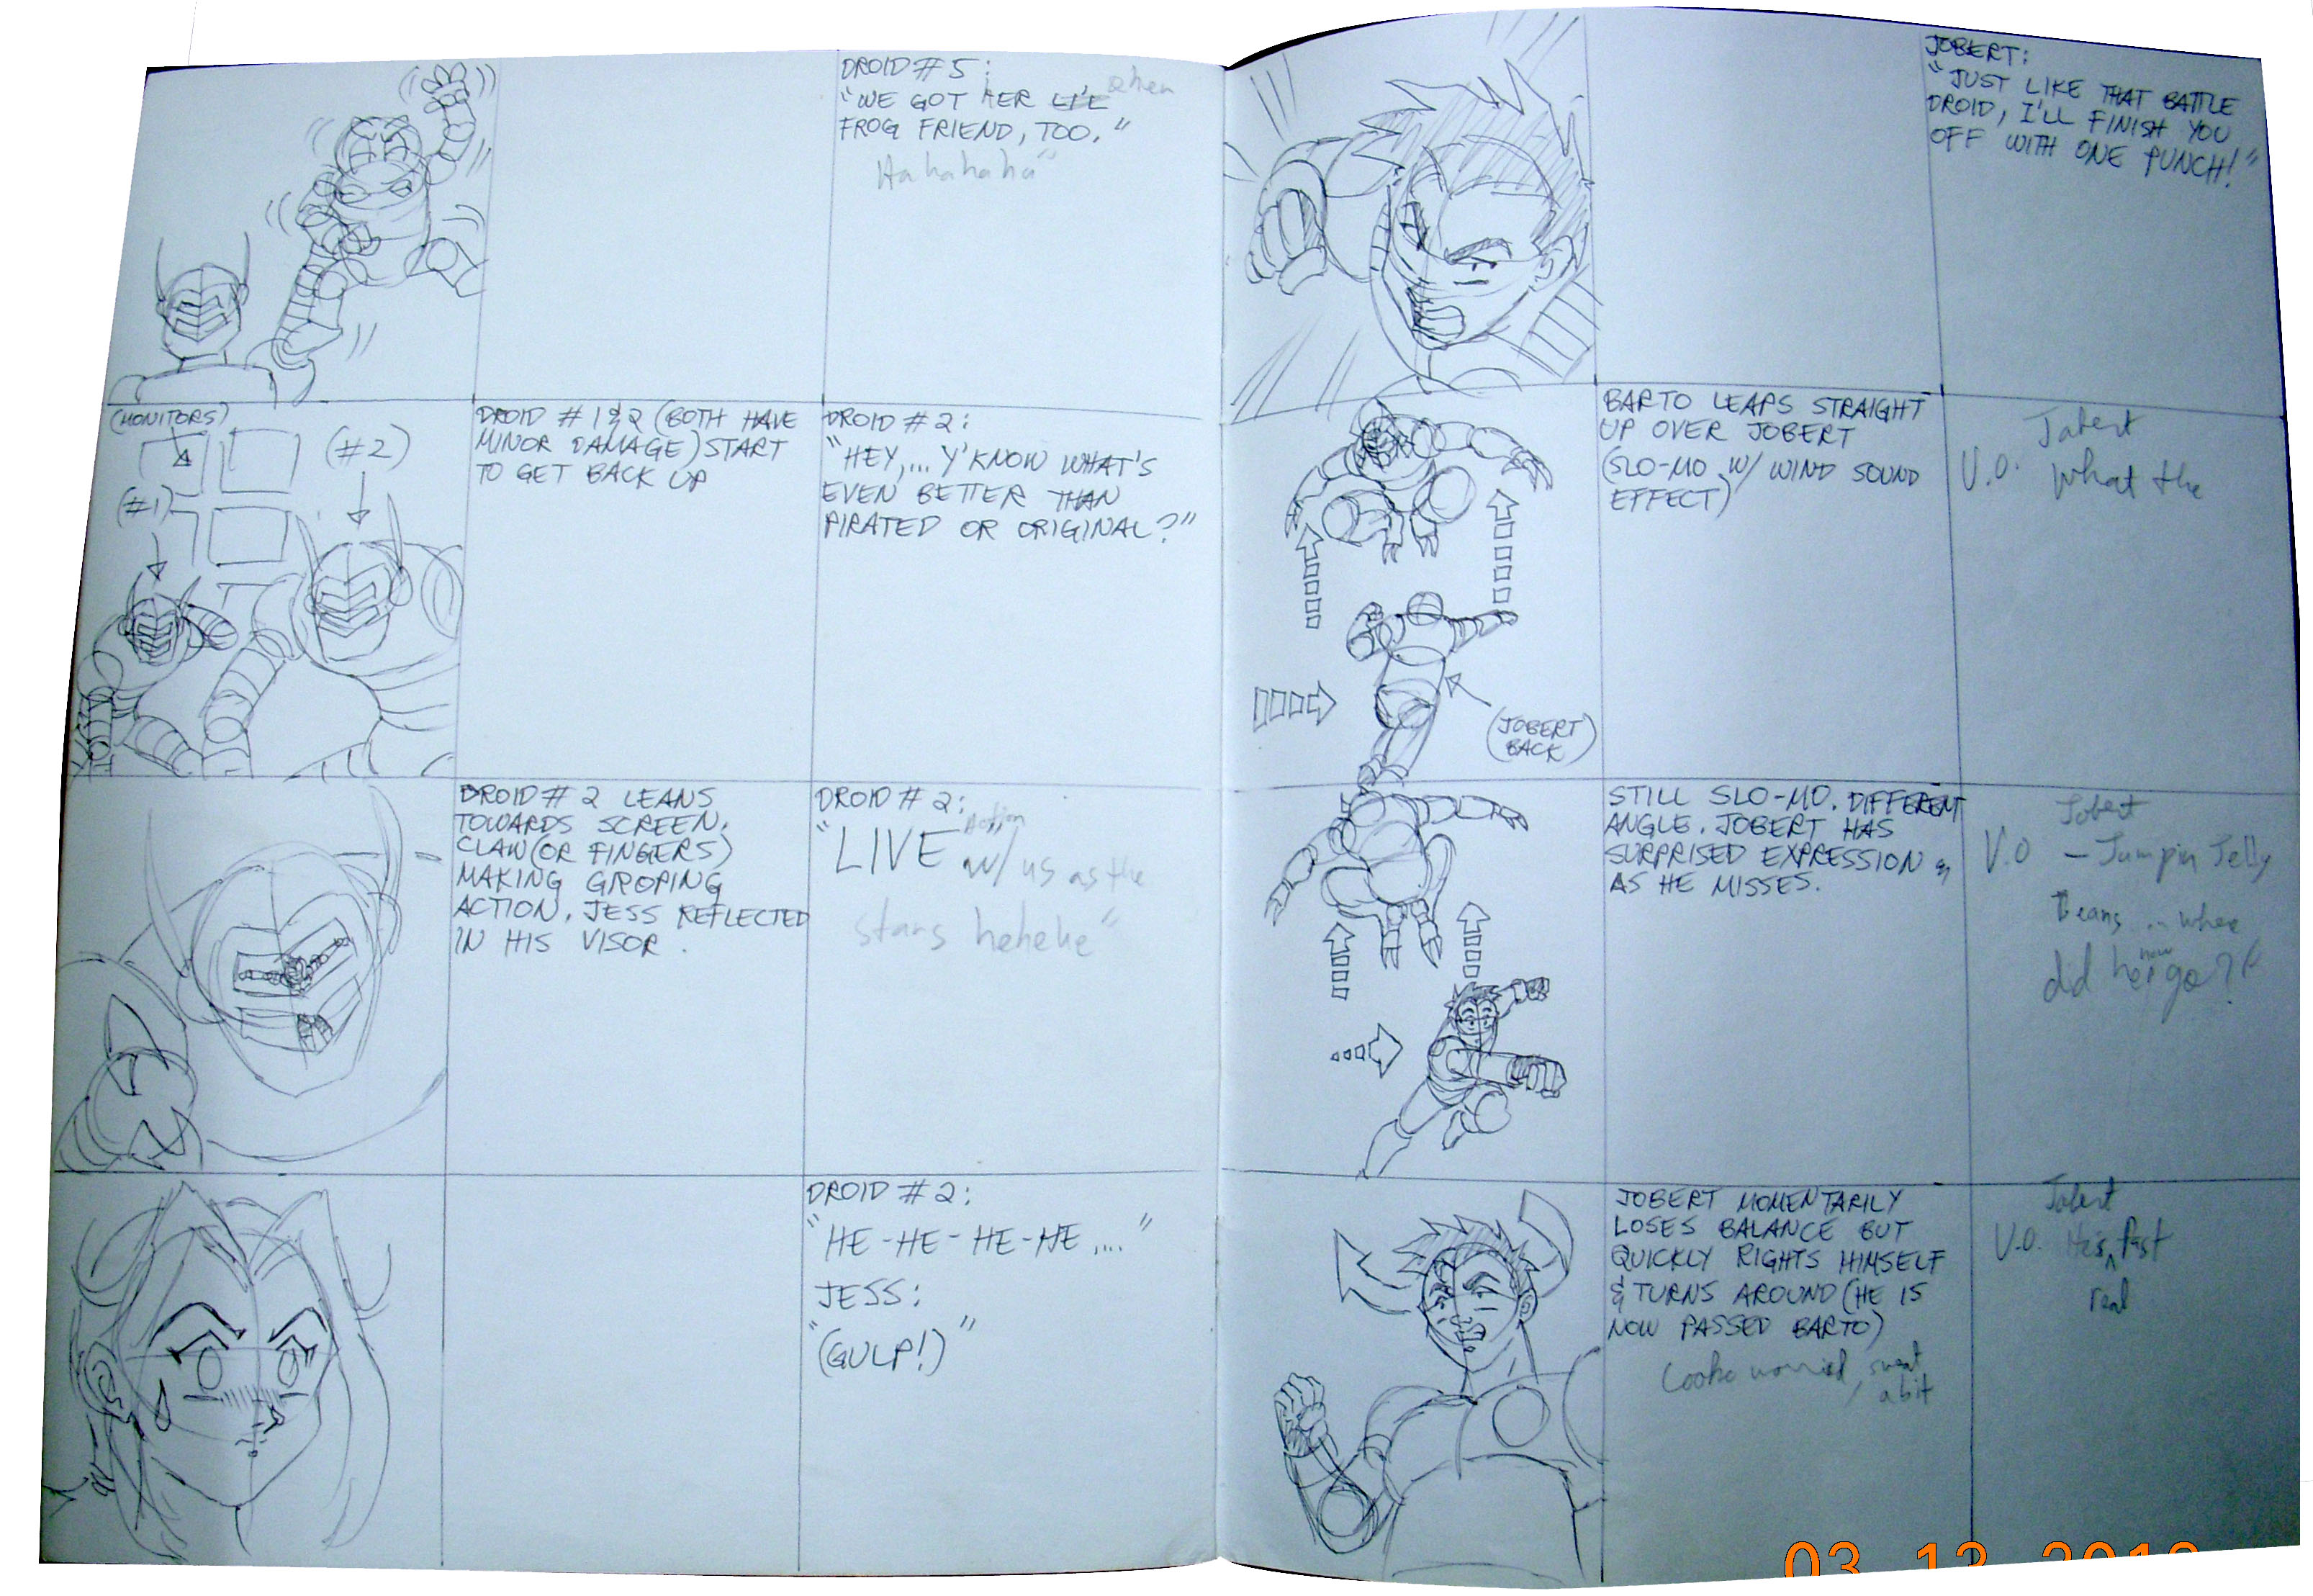
The Storyboard
The storyboard, which is created by the artist from the script, is done for all types of animation, live films, commercials, etc. A storyboard is a visual representation of all the scenes and actions contained in the script. The dialogue, backgrounds, action notes and characters are included. The storyboard will be created at the same time as the characters, props, location design and audio recording. The first storyboard will not always be the final one, as the designs are subject to changes during the beginning of the production. The storyboard is essential to the layout, the posing and the animatic. For 2D animation, the storyboard is done on paper.
For the project, initially, the studio tried to do the storyboard for all the 13 episodes in-house. The Director – Alstaire, did the first 3 episodes, where he expanded the story and added some action scenes. But due to other workloads for the series, he had to delegate the other episodes to other artists. Luis Dimaranan, his mentor, did episode 4 but was also busy with other projects; so we tested a freelance animator to do episode 5. But Alstaire didn’t like the staging for many of the scenes for episode 5, so he had to adjust and redo some of them. His problems with the said artist’s style prompted him to do episode 6 himself.
Work was piling up, so it was impossible for Alstaire to do the other episodes and was searching for an artist who can do the job. Fortunately, he was introduced to Ian Kang, who had a comic book and Manga/Anime style of storytelling. Ian’s first draft for episode 7 was good, so the studio decided to let him finish the rest of the episodes. One problem though was that the director thought the script for episode 12 was the end of the story, and episode 13 was another story altogether. So the studio with the producer decides to just expand episodes 11 and 12 into 3 episodes, and drop the episode 13 script. Ian had the difficult task to add more action and drama to a very short script, but he was able to do it. But Ian’s added story of Jobert’s evolution was over the top for the producer, so Alstaire had to adjust and tone down the final episode.
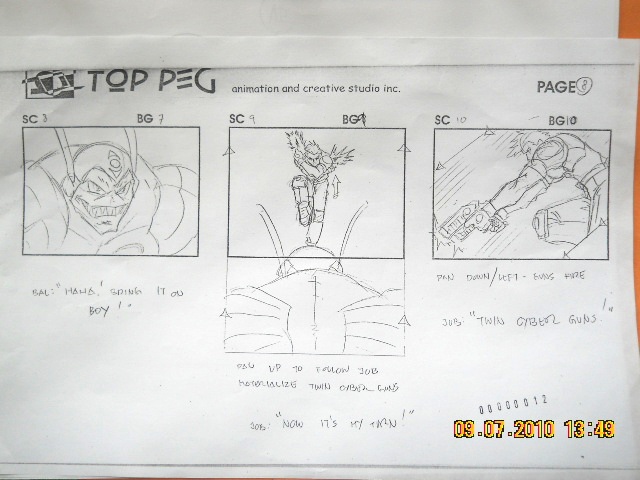
Storyboard Sample
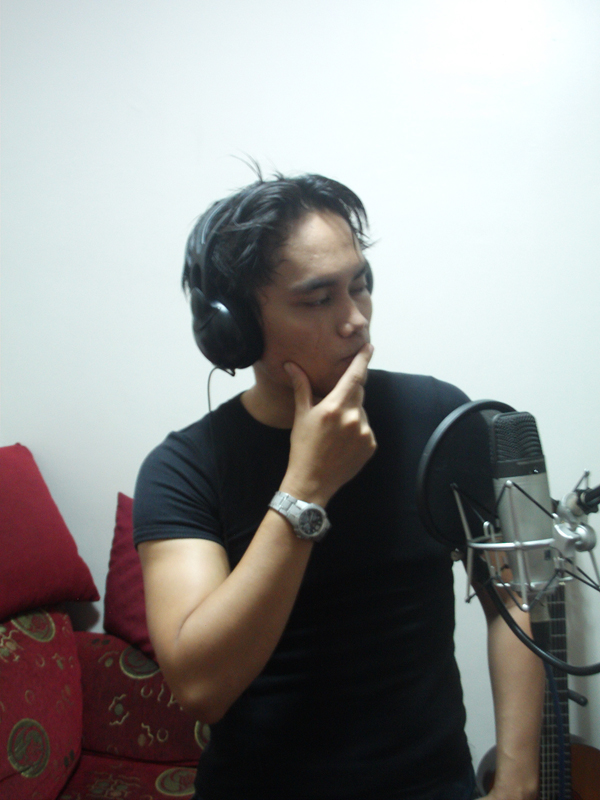
Audio Recording
The audio recording is also called voice recording. the script is needed for dialogue and extra sound effects. The voice actors will read the lines from the script and record the dialogue. These voices will be used later on for the animatic, the animation, and the final production compositing.
Due to the high price of professional voice actors, we had to audition people who had natural voices that would fit each character. It was a tedious process but with the help of a small recording studio of Chet Tiongson, we were able to get a good batch of voice talents. We had a small group that did multiple voices in each series, even Alstaire decided to do some voices of minor characters. We were only able to record when the storyboards were finished, which meant the voices were not recorded in a succession of a few days for all the episodes. The episodes had to be recorded a few months apart. The voice talents also had to be free from their jobs, so usually, the recording starts at 8 pm due to various locations of the talents from their work. The recordings would also finish about 12 midnight to 1 AM. But for the first time voice talents, it was a fun experience.
Some problems for the recording were casting voices for the younger versions of the characters and we had to use multiple talents for these, and many did not make the cut. After a few years due to production delays, we found out that we were missing some dialogues, due to some talents not being present on some recording nights. we also needed to change some dialogue to better fit the story. So we had to recall the voice talents, this time to a new recording studio. The problem was a key voice talent, the one who voiced Jessalaine already settled in Germany, so we had to find someone who had almost the same voice.
After the compositing of the final episodes, the producer decided to change the voices of 3 characters to make it clearer and understandable.
Voice Recording at the Studio
The Animatic
The animatic, also known as the Leica reel, comes directly from the storyboard. The animatic is the first movie of a project and is used to help the animators and compositors. The storyboard is scanned in and mounted with sounds and dialogue. There is no animation yet. It is simply the storyboard frames changing panel by panel with dialogues and some sound effects to help evaluate the rhythm and the look of the show. This will help avoid mistakes that would have been found only at the end of the show. This step is unnecessary if you are absolutely sure of your storyboard and timing, but an animatic is always recommended. Generally, an external software is used to do the storyboard editing to create the animatic.
As a budding director at the start for Jobert, Alstaire wasn’t aware of the purpose of animatics, he figured out that we did not need it at that time. So not all the episodes for Jobert had animatics. Now, Alstaire realized that it would have helped the producer see the story and pinpoint revisions before we even started production. Instead of an animatic, what we did was we had Luis do the sound cut for Jobert, this is the process of placing the audio in its proper place and timing based on the storyboard. Essentially, it is the animatic for in-house purposes. Since Luis was the one doing this, we were confident that the timing was good. Although after a few episodes, we had to outsource this to other experienced animators.
One mistake that Alstaire learned much from was to make sure the one doing the animatics is experienced. In our case, the exposure sheet writer volunteered to do some episodes. When Alstaire checked these episodes, some were lacking in dialogue, and the person involved used other dialogues that weren’t supposed to be there. These mistakes caused a lot of setbacks in production. Alstaire had to look for the missing dialogue, those that weren’t found had to be recorded again.
Design
Once the script is completed, the designer can start work. Before any animation, background or coloration can be done, the design needs to be addressed. The artist has to decide on the production style, the character’s look, the location’ complexity, etc. Once these designs are done and approved, the “Model Pack” is produced, containing all of the models for all the aspects. The final designs and models will be used by the color stylist and layout artist, and finally by the animator.
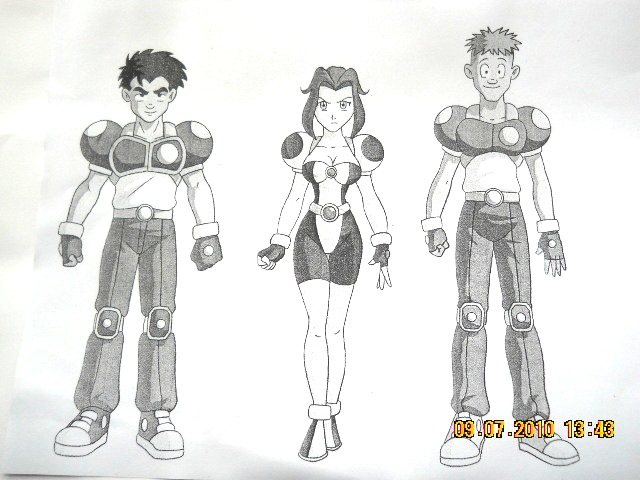
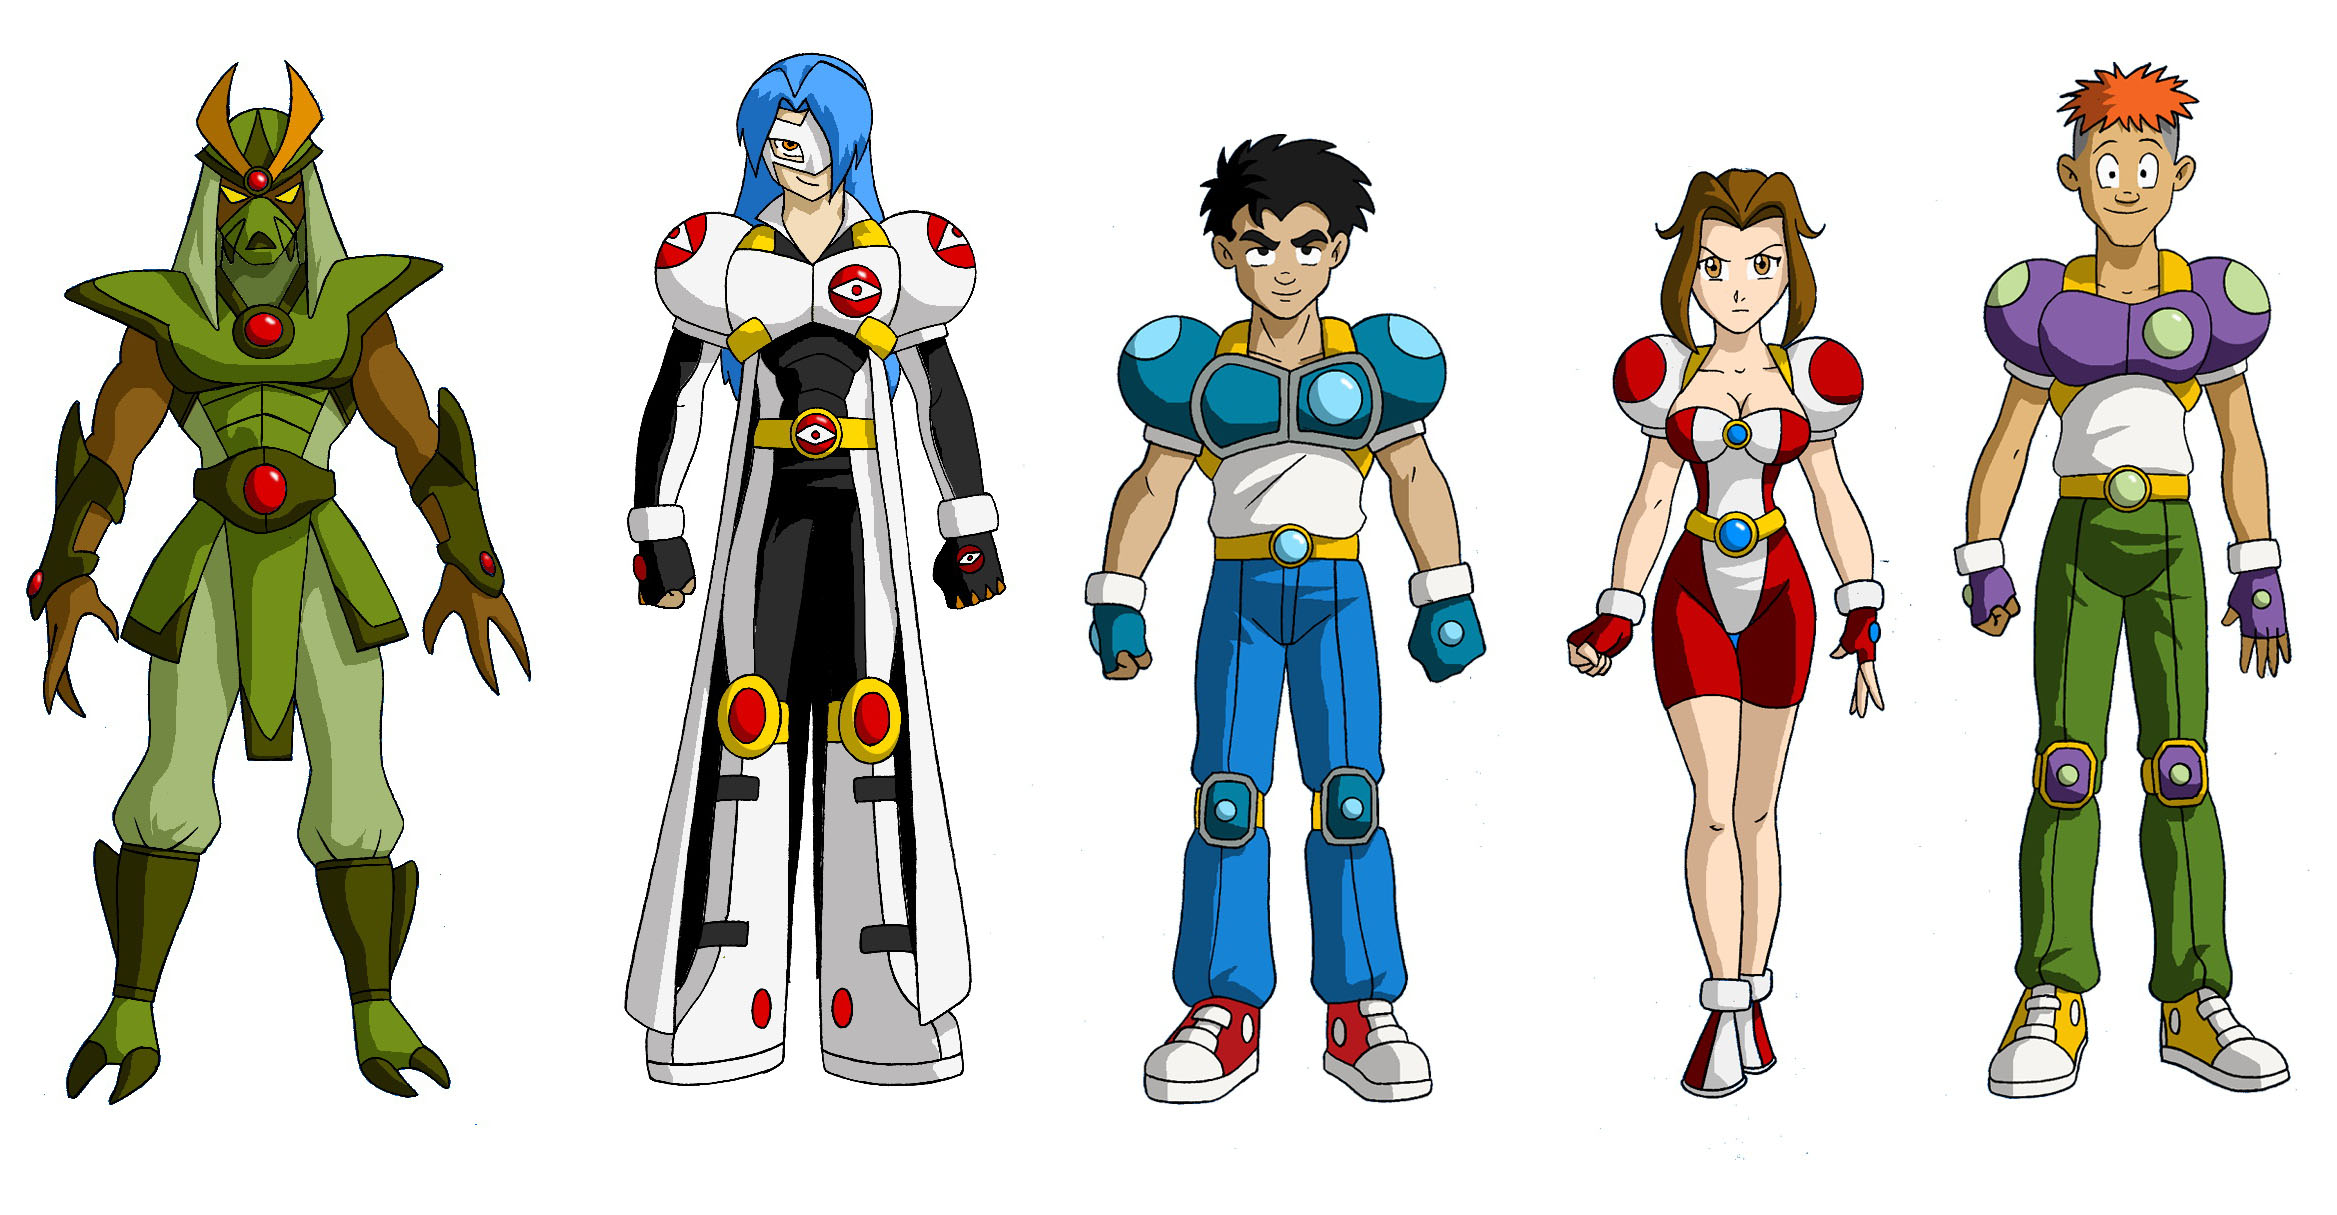
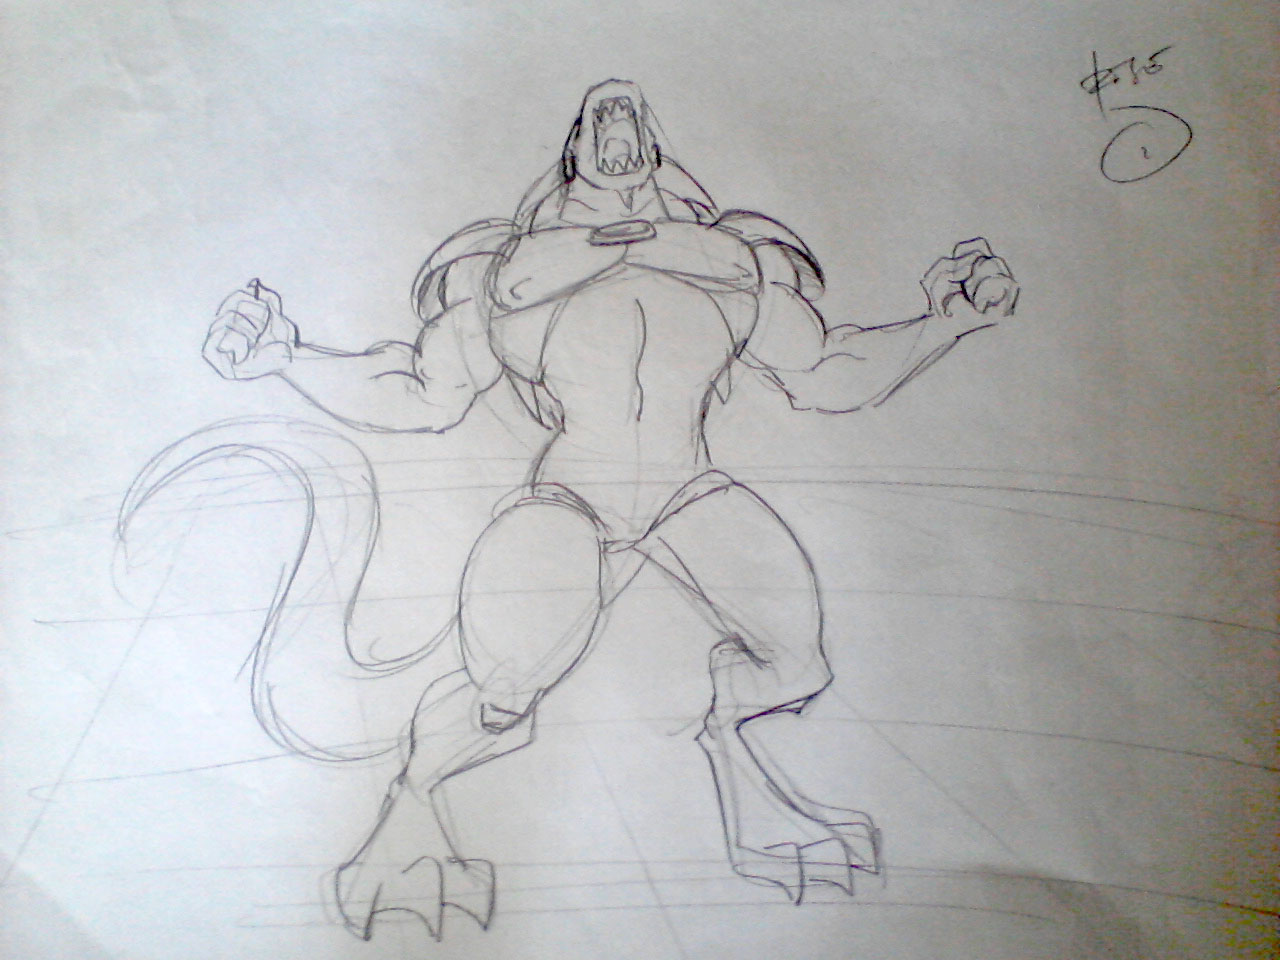
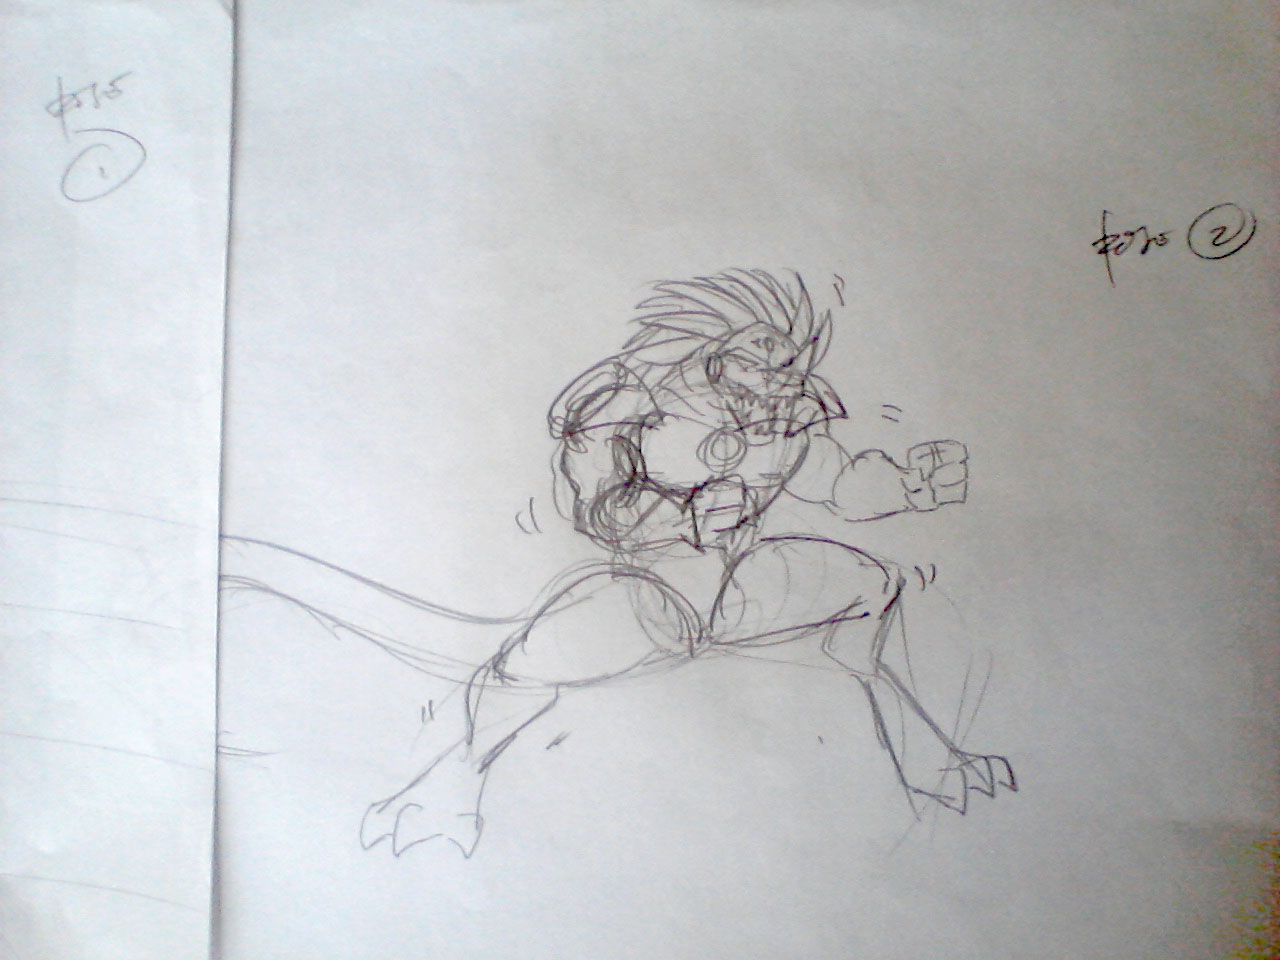
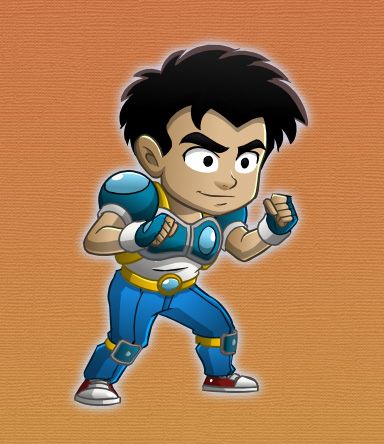
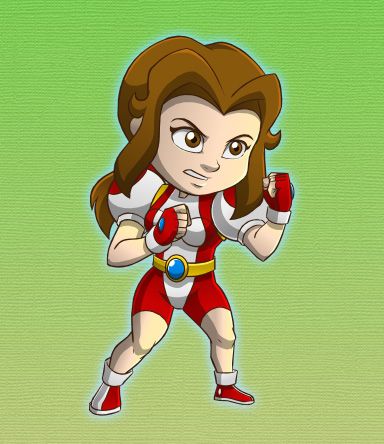
The design for the series was taken directly from the comic book, which is from the Japanese Anime look. Alstaire just did some minimal changes in the design and look of the characters to make it better for animation. Some characters were also designed based on the storyboards of Ian Kang. As suggested by our animation series broker, years later we covered the cleavage of Jessalaine so as not to offend other cultures.
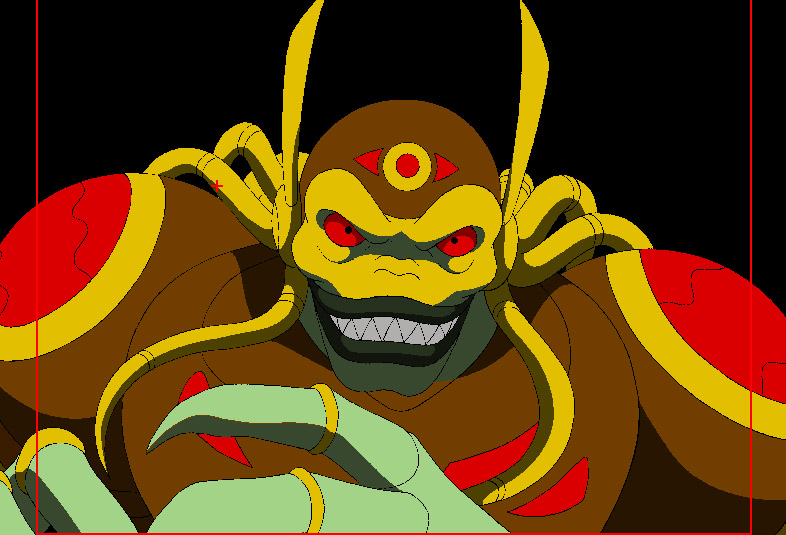
One design element that Alstaire wished he had changed was the shoulder armors of the Crop Circle Warriors. It had a spherical design that has no definite connection with the arms and body. So the animators were having a hard time executing the action scenes; the said design only worked well in the comic book.
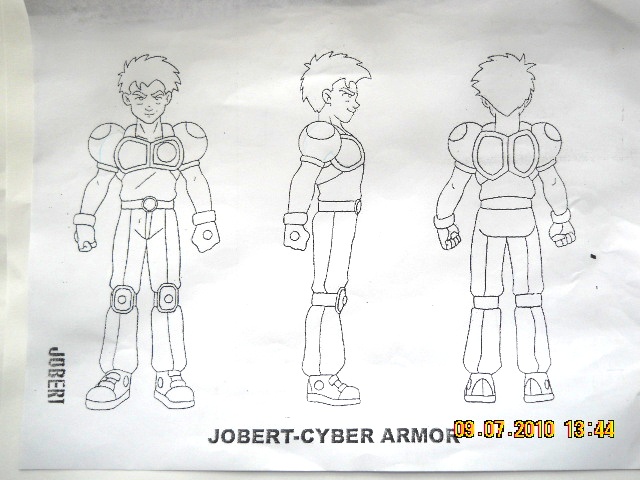
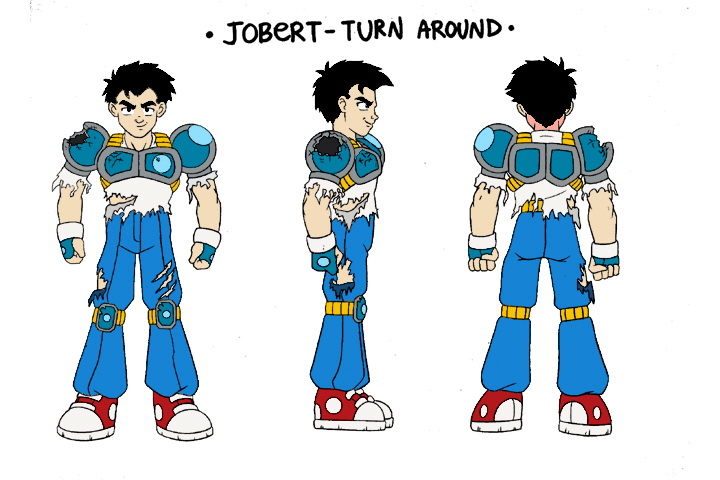
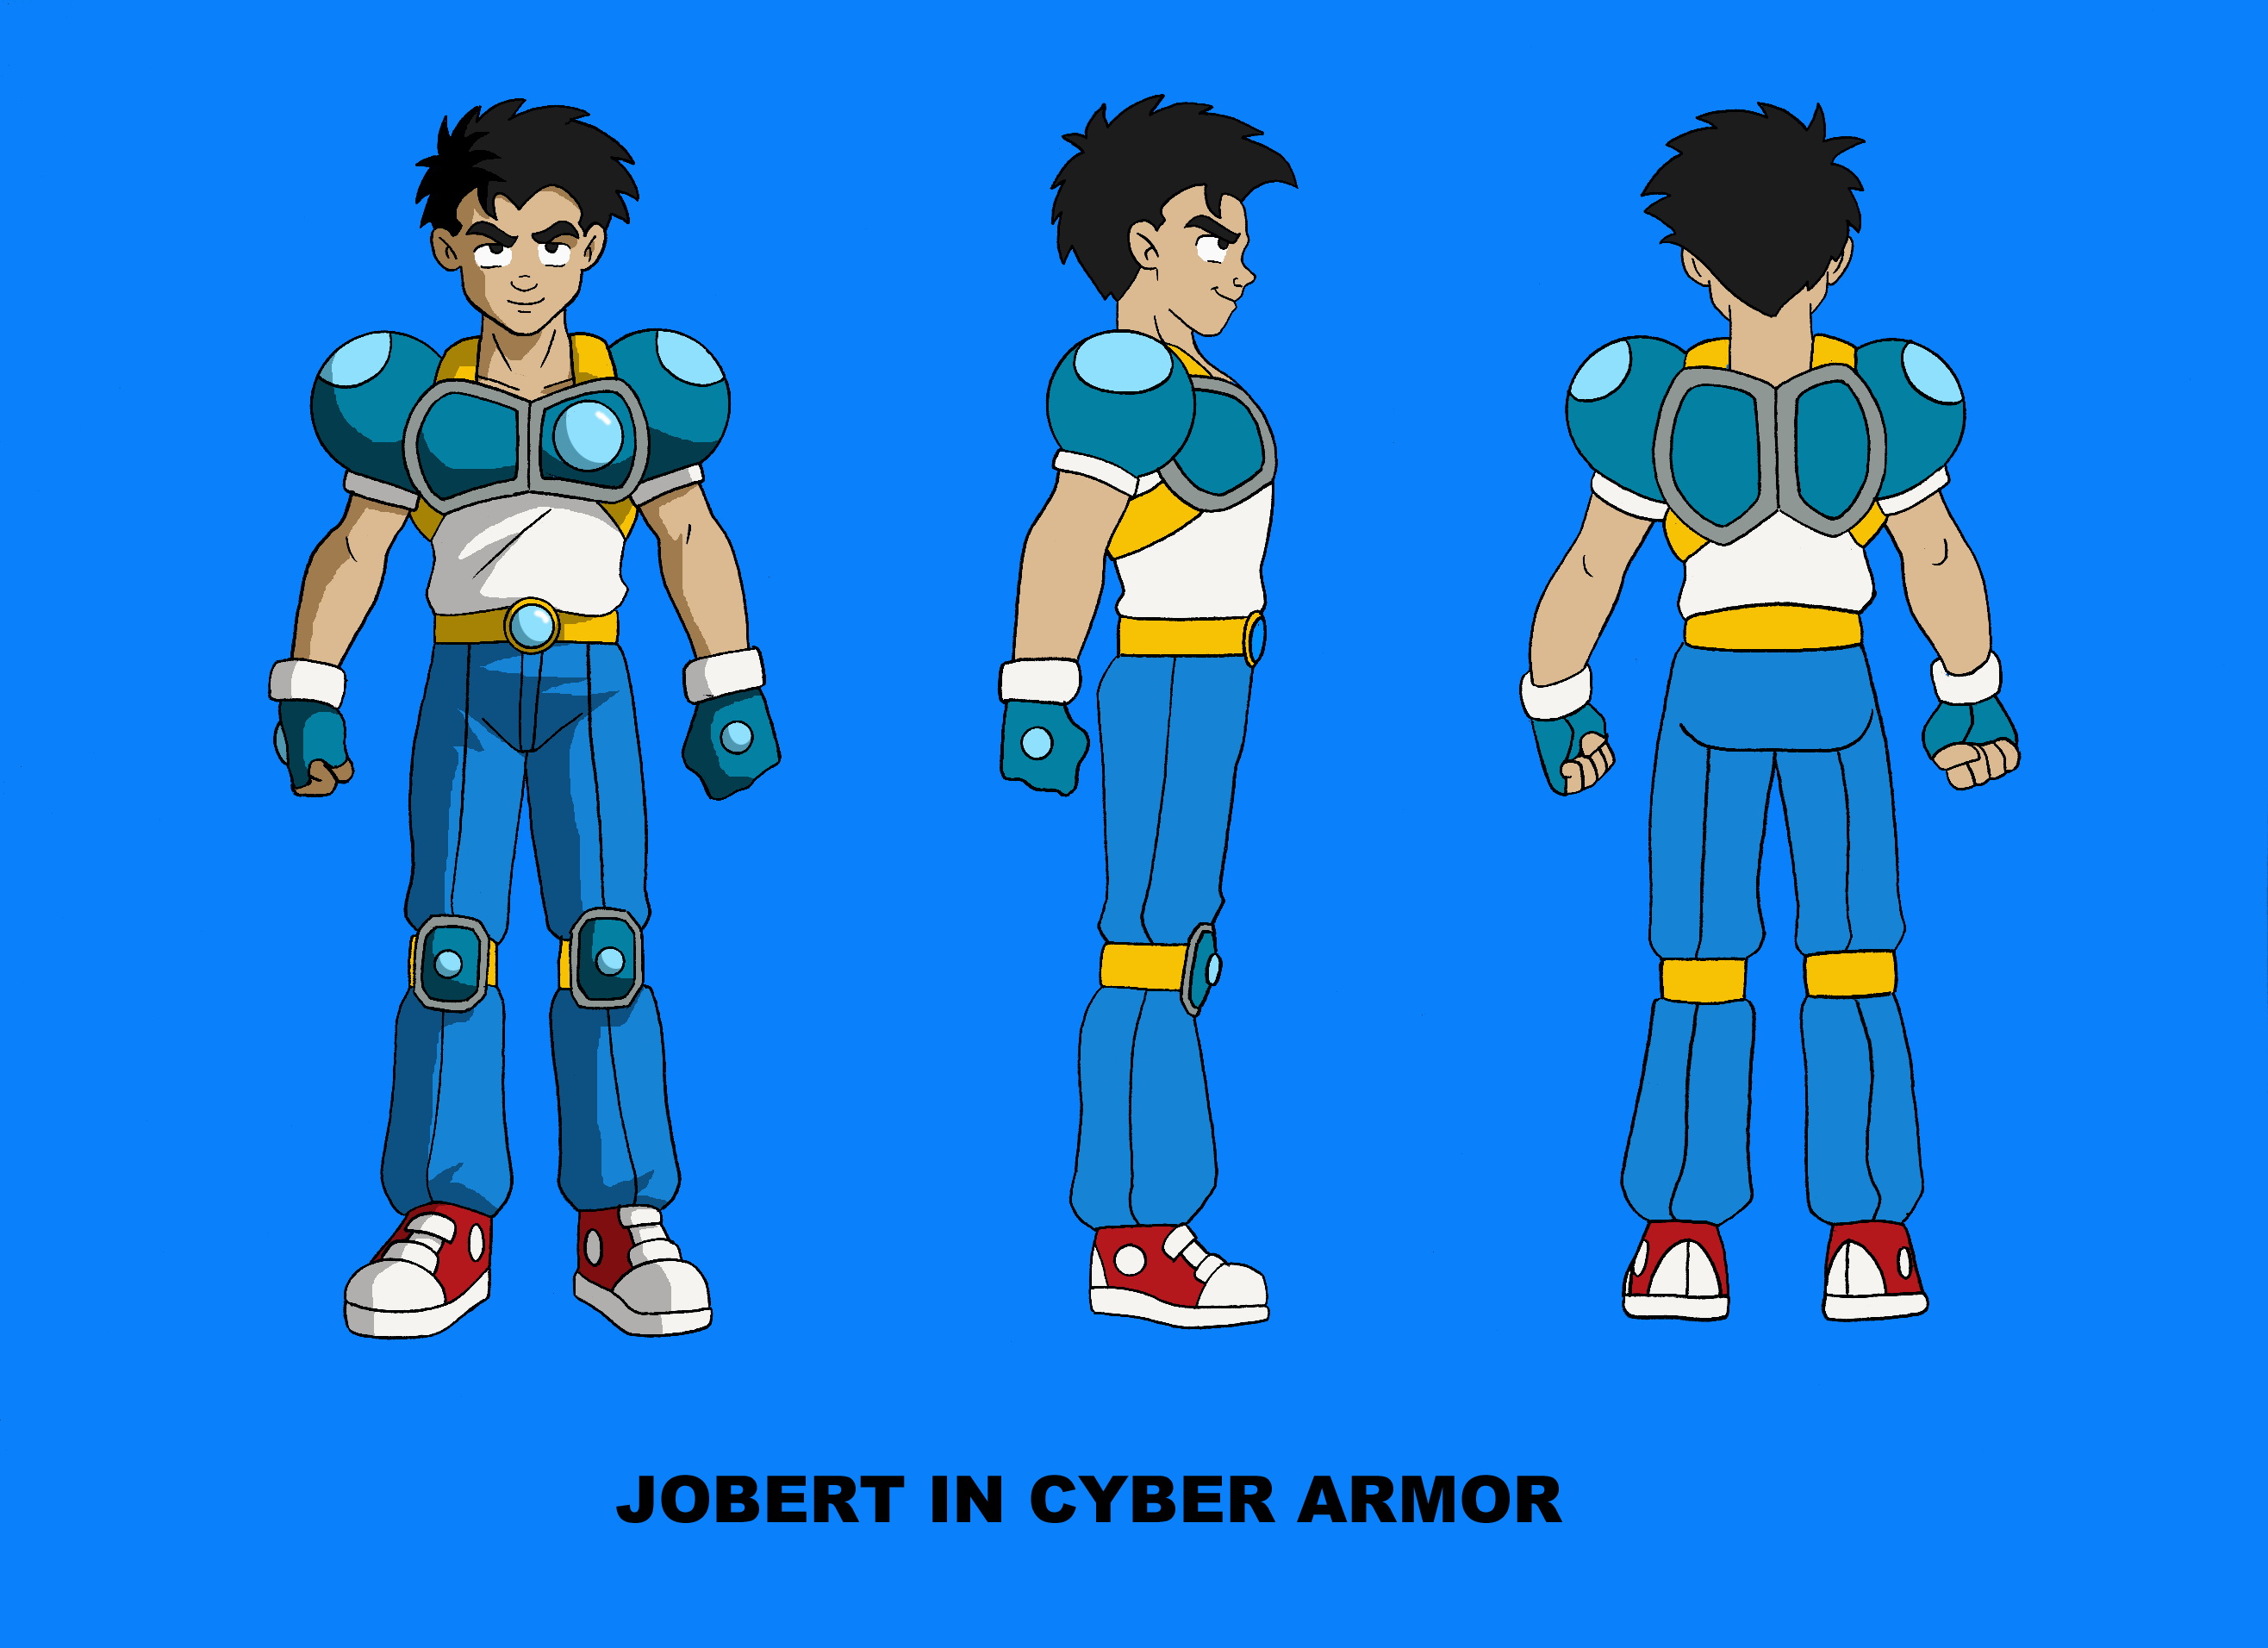
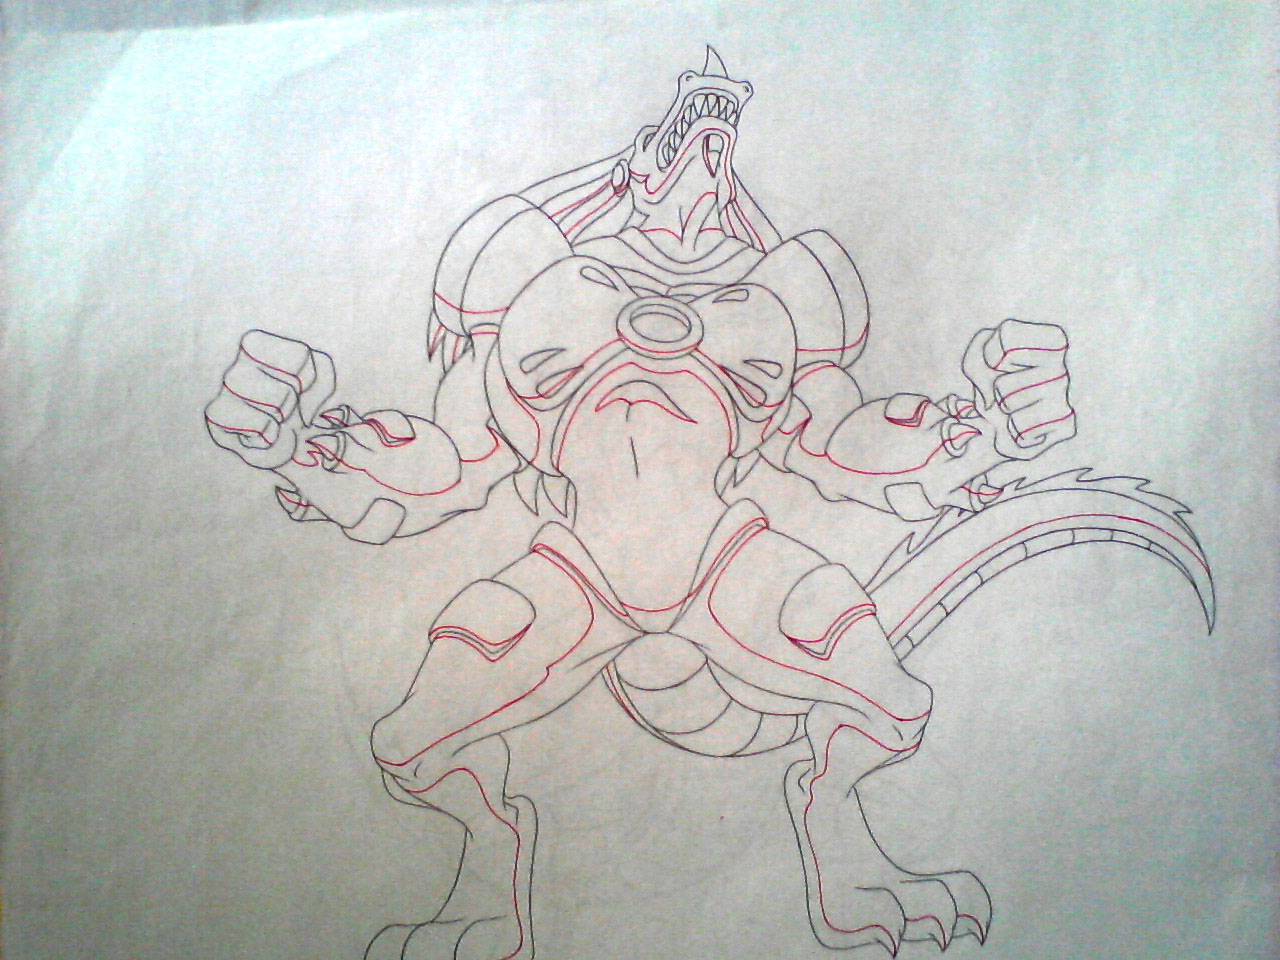
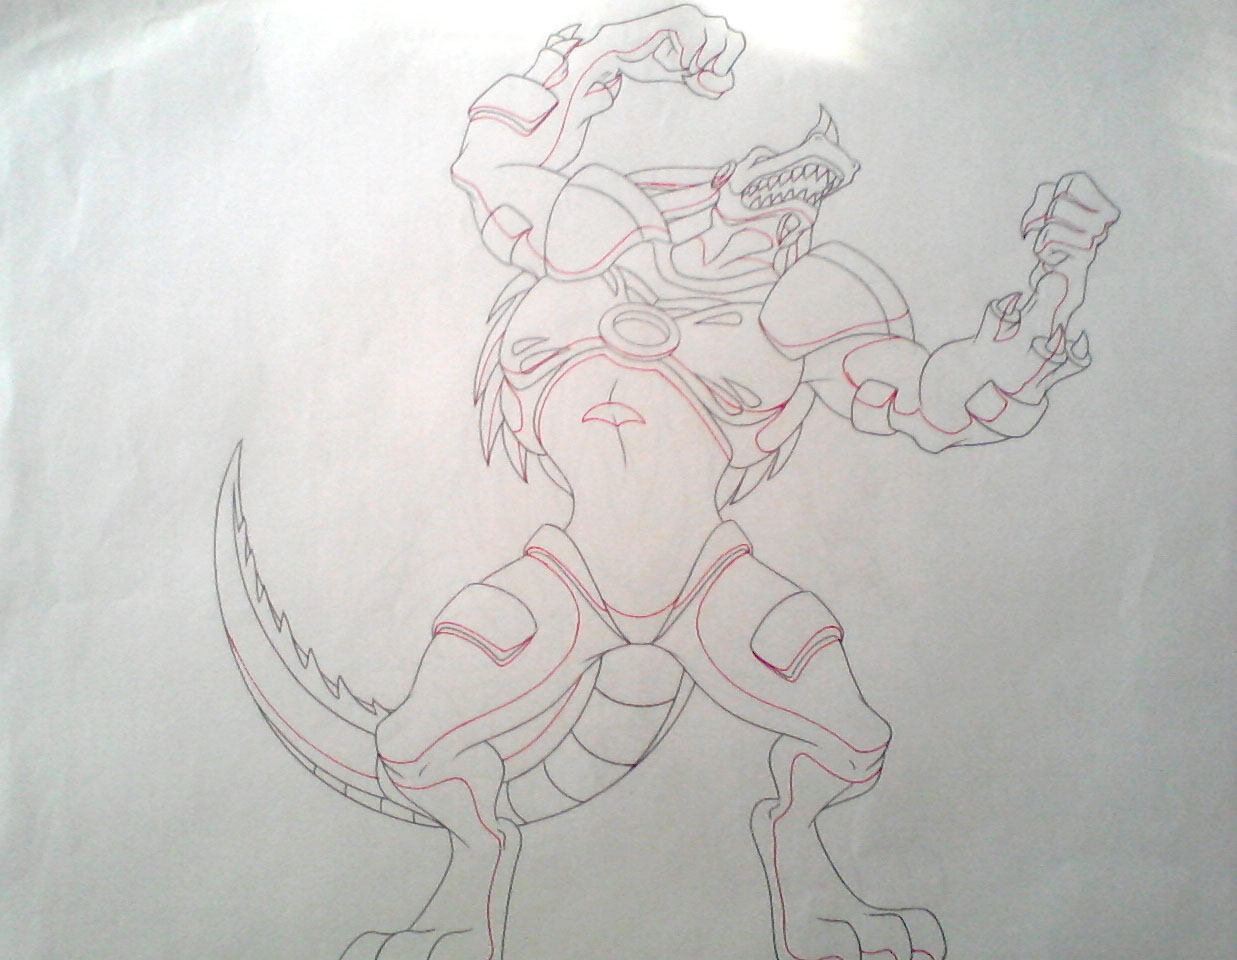
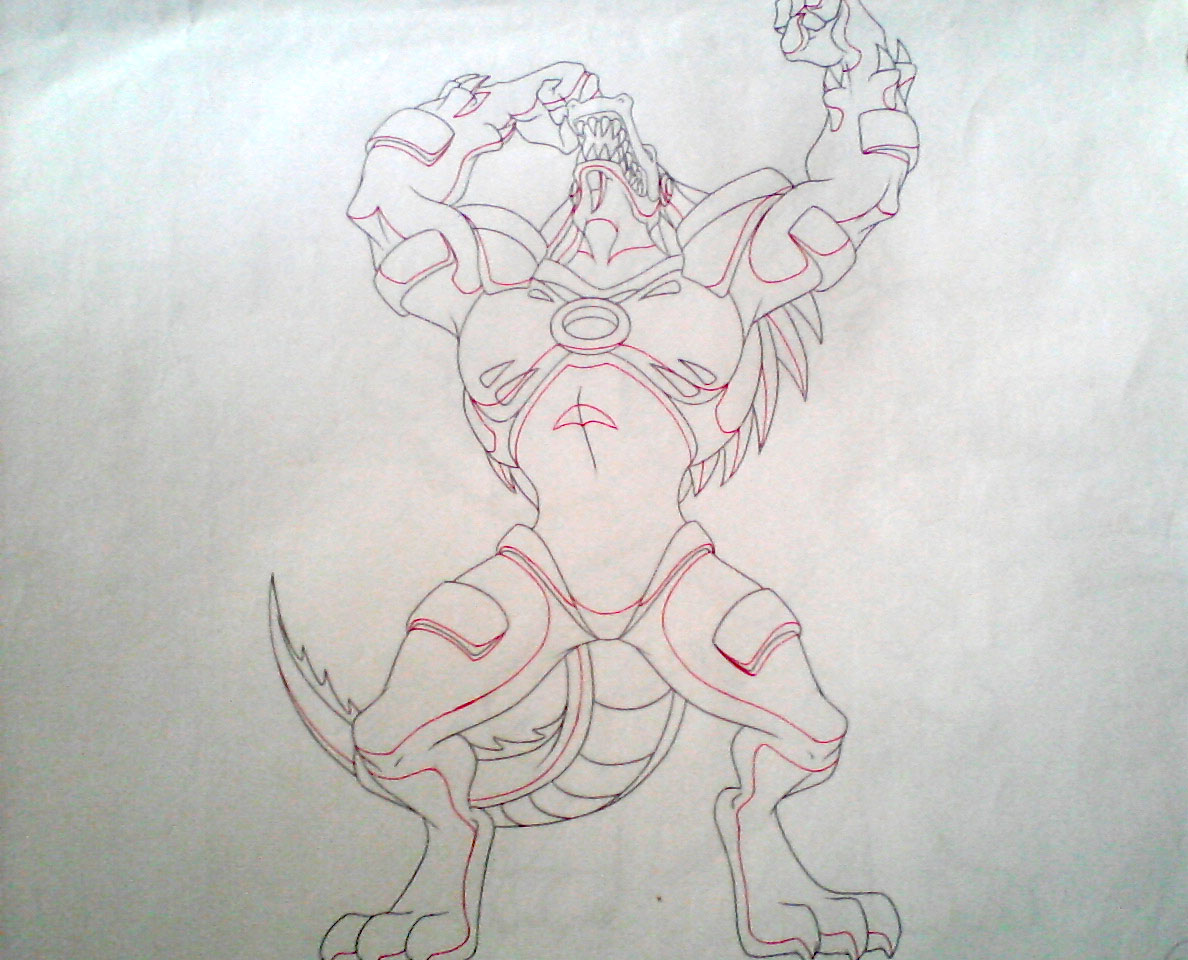
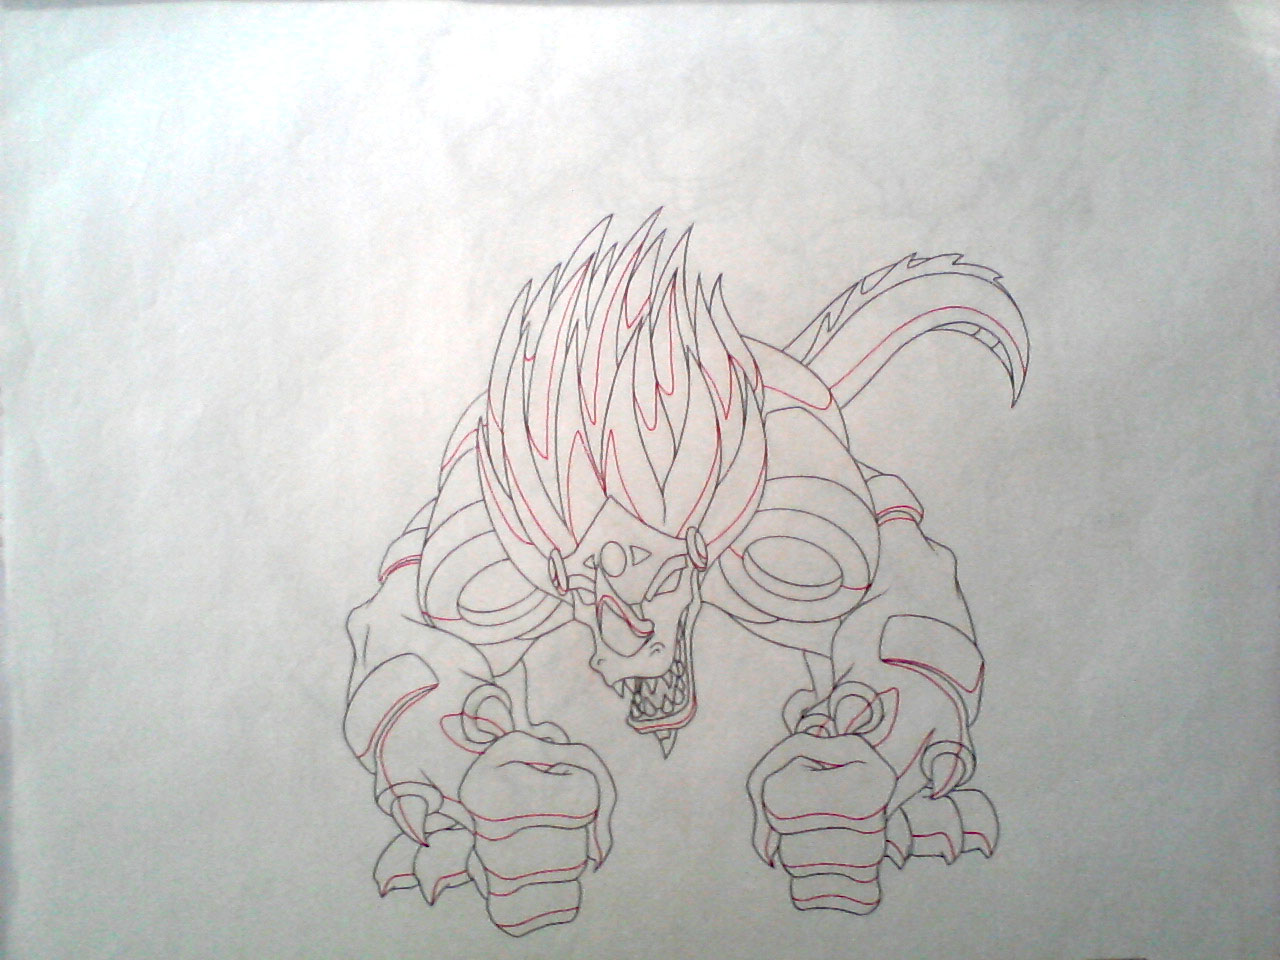
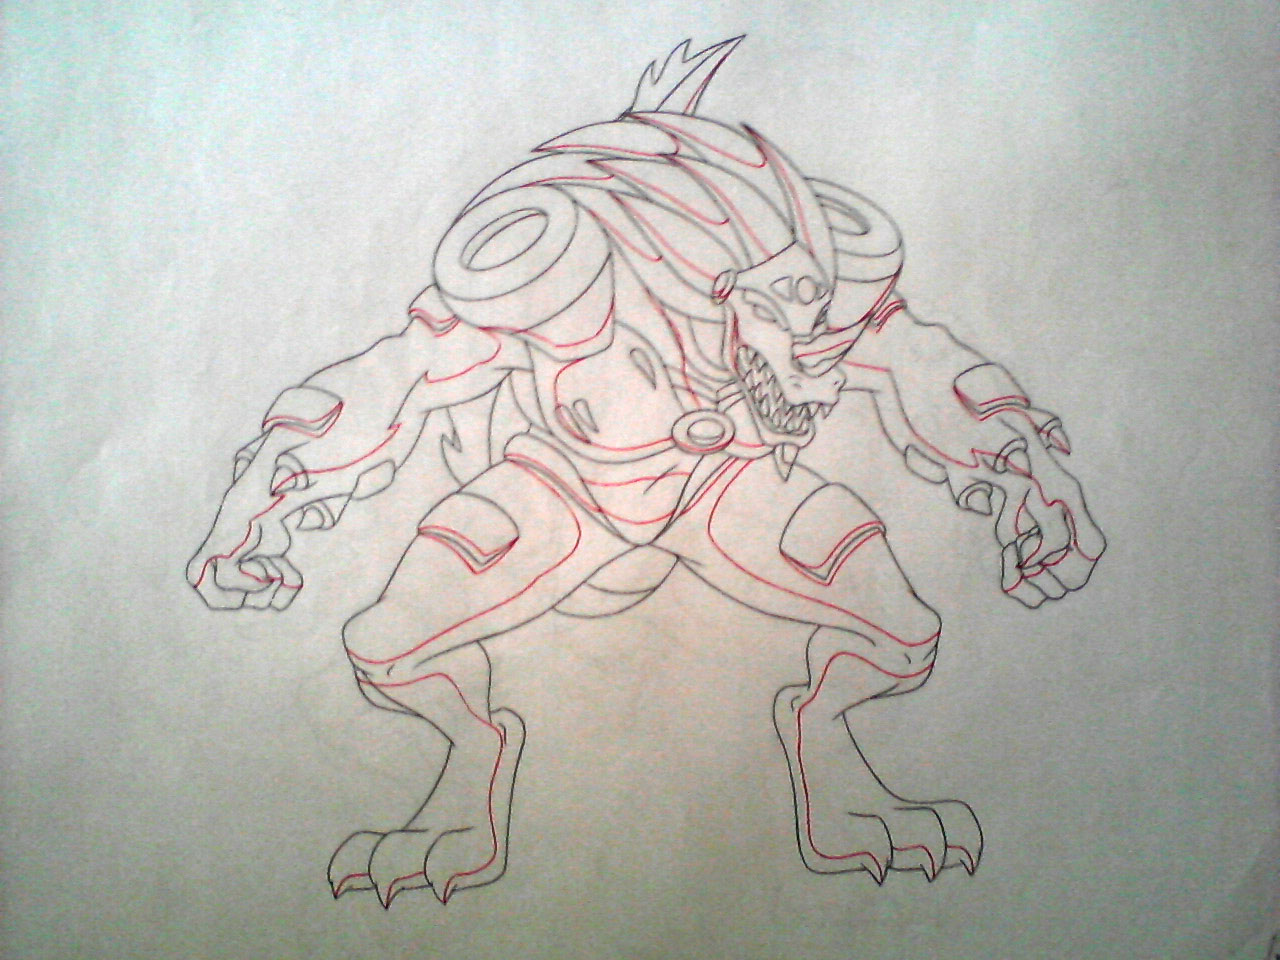
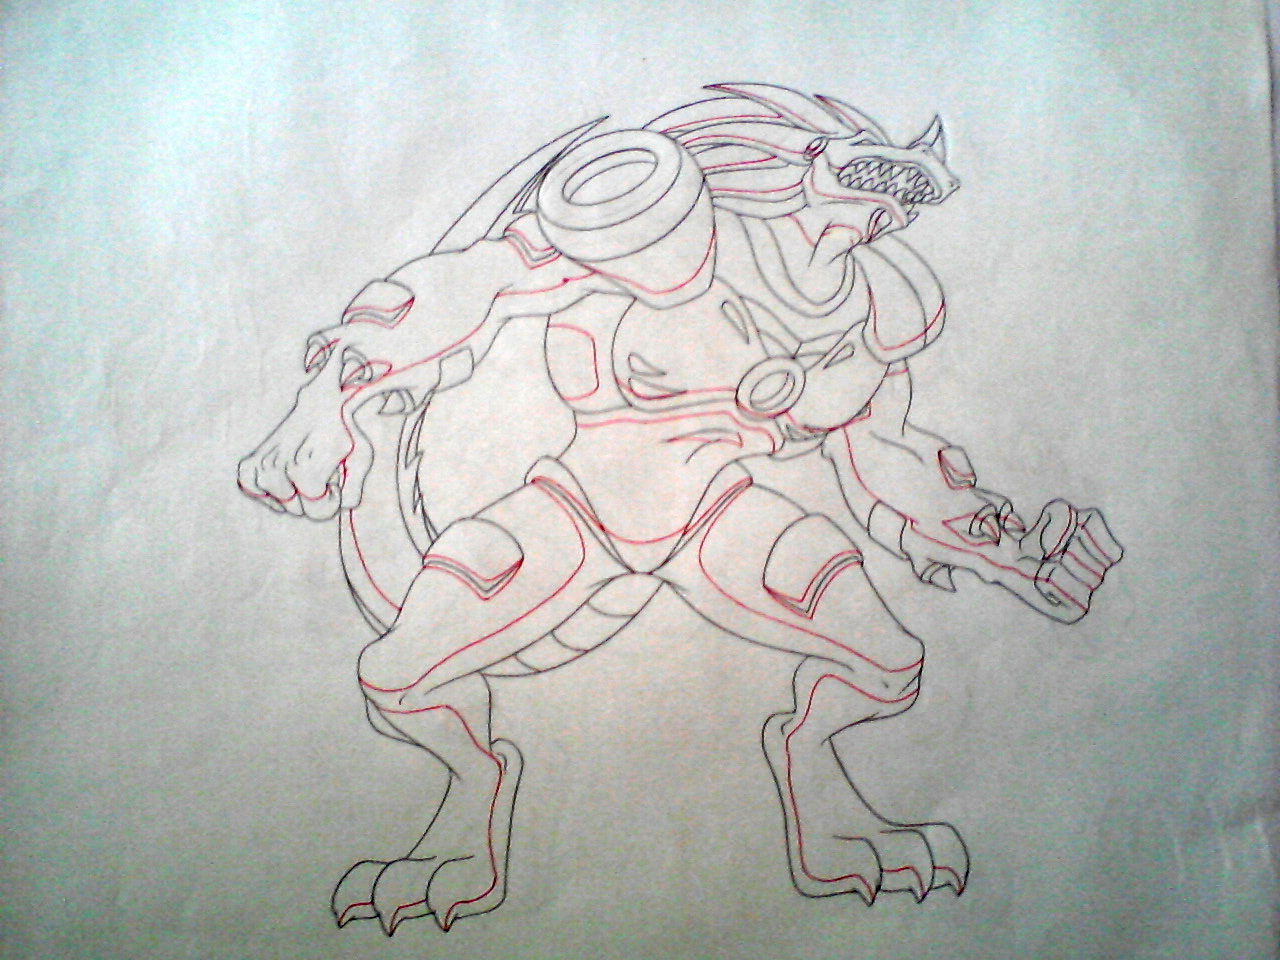
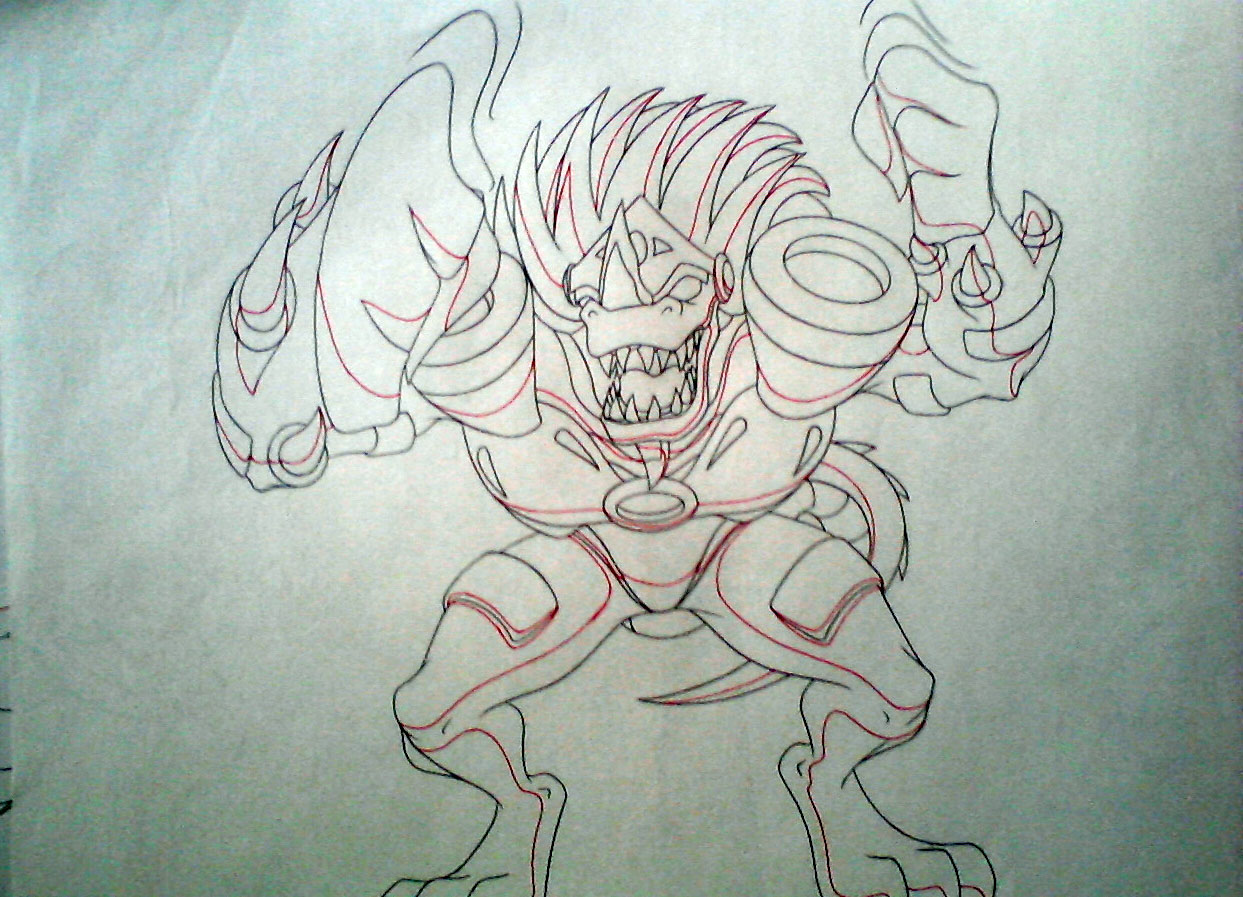
Model Sheet Turnaround
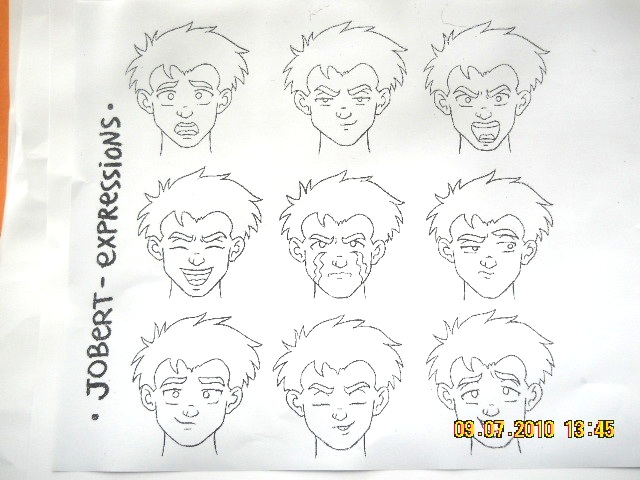

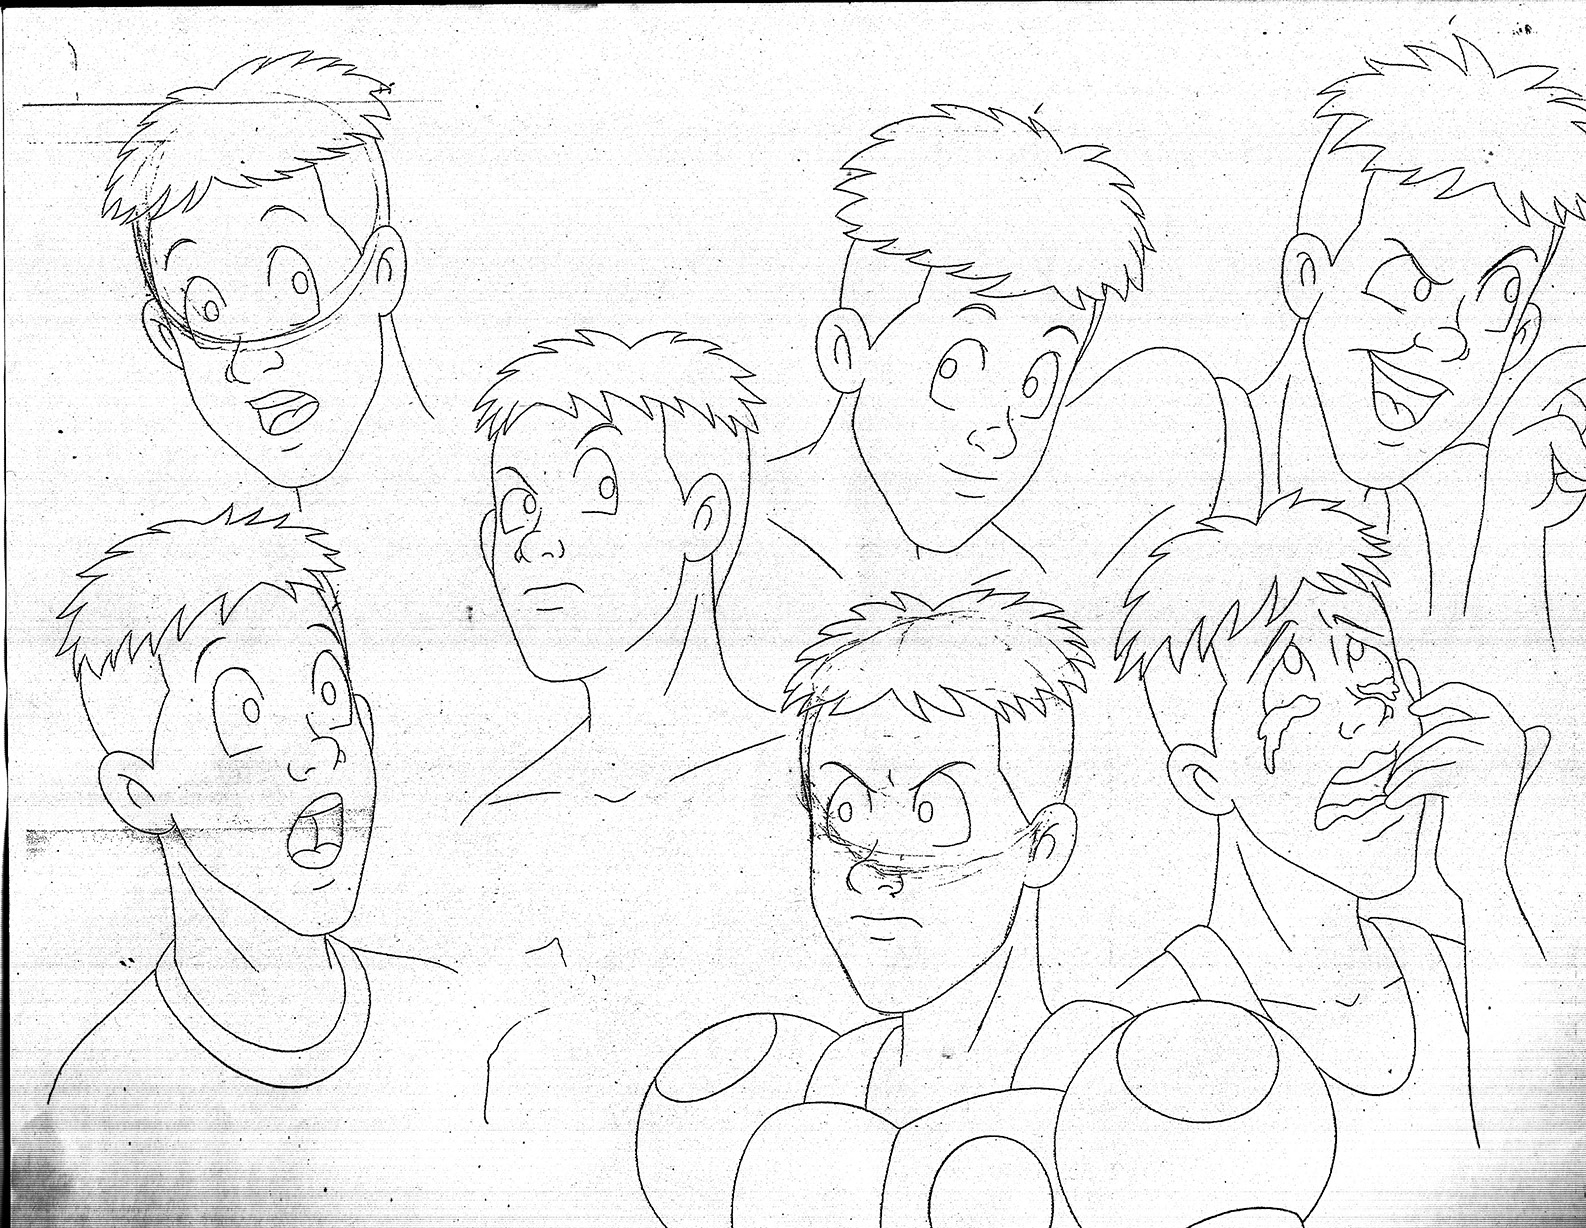
Model Sheet Facial Expressions and Mouth Movement
Model Sheet – Size Comparison
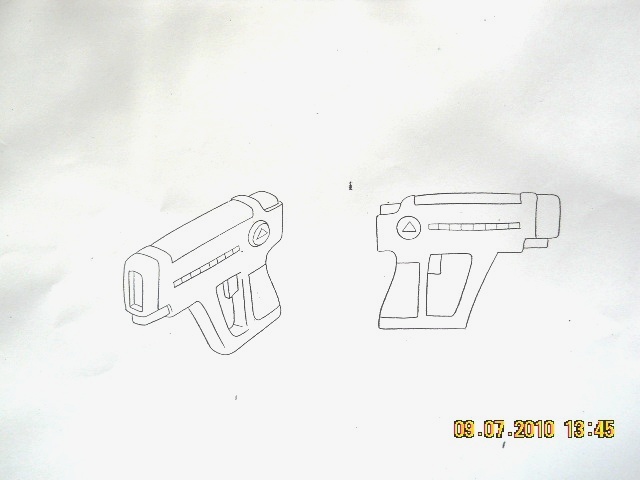
Model Sheet Props
Color Styling
Once the black and white designs are done, they are sent to color styling. The color stylist will choose the colors and ambiance for the production and will balance the characters, props, and effects with the locations’ palettes. The color combinations create moods for the show. When the colors are approved, color models are produced and backgrounds are painted. Color models will often be added to the Model Pack. The color models will be used by the color artists and the colored background will be sent to the compositing.
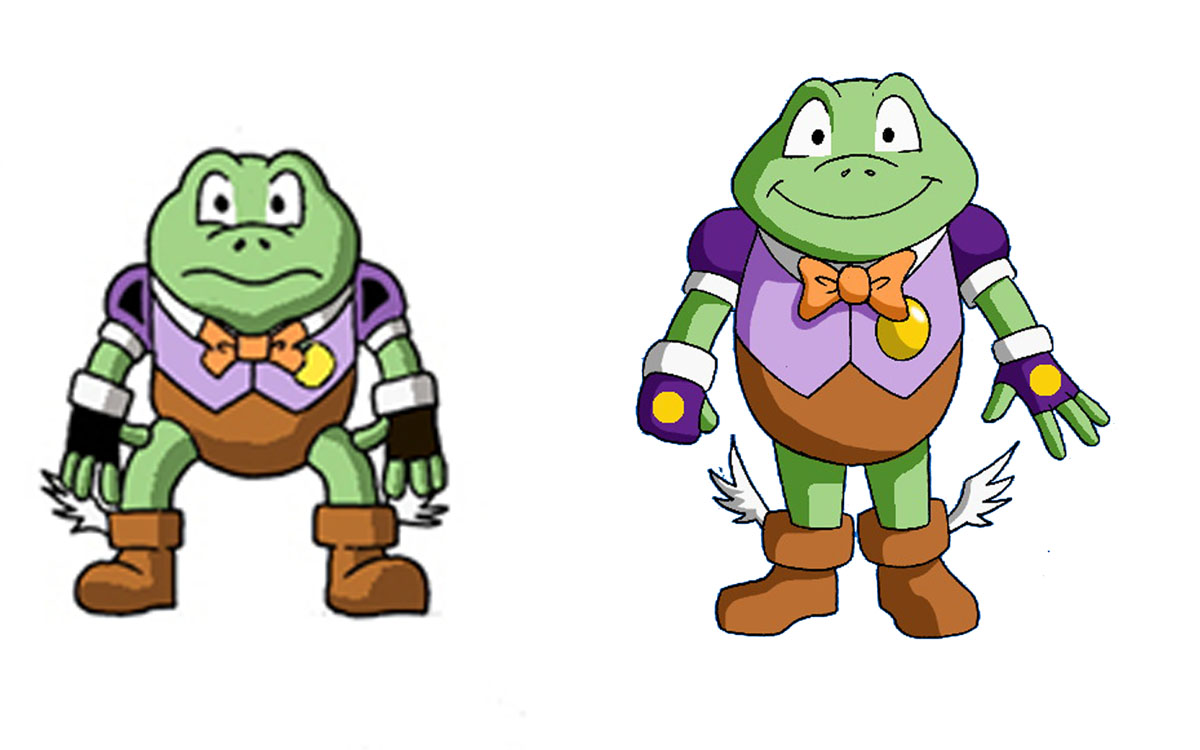
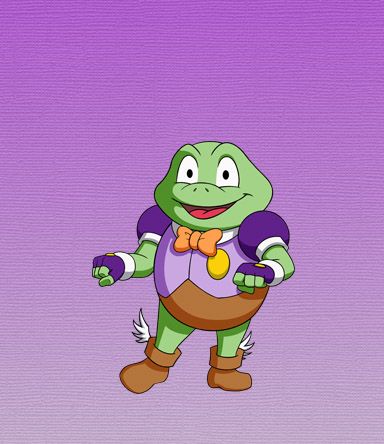
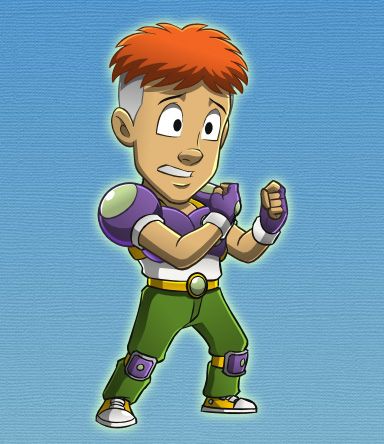
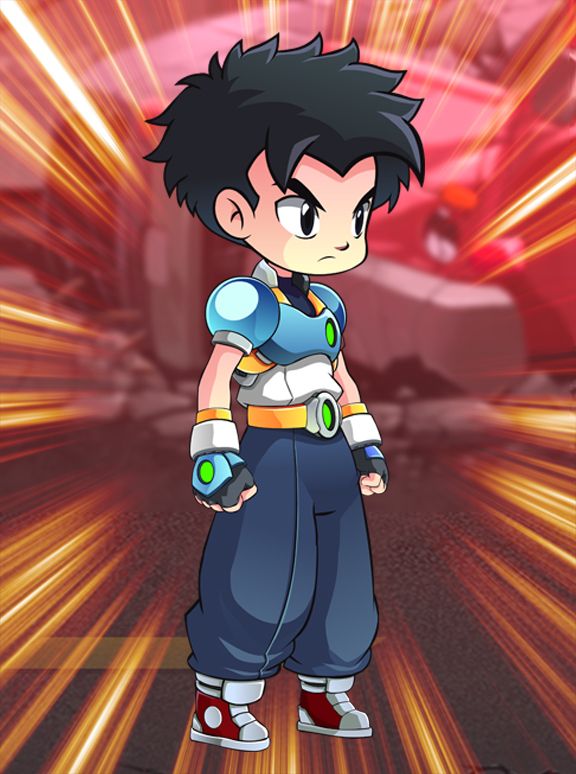
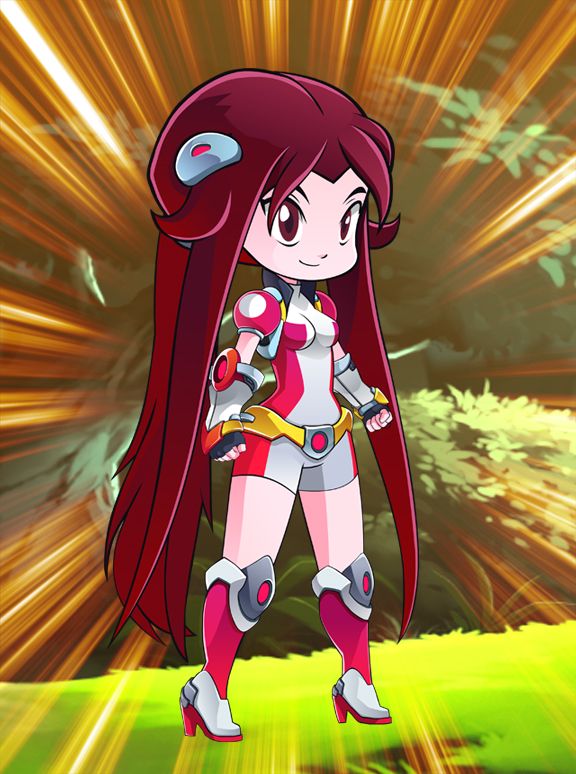
In the project, we took the colors from the comic book cover itself, and just enhanced some colors and added some design elements. Shown in the last 3 pictures, the character models for Jobert and Frogee Mercury were altered a bit to improve the look in the series.
Characters
Production
Layout
The layout and posing process link the storyboard artist and the animator. The layout artist uses the storyboard and prepares an organized folder for an animator. This folder contains a field guide that shows the proper camera move and the right size of the scene. It also includes the character’s main poses from the storyboard following the official design, the effects, backgrounds and all the other information necessary to the animator. The backgrounds are done directly out of the storyboard and the location design. The background artist refers to the storyboard and draws the background for each scene.
Alstaire was the only artist who had experience in layout but was already loaded with work. The studio decided to hire layout artists, but because of the low budget, we paid the artists per episode instead of per scene as the standard practice. The first layout artist really did a bad work, so Alstaire had to redo those that were done for episodes 1 and 2. Succeeding layout artists only finished some episodes partially because they were also doing some other jobs for other studios.
Luis agreed to layout episode 4 and Ricky Liwanag did a good job on episodes 5 to 7, but he passed away after doing his job. With the storyboards for the remaining episodes having good drawings, the studio decided on just enlarging the storyboard panels to animatable size and had the backgrounds done by some animators. Some of the backgrounds were still poor because of the artists involved lacked the skill in background drawing, but Alstaire was able to fix them and other backgrounds were just adjusted during coloring.
Layout Pose
The Layout-Pose 1 and 2 are done by the Layout Artist based on the storyboard. This will be given as guides for the animators.
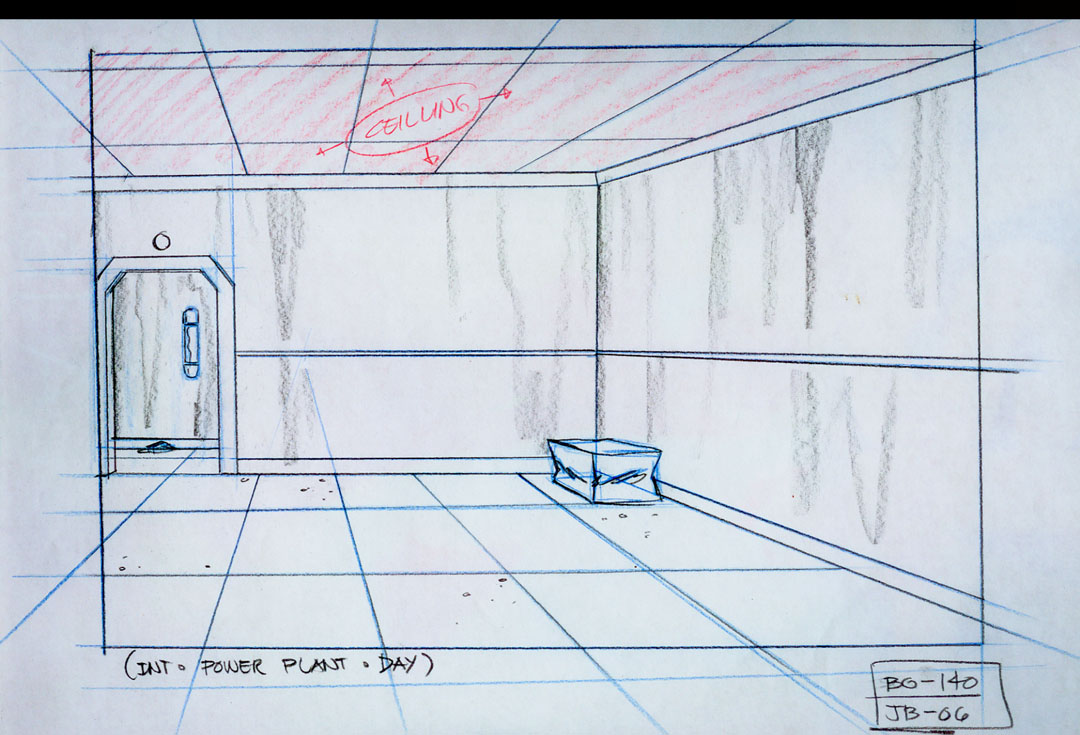
Layout Background
Colored Layout Background
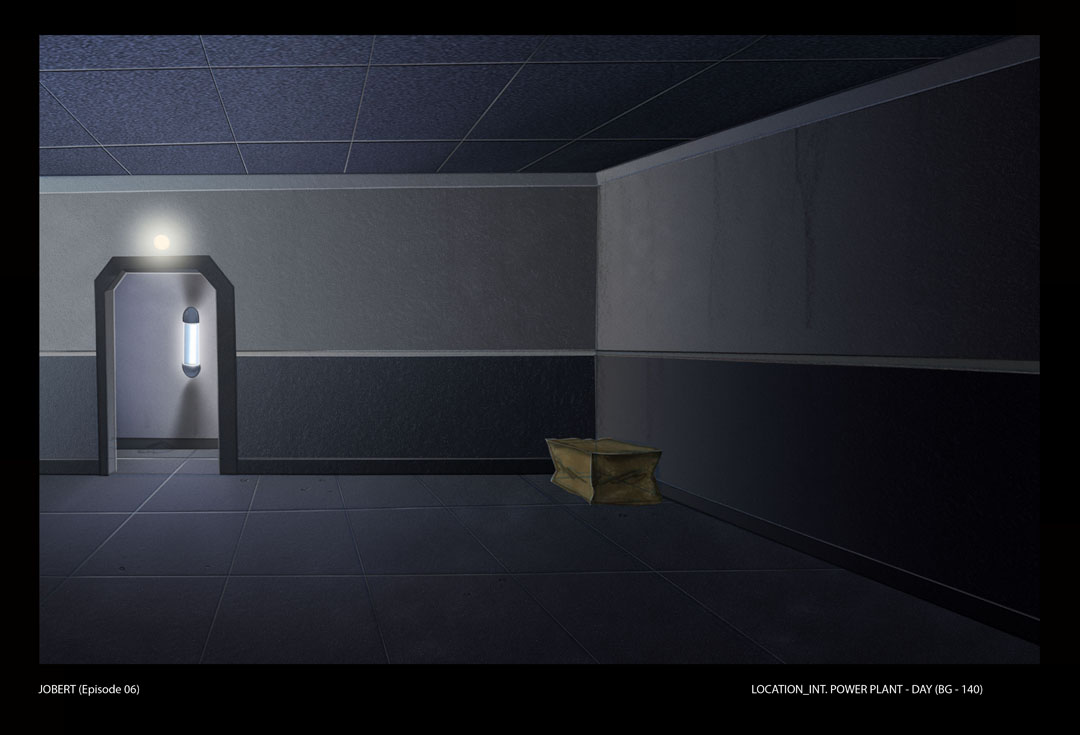
Background Painting
Once the background layouts are completed, they are ready to be painted. The background painter will take the final layout and paint them using the palettes created by the color stylists. Once the backgrounds are painted, they will be sent to the Scene Setup team or the Compositing team.
Joel Orcena was the one who did the backgrounds for the trailer and the first 2 episodes of the series. The line art done by the layout artist was sub-par, the background artist had to try to enhance them. Joel did the best he could and was able to fix the first episodes, but his family asked him to take over his father’s business, so he had to go back to Bicol.
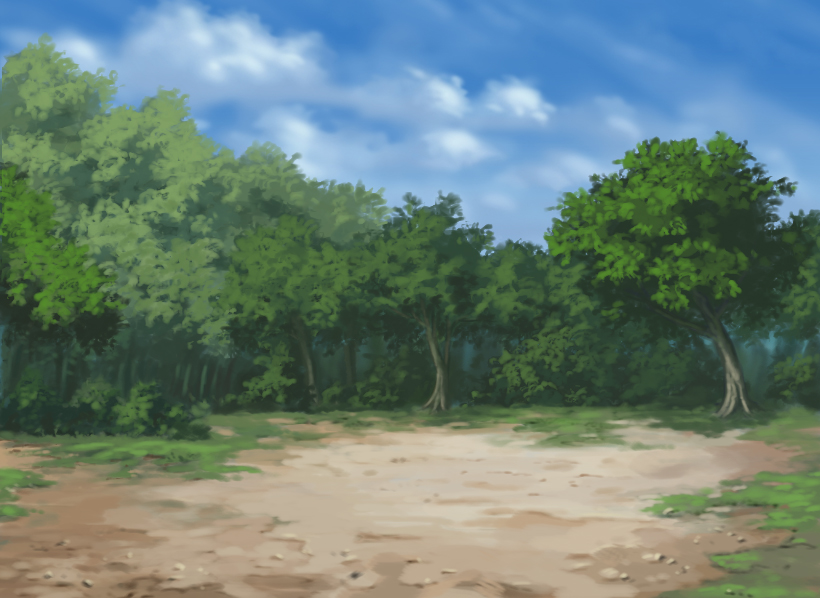
We needed two new background artists to continue with the series when 3 students applied for the job namely: Socrates Gucor, Bryan Lumantas, and Opel Maglana. Each student had traditional painting backgrounds and they were interested in trying digital painting. Episodes 4 to 8 were their initial projects, and each episode’s background improved through time. Socrates was the artist who seriously wanted to improve his craft and he was the one who remained till the final episodes. So his work has vastly improved, especially in the final episodes. Bryan and Opel subsequently went back to Davao after finishing their projects. We also had some scenes were we used 3D graphics for the background.
Samples
Animation
Once we have the Model Pack, Storyboard, Layout, and Backgrounds approved we can now proceed to Animation. The animators create scenes by acting out the situations that the character in the scene requires, they based their timing and noted it down using the Exposure Sheet (X-Sheet).
Exposure Sheet (X-Sheet)
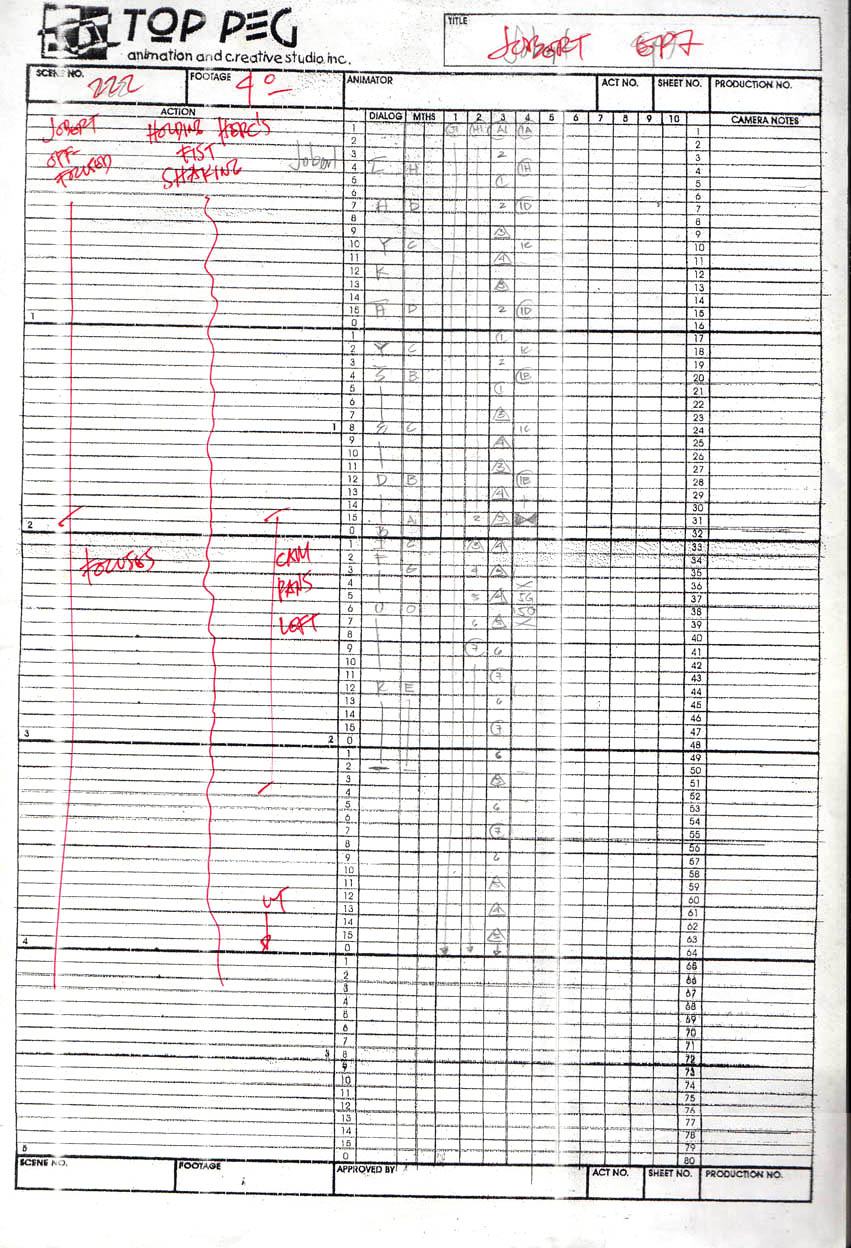
Also referred to as camera instruction sheet, dope sheet or X-sheet is a traditional animation tool that allows an animator to organize his thinking and give instructions to the cameraman on how the animation is to be shot. It consists of five sections and is a bit longer and narrower than an A4 size paper. Every eighth line down is marked thicker than the rest and shows half a foot of film. One second animation would take three of these sections. The sound breakdown was often done on separate sheets called bar sheets made by the editor and given to the animator who would transpose them to his dope sheet.
The timing director, who in most cases will be the main director takes the animatic and analyzes exactly what poses, drawings and lip movements will be needed on what frames. An exposure sheet is created; this is a printed table that breaks down the action, dialogue and sound frame-by-frame as a guide for animators.
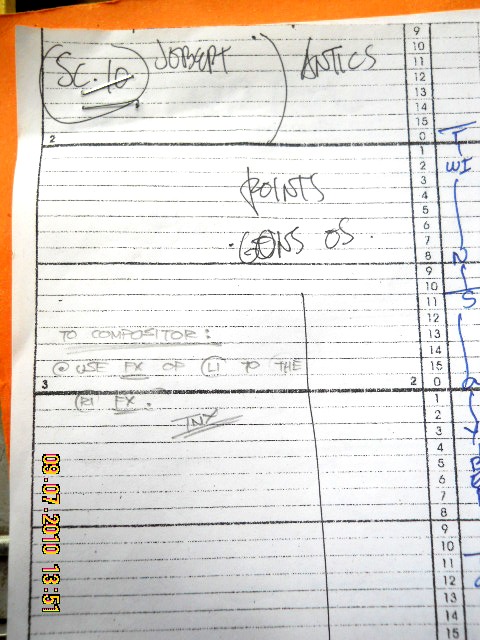 Exposure Sheet Director’s Slugging
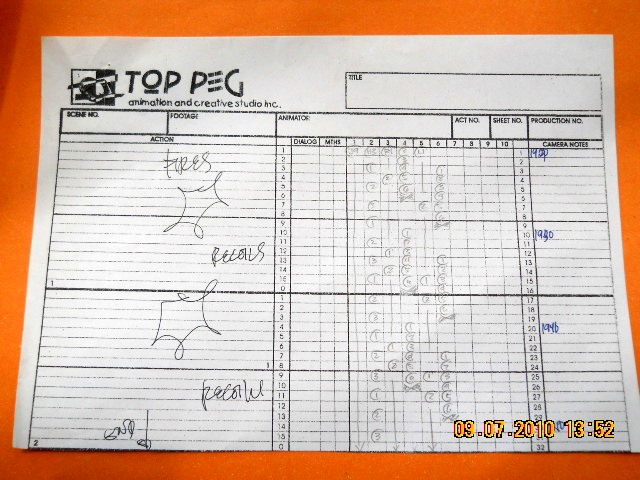
Exposure Sheet
 Exposure Sheet Dialogue Guide
One of the problems we encountered in “Jobert and the Crop Circle Warriors” series are the missing X-sheets from the scene folders. These X-sheets should have been scanned and given to the Digital Ink & Paint artists. But both the digital and actual copies were missing. It might have gotten lost in scanning or in monitoring, as we had different production coordinators who handled the project. This was very difficult because most of the animators who have worked on the series were freelancers and are now difficult to contact. The director now has to reverse engineer the scenes to replicate the new X-sheet, the difficulty is when there is dialogue in the scene or when the scenes have a number of layers that are animated. To better understand the problem, I will try to explain what an X-sheet is and why it is important.
Sample X-Sheet in the Jobert Series
An X-sheet of exposure sheet is a page that contains all the information that the animator will need when animating a scene. Each studio sometimes designs their own X-sheet according to their needs, but in our case, we used the standard X-sheet. A standard X-sheet is divided into 5 sections…
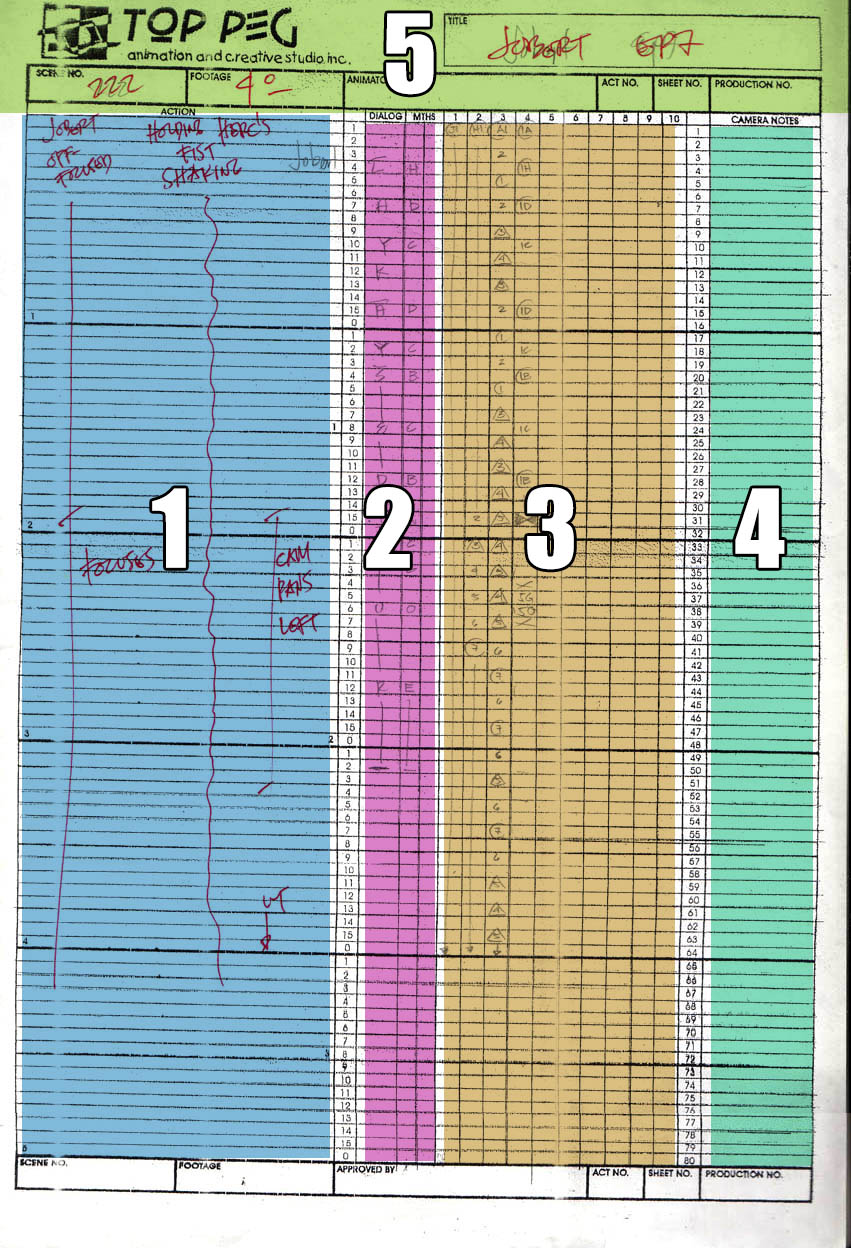
X-Sheet Parts
1. The column in the far left is where the notes from the director, which are suggestions on how the animation would flow.
2. The next column is where the “dialogue” is written and the mouths (MTH) that are needed to be drawn for the dialogues recorded earlier.
3. The center section is where all the animation drawings are located. It is split into 10 smaller columns, each one represents one level of animation. During the pre-digital days of animation, when all the drawing were still done on acetate, this was limited to only 6 columns. 5 levels of acetate, any more would make the video darker, and the extra level of the background. The number of each drawing is written according to the order that they will be shot.
4. The final column is for the camera instructions, giving information for the panning (moving left to right or up and down), trucking (zooming in or out) and field size (drawing size).
5. The top is where the show title (Jobert Episode 7), scene number (222), footage length (4º or 4 feet), animator’s name, act number, sheet number, and production numbers.
There are also numbers written which provide additional information for the animator.
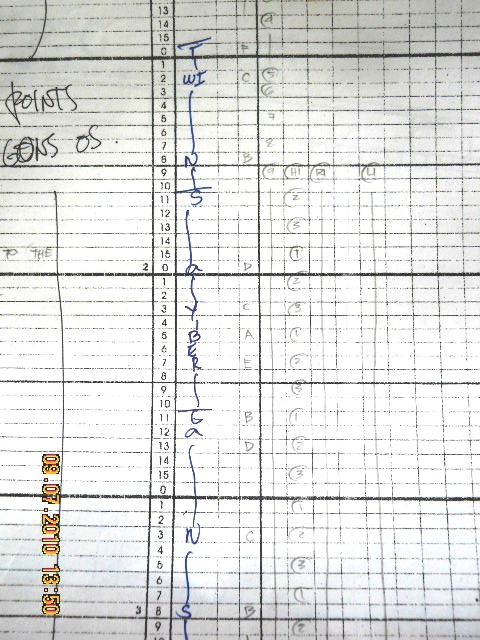
X-Sheet Indicators
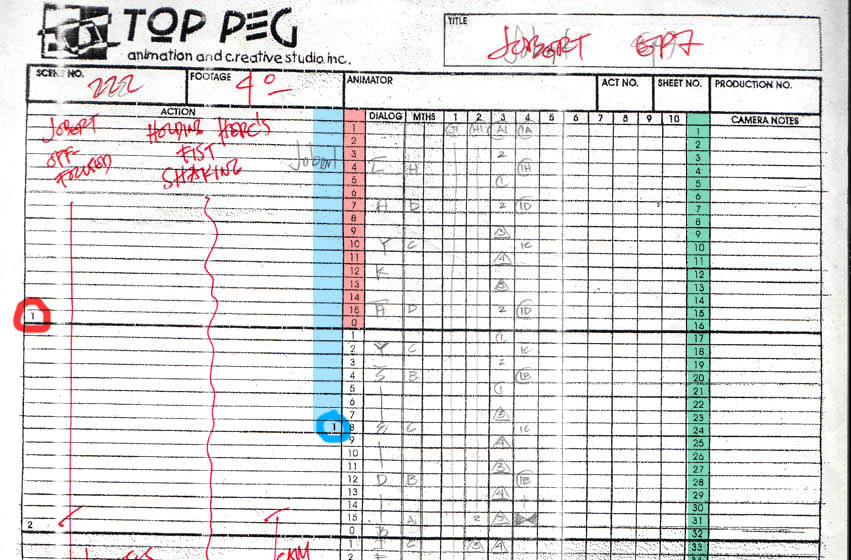
Each row designates one frame of animation. The numbers on the right (green) shows the number of frames (usually it is 80 frames per sheet). The numbers on the left column (red) are split into 16 frames to show 1 foot of animation which is also indicated by a number on the far left (red circle). A number (blue circle) every 24 frames, indicates one second of animation.
1 foot is equal to 16 frames of animation.
1 second is equal to 24 frames of animation.
1 frame doesn’t indicate one drawing though.
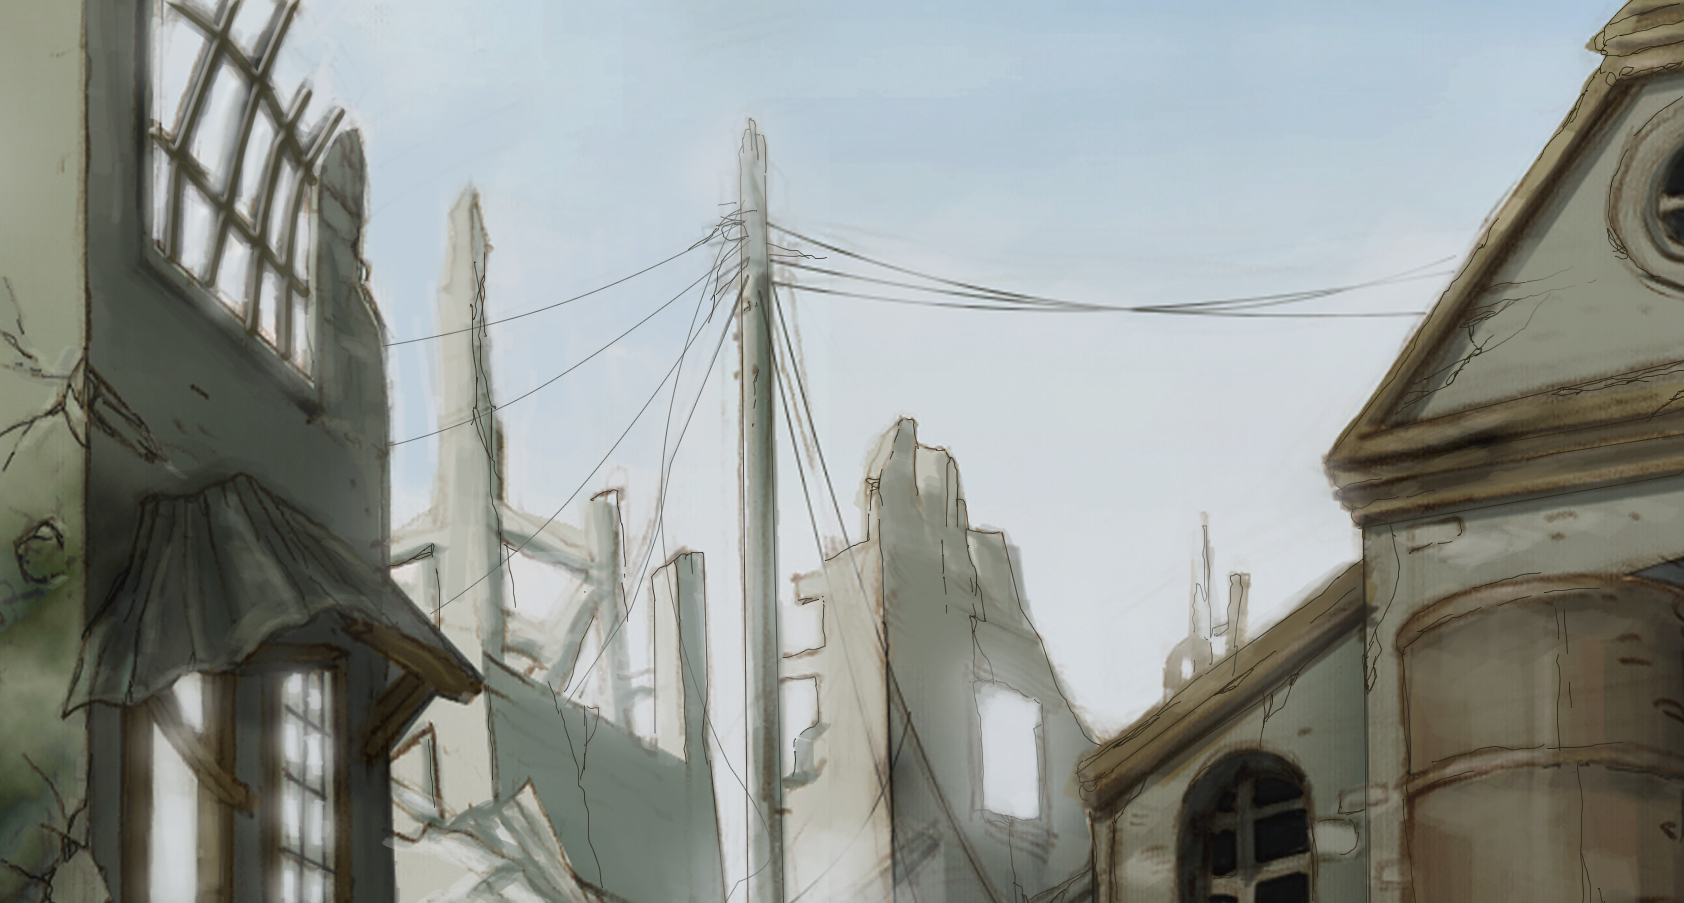
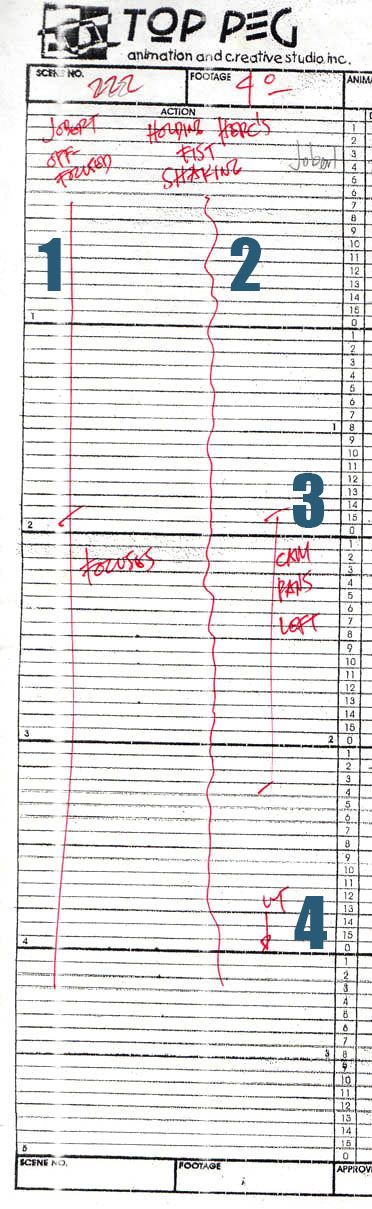
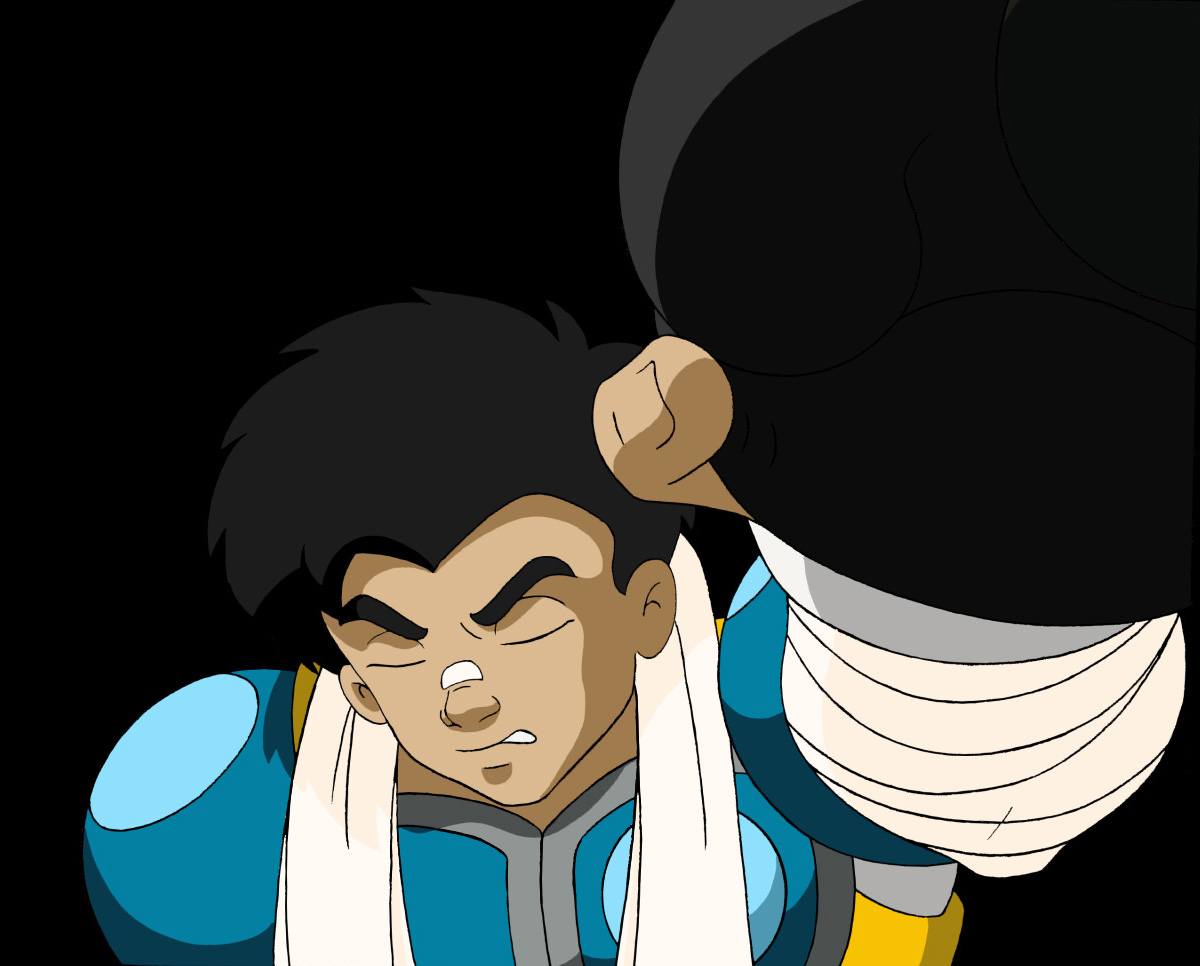
Now to explain each column for this particular scene in detail. The action column has the director’s notes. the director decides on the timing of the animation based on the storyboard. In the story, Herc, one of the Tahug Ziga Corp, was about to punch the injured Jobert to the face. To his surprise, Jobert easily caught his fist. Jobert then speaks: “Like I said before.” So in this scene, Jobert is already holding Herc’s hand and Herc’s hand is shaking trying to break Jobert’s hold.
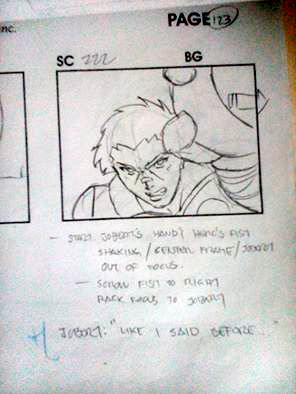
This is what the director writes to the animator to interpret. 1) The director wants the scene to start with Jobert’s head and body off-focused (blurred), and then after 32 frames, the camera focuses on Jobert’s body. 2) The focus of the camera is Herc’s fist-shaking because of Jobert holding it. The wriggly line indicates that it shakes until the end of the scene. 3) This is a camera note, which should have been written at the end column. It states that the camera moves from right to left at this point in time (frame 30) and for the duration (21 frames). 4) Cut indicates the end of the scene.
X-Sheet Action Notes
Next is the dialogue column and the mouth drawings needed. The sound reader is in charge of listening to the dialogue and writing the dialogue in the X-sheet (red). The character who spoke is also indicated (encircled in red). As you can see, the sound reader wrote the dialogue as it sounds instead of the correct spelling of each word. Instead of “Like I said before”, he wrote it as “LAYK AY SED BEFOR”, because words can have different ways of being said or pronounced depending on the voice actor’s pronunciation, diction, and accent. The animator then matches the sound with the mouth opening (blue) to be used in his animation.

X-Sheet Dialogue
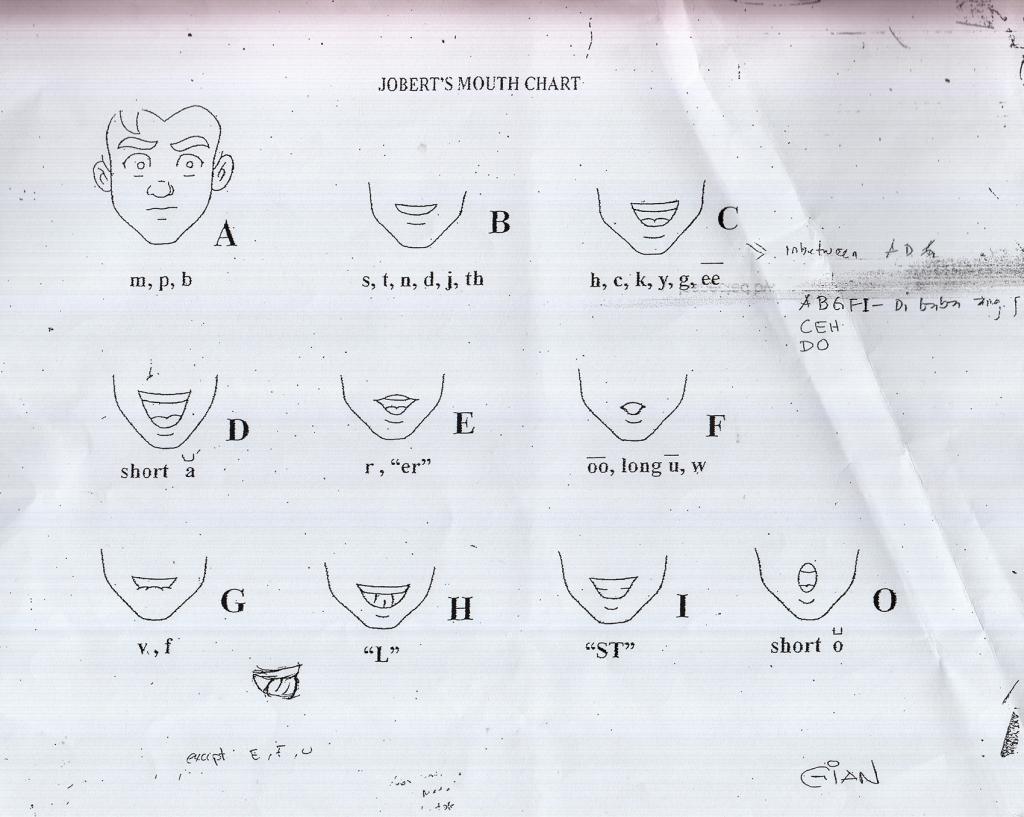
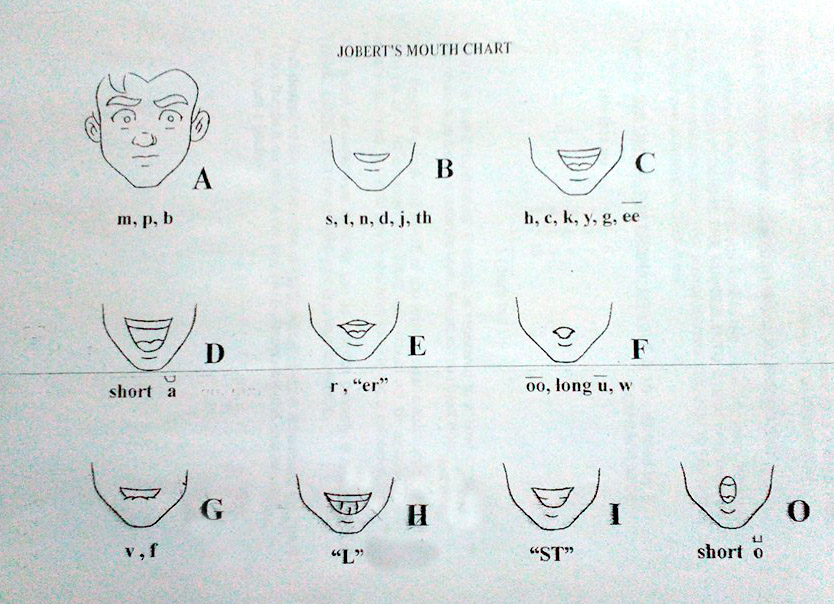
The animators use a Mouth Chart as a guide. Each opening has a code and the sound that mouth opening produces. For example, the “A” mouth produces the sound for the letters M, P and B. Don’t confuse the mouth code with the sound it makes. In Japanese Anime, the codes are numbers, they use fewer mouth openings.
Mouth Chart
Next is the Animation Levels column. This is where you will find the animation numbered in sequence. Level 1 being the lowest, each level can indicate parts of the overall animation or different characters in a scene. this can also indicate props or objects that are included in a scene. For example Scene 22 of Episode 7
X-Sheet Level
Levels
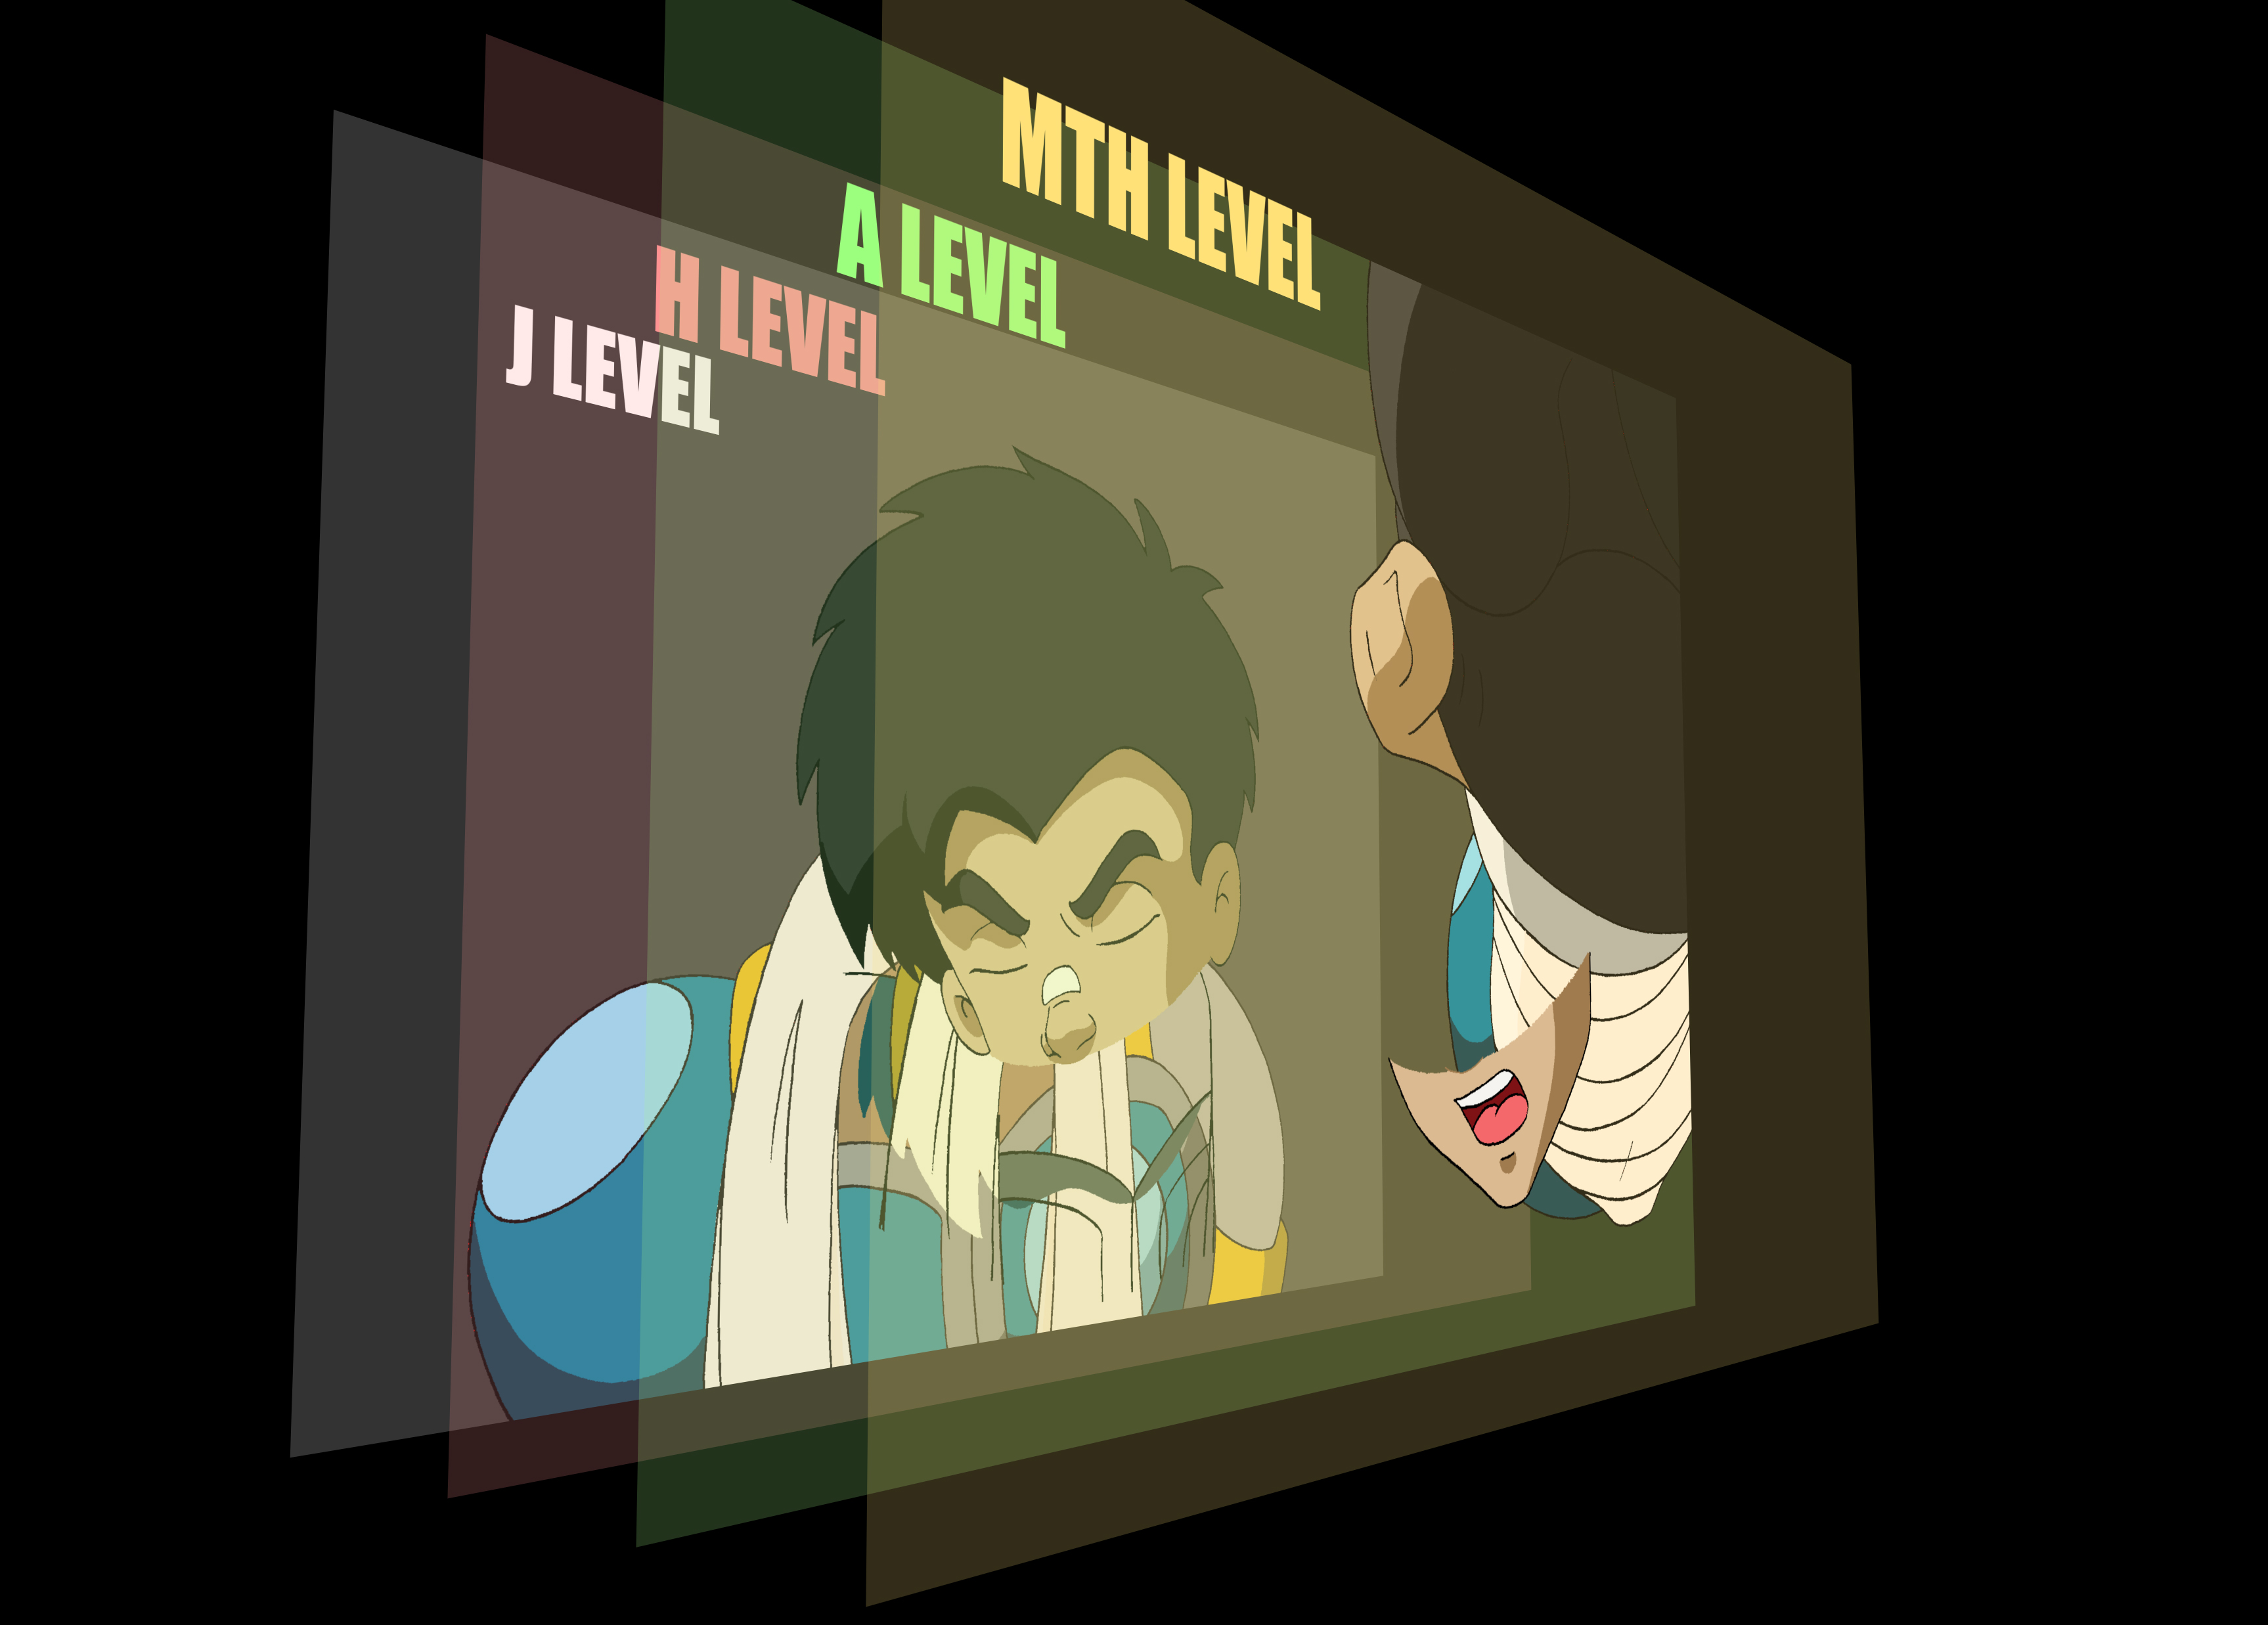
At the left, we can see what numbers stand for. And at the above image are what the image looks like when arranged. The animator uses letters to indicate a body part and a number to indicate the sequence of drawings.
J level (Jobert) which is the body is the lowest level followed by the H Level being the Head. A level is an Arm. For the Mouths (MTH), a number is followed by a letter is used; the number is where the mouth is registered to and the letter being the mouth code. For example, 1A means an “A” mouth (see chart) that is registered to H1 or Head 1.
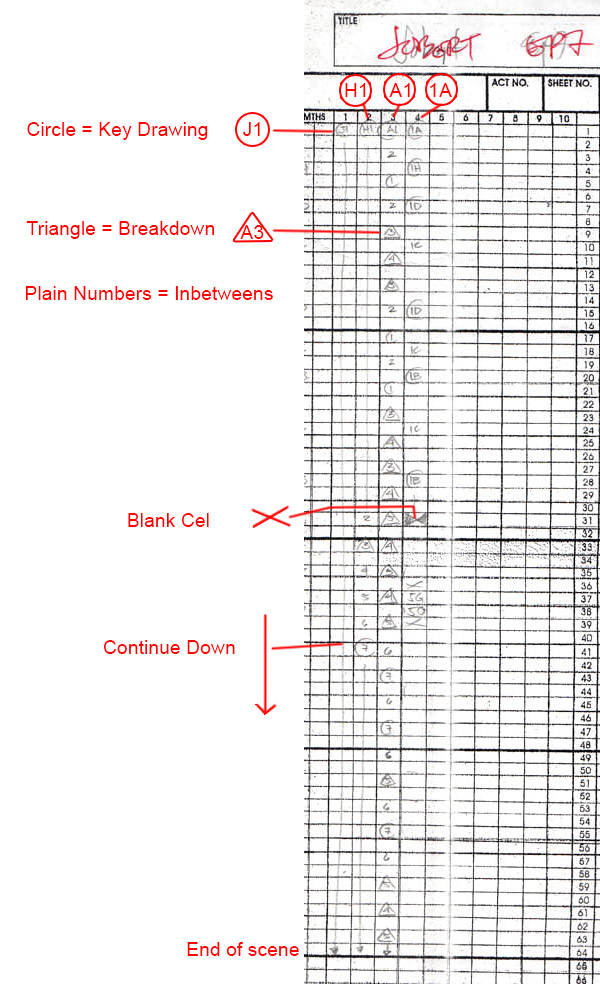
A circle around a number means that it is a Key drawing or one of the main poses of the animation, these are done by the Animators. The numbers without boundaries are In-betweens, these are provided by the Assistant Animators based on the Key Drawings. A triangle means that these are Breakdowns, special In-betweens provided by the Animator. Usually, Animators provide breakdowns if they want a different path of action rather than an In-between. A Cross means that it is a blank cell. A straight line after a number means this drawing is held or it is exposed continuously.
Finished Drawing
Now we know how important X-Sheet is; this is a big problem we encountered when a number of X-Sheets were missing. Here’s how we solved the problem.
In the scene we sampled, Jobert is talking while he is holding the fist of an enemy. The fist was also shaking, trying to outmuscle Jobert. Without the X-Sheet, we only have the drawings, and we didn’t know where the mouths would be located and we would have no idea that the hand is shaking.
What we did is to check the storyboard dialogue and action indicated. After this, we located the soundtrack and tried to synch the mouths with it. Sometimes it didn’t align perfectly, so instead of trying to figure out the right location, which may take a number of trial and error; we adjusted by adding drawings or more mouths so the animation would synch. If there is no action indicated in the storyboard, this would be a lot harder to reverse engineer. If it is a short scene, we will still try to figure it out, but if it is a long scene, it would be better to just re-animate it again.
As the director of the show, and knowing the sequence of the story, these were easy fixes though time-consuming. Now our young artists sometimes just go to work without learning, they fail to study and understand the story first. So when they get a problem like a missing X-Sheet, they would rather get a different scene than figure out the problem. Those who do try to fix it, most of the time it will take them a very long time to finish fixing it.
Pencil Test
After all the drawings are cleaned-up, they are then photographed on an animation camera, usually on black and white film stock. Nowadays, pencil tests can be made using a video camera and computer software.
For the project, the Exposure Sheets were written based on the sound cut, what the time length of the sound cut was also the length of the whole x-sheet. The dialogue is also written here. After this, the director will draw sketches for timing on where the actions will occur. This will be the guide for the animators to follow. Alstaire did all the slugging for all the episodes.
The pencil tests were done by using a webcam and connecting it to a computer, we tried different types of software to achieve this. To save time for the animators, we hired different people to do the line testing, instead of the animators doing the line test for their own work.
The animation part had tons of retakes. We had a number of in-house artists but due to the number of scenes, we had to hire freelancers to help. But the freelance animators produced a poor quality of work, so we had to redo most of them. Some animators based their work depending on the budget of the show, if the budget is high, they produce good work, if the budget is low, they produce low quality work. Some freelancers even took home their work and never came back, with some even changing their contact numbers for whatever reason. We decided to have all the animation done in-house because of the lost time and money with the work of the freelancers.
From the original batch of animators, Alstaire was the only holdover. We had to often hire new supervisors since some of our supervisors moved abroad or to bigger studios. We had to train new artists every year, as we lost old artists who moved on to other works, such as call center jobs. This constant change in artists and animators was a challenge since had to train guys to be up to par with the last batch of animators. Some animators were trainable but others were really disastrous. The director himself even animated most of the difficult scenes in the series. We also hired animators we trained in Dumaguete, where Anthro came from. Anthro was an expert in anime action, so he was given the difficult action scenes for the last 3 episodes. Due to the disparity of talents, a sharp viewer will be able to see the improvement of animation from episodes 1 to 13.
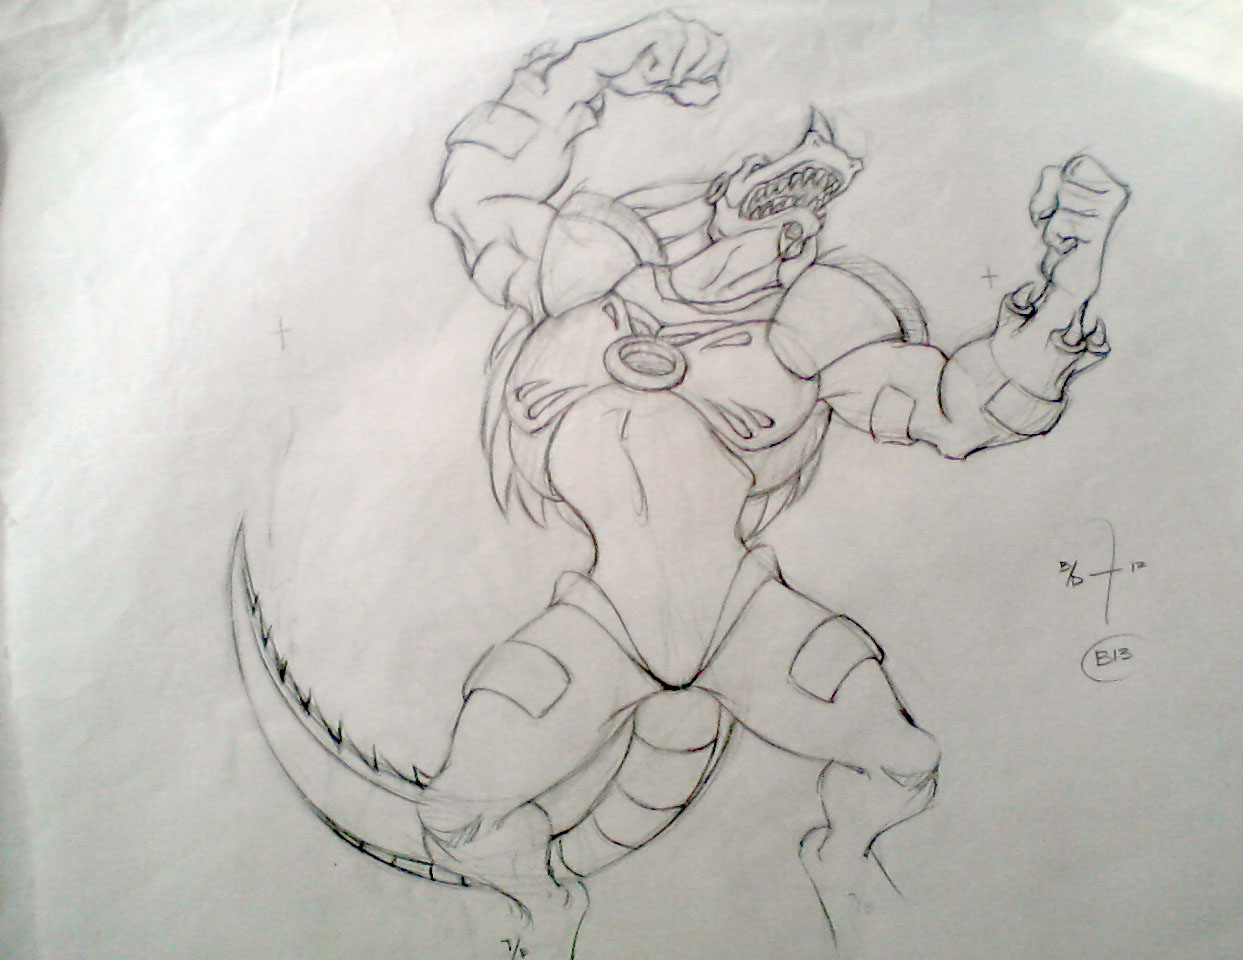
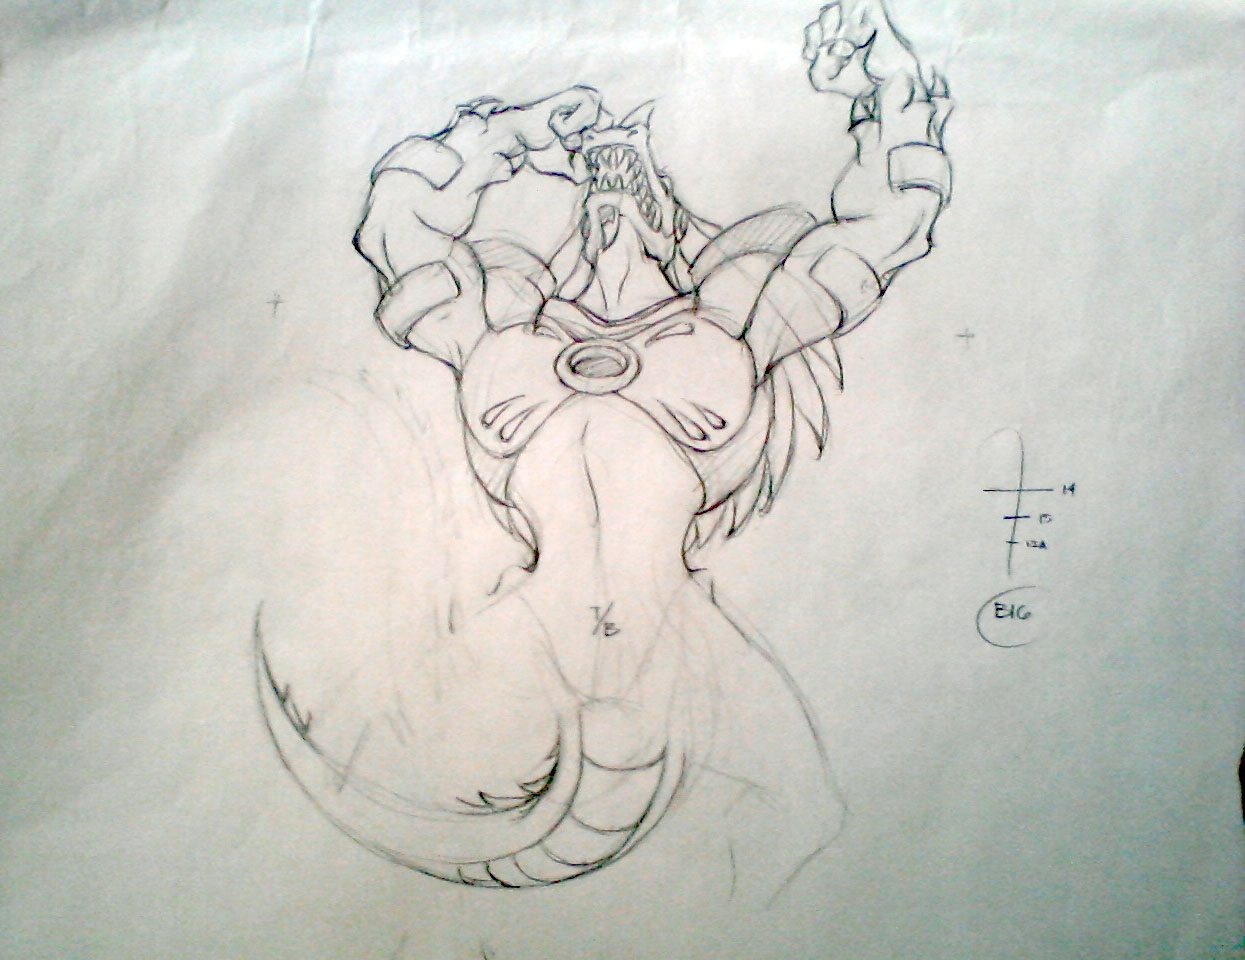
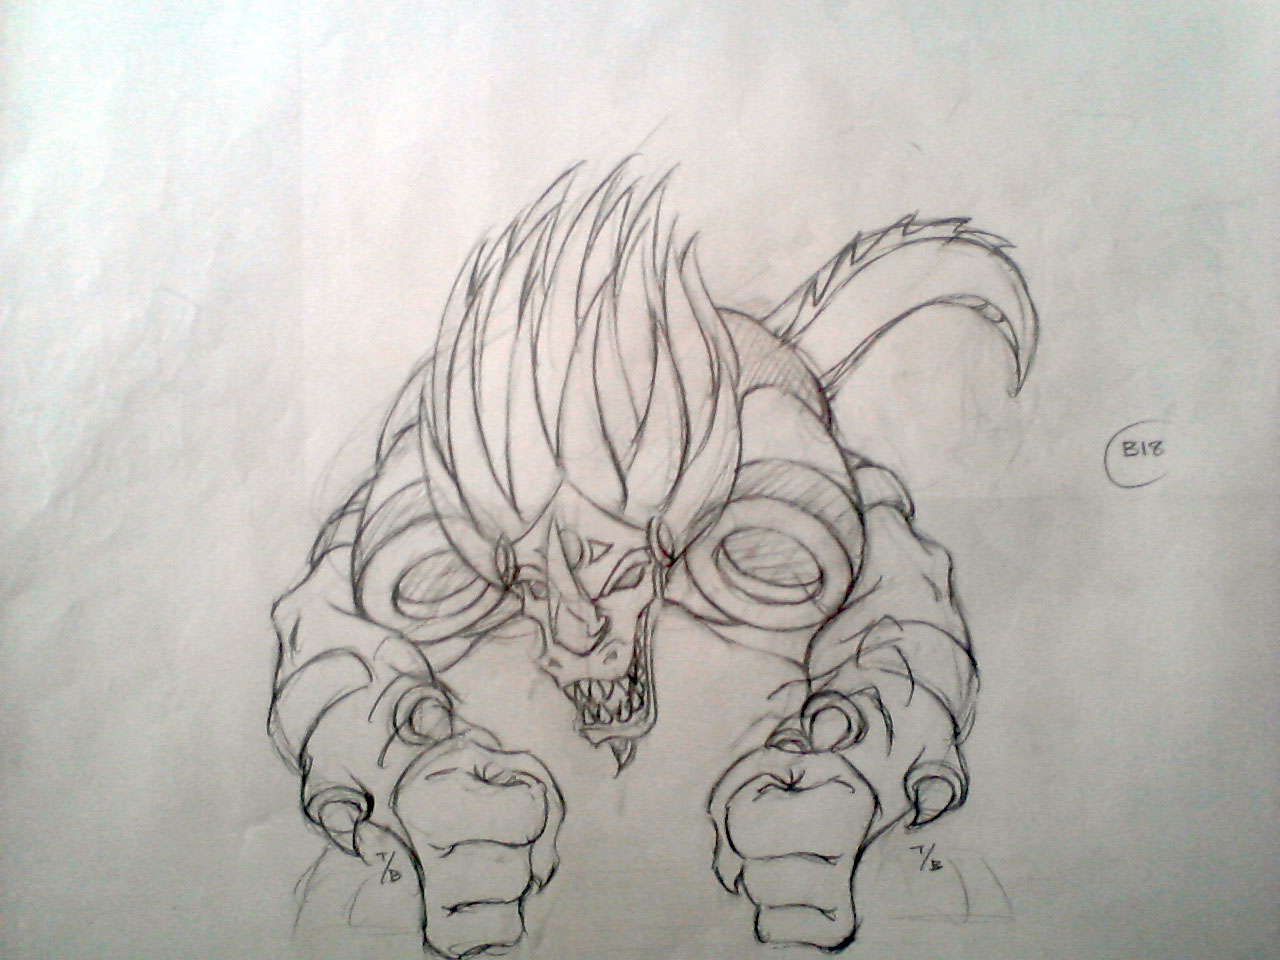
Animation

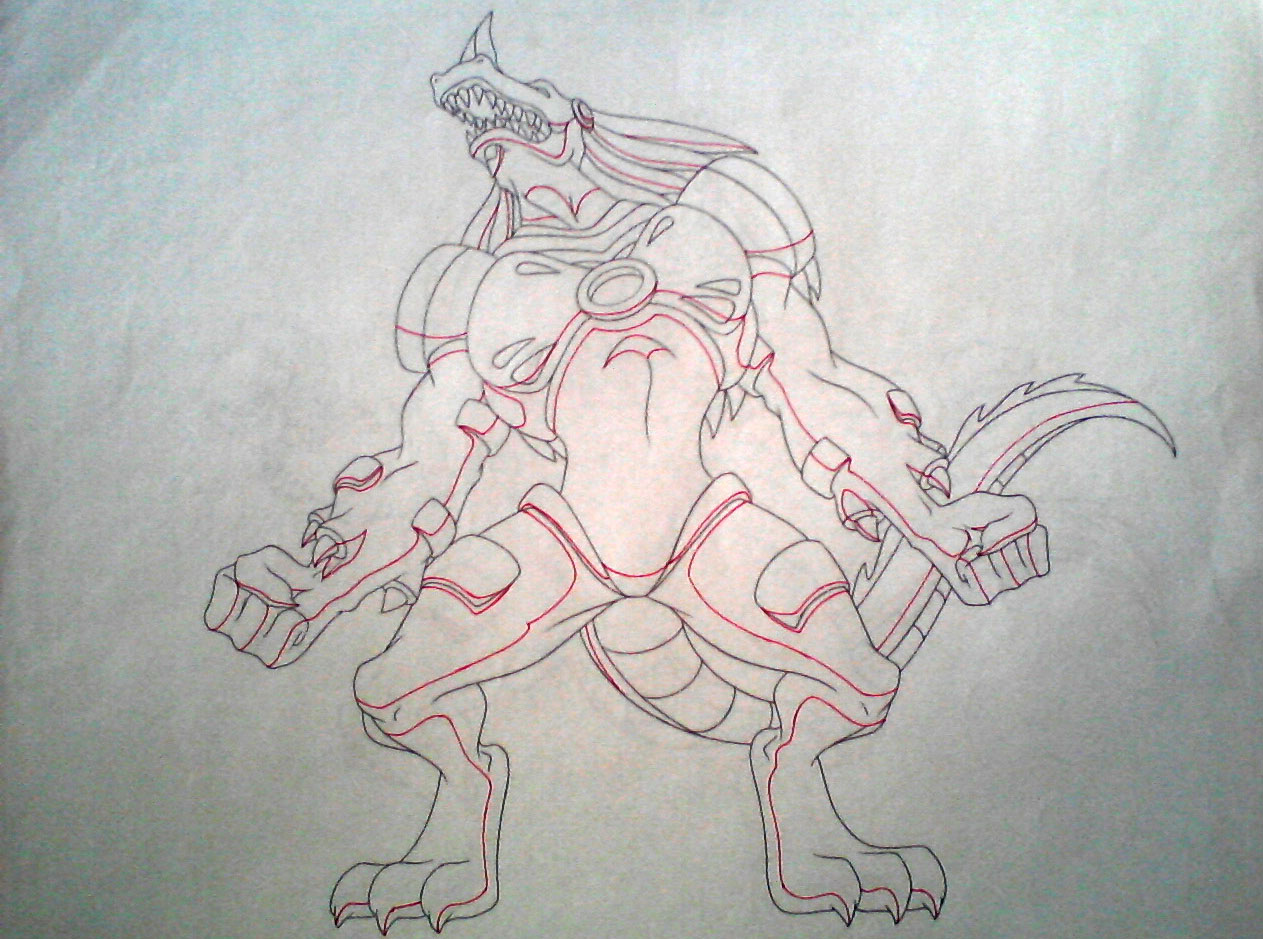
Animation N0. 1
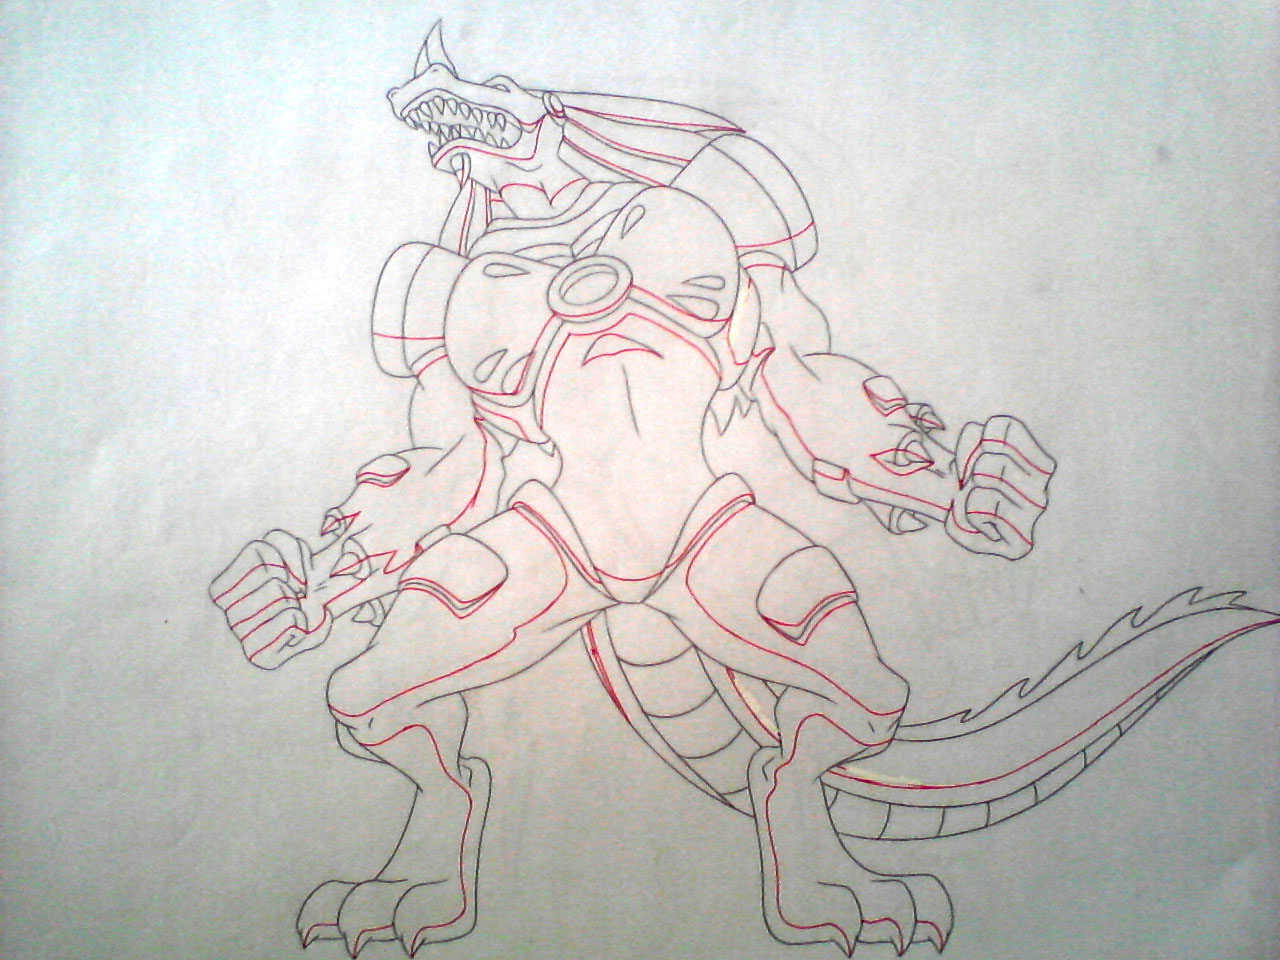
Animation No. 9
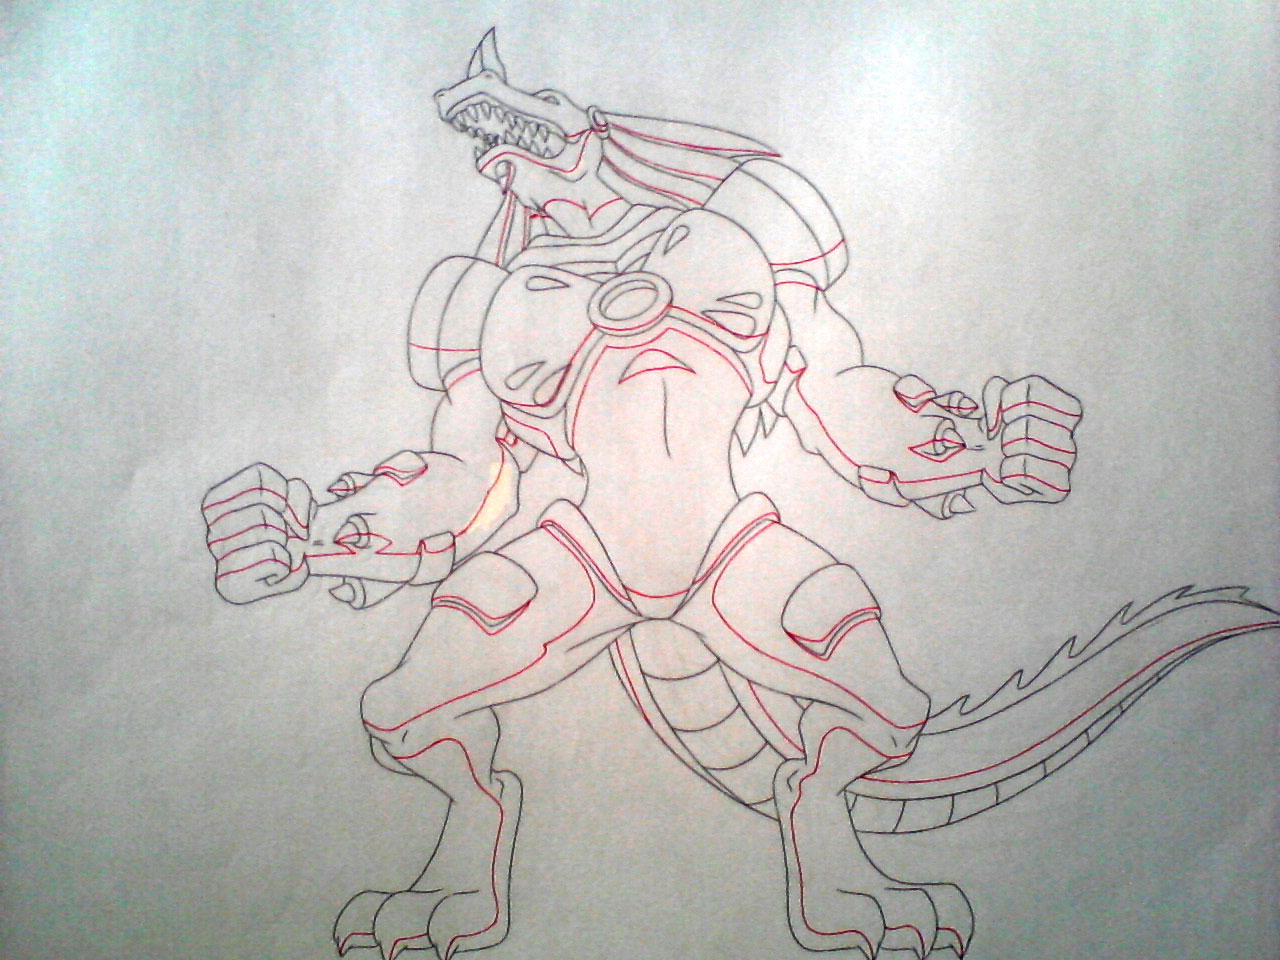
Animation No. 10
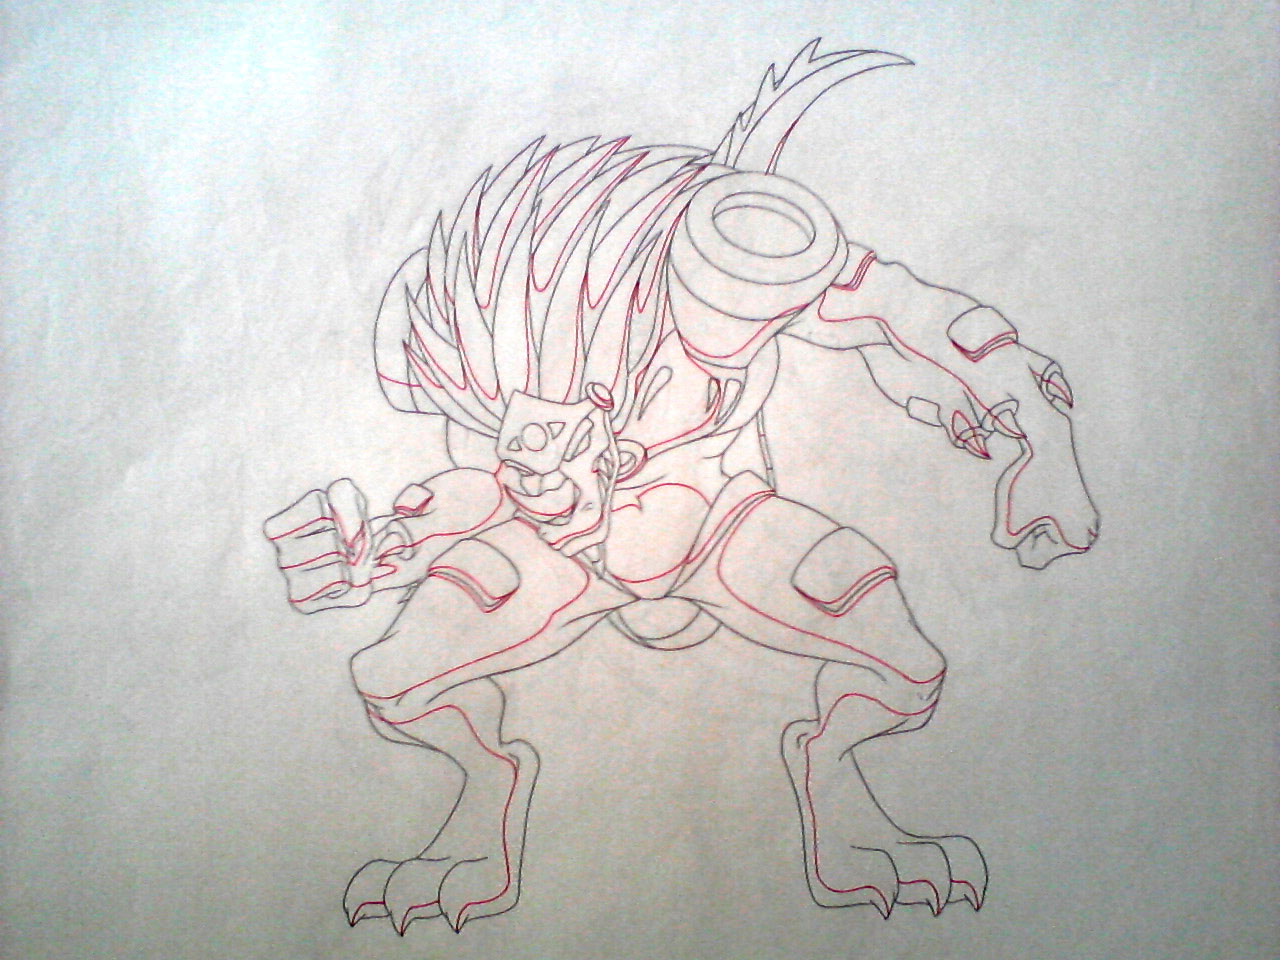
Animation No. 12
Animation 01,09,10 and 12 are the Key Drawings drawn by the Animators… from the Layout poses, the animator makes more poses to complete the action, he also charts them to the Exposure Sheet. He will provide instructions for the Clean-Up and the number of In-betweens needed.
Clean-up and In-between
Once the key animation is approved, the lead animator forwards the scene on to the clean-up department, made up of the clean-up animators and the in-betweeners. The clean-up animators take the lead and assistant animators’ drawings and trace them onto a new sheet of paper, taking care all of the details present on the original model sheets, so that it appears that one person animated the entire film. The in-betweeners will draw whatever frames are still missing in-between the other animators’ drawings. This procedure is called tweening. The resulting drawings are again pencil-tested and sweat boxed until they meet approval.
Clean-up and in-betweening is the entry level for all artists, and most of the artists at Top Peg are these kinds of artists. This is the most tedious process of the production part because this will have the most workload. A regular artist at a big studio is required to do at least 100 drawings a week. Most of our artists can only do about 50 a week. So we really had to outsource again to freelancers to finish the project. As with our experience with freelancers, most of their output was disappointing.
Clean-Up and In-Between (CUIB)
CUIB No. 1
CUIB No. 9
CUIB No. 10
CUIB No.12
Clean Up 01,09,10 and 12 are the Key drawings of the Animators traced into a nice line with shadow lines (red) added. This will be ready for scanning after it is in-betweened.
In-between (IB)
IB No. 2
IB No.3
IB No.4
IB No. 5
IB No. 6
IB No.7

IB No. 8
IB No. 11
In-between 02 to 08 and 11 are the in-betweens, the Animations and Clean up are numbered to see how many in-betweens are needed, there is also a timing grid on the animators drawing as a guide for the in-betweeners. After this is done, it will be given to the scanners. Combine the CUIB numbers 1,9,10,12 and IB number 2 to 8 and 11 to have a complete animation of the character movement from numbers 1 to 12.
Scanning
After all the hand drawings are done, those are now scanned into the computer. In large studios, they use a large scanner with an auto feeder. These type of scanners, together with the right software, can read paper holes. So even if the paper was misaligned, the software automatically puts all the pages in the right position.
Small Scanner
The large scanner with the auto feeder is too expensive for a small studio. We just used a small home scanner and placed a peg bar, so all the paper would be centered. The problem was the small scanners were much slower than the large scanners, and it took up the time for the Digital Ink and Paint Artists before they can even paint; so we hired On-the-Job-Trainees, messengers or administration staff to do the scanning on their free time. This method allowed the painters more time to paint and finish their work faster.
Today, there is a much more efficient way of production, which people in the animation industry call Tradigital Animation…this is combining the traditional method of animation with digital technology.
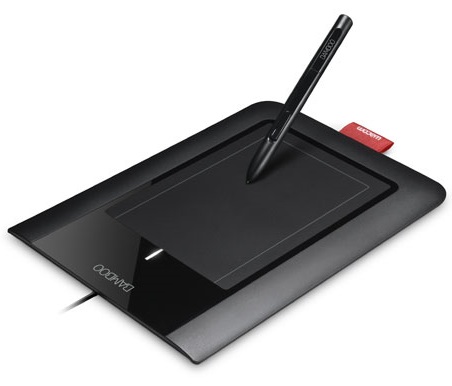
Instead of animating on paper, the animator draws directly to the computer by a digitizing tablet. The regular Wacom Tablet (Bamboo Pen) cost about P6,000, but there are less expensive brands but those are not durable.
Sample
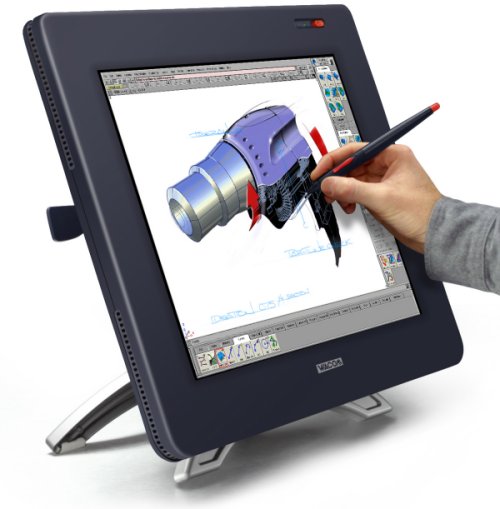
There will be a slight adjustment for the artist because he will be looking at the monitor and drawing at the tablet, but an artist can learn this in 2 weeks. Although there are more advanced tablets like the Wacom Cintiq, it is still expensive due to little competition. The said tablet can cost up to P150,000 each.
Sample
The Tradigital way is more cost efficient in production. While the traditional way, a full production, 90 min animated movie, a studio would need to use paper, pencil and erasers amounting to at least P2 million pesos. The Tradigital way may have expensive equipment and software, but if one compares the cost of 20 Wacom Bamboo pen will cost plus the software will only be expensive at the start of production. In the long run, corrections will be cheaper compared to the traditional way and the next projects can be continued with the same equipment.
Tradigital is time efficient because one draws directly to the computer so we eliminate the scanning process, which eats up a lot of time, which depends on the speed of the scanner. We also eliminate the necessity of Pencil Testing or Line Testing by the animators. Traditionally, after the animators draw on paper, they shoot their drawings with a camera and it is captured into a software where they can check if their animation is correct. Tradigitally, after they draw on the tablet, they can play it instantaneously. This limits the time for the animator to stand and transfer to another workstation. The artists can also enlarge and reduce some character models using the tablet instead of a copier machine. With the obvious benefits, most studios are now transferring to this innovative process of animation.
For Jobert and Crop Circle Warriors, we started with the traditional way, since the tablets were expensive when we started. So we still use the traditional way up to finishing up the 13 episodes. For season 2, if it pushes through; we will use the tablets already. But there are some freelance artists using the tablets, especially in the painting stages of the characters and backgrounds.
Ink and Paint
When the color models are ready, the drawings are scanned and properly exposed, the colorist can start cleaning the artwork and start applying the colors using a digital paint software. When the drawings are cleaned, inked and painted, they are ready for compositing.
Since the Ink and Paint process and software was simple; we hired non-artist to do the painting. One problem we encountered, was the hired non-artists didn’t have the creative eye on what they were coloring. They were confused on what parts were shadows and what was not; an artist can easily distinguish this. So there were a lot of retakes and we only had one Ink and Paint supervisor.
There were was one point where we had Ink and Paint artists take home their work since we didn’t have enough computers. The problem was that some artists abandoned their work without telling us. We had to train new Ink and Paint artists to replace those who left and again distribute the scenes that those artists left.
Compositing
The compositor imports the colored background, the animatic reference and the sound as required. Referring to the exposure sheet, the animatic, and the animation, the compositor assembles all of these elements and create the camera moves and other necessary motions. Finally, the compositor adds any digital effects required by the scene. These can include tones, highlights, and shadows. When the compositing is finished, the final step is rendering.
Compositing looks easy because all you have to do is put everything together. To lower the cost and with the advent of computer motion graphics, Alstaire suggested that we use digital effects instead of drawing for the effects. We tested it and we were happy with the results. We needed better computers for the special effects, so we purchased 2 compositing computers. We also trained our own artists to composite, since the remaining works are the final output; we didn’t want to outsource the job.
Alstaire did some compositing for the first shows, but he needed help when the production work was overflowing. We were able to develop few good compositors, but some of them moved on once they learned much from us. Another problem we encountered was when some compositors just composite the scenes together without checking their work with the storyboard. So when a scene needed some enhancement, they missed it completely. Compositors need an eye for the screenplay, which can be developed if one is fond of watching movies and Anime. Because of these mistakes, most of the scenes were again adjusted by Alstaire.
When we started Jobert (now Jobert and the Crop Circle Warriors), our target media was DVD or Betacam, which was standard at that time. we worked on a 720 x 486 Widescreen format. Today, most TV’s are in HD or High Definition, with at least a 1280 x 720 (half HD or 720p) or 1920 x 1080 (Full HD). We had to adjust our project to match the standard today, at least half HD with the last 4 episodes. So we had to convert the first 9 episodes. There were also comments that our first 2 episodes pacing were a bit slow, so we had to adjust them. Luis also found episode 6 to be too long, so divided it into 2 episodes.
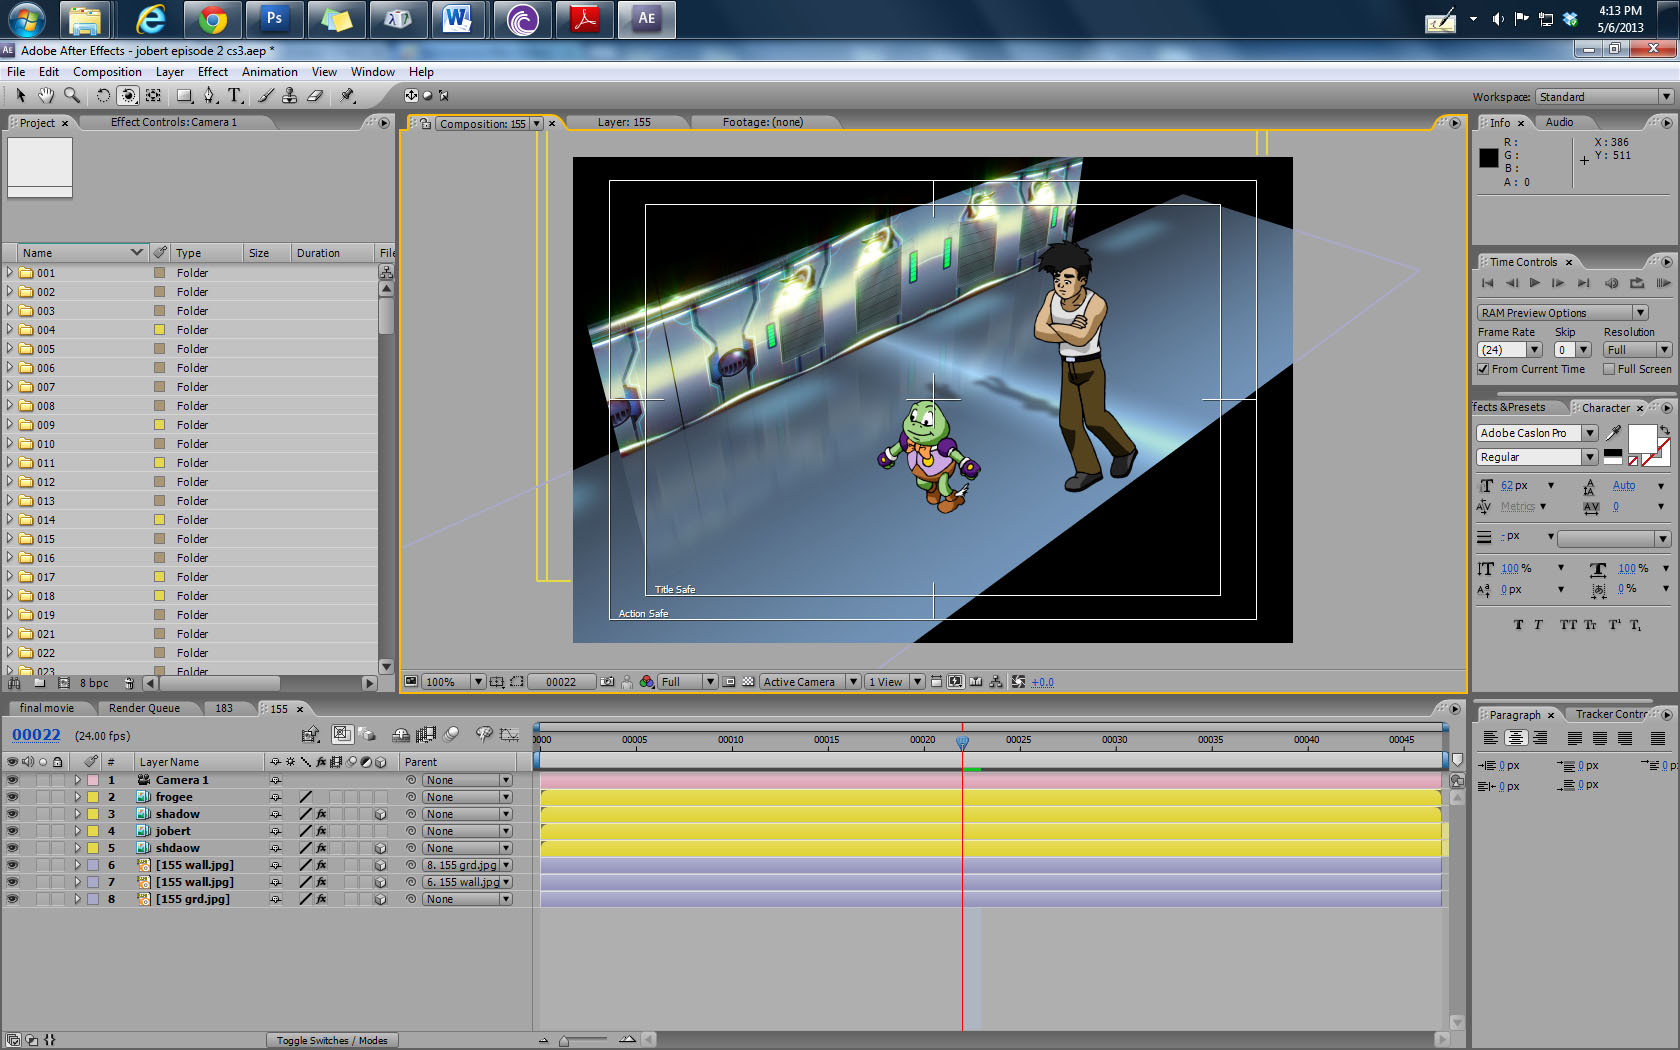
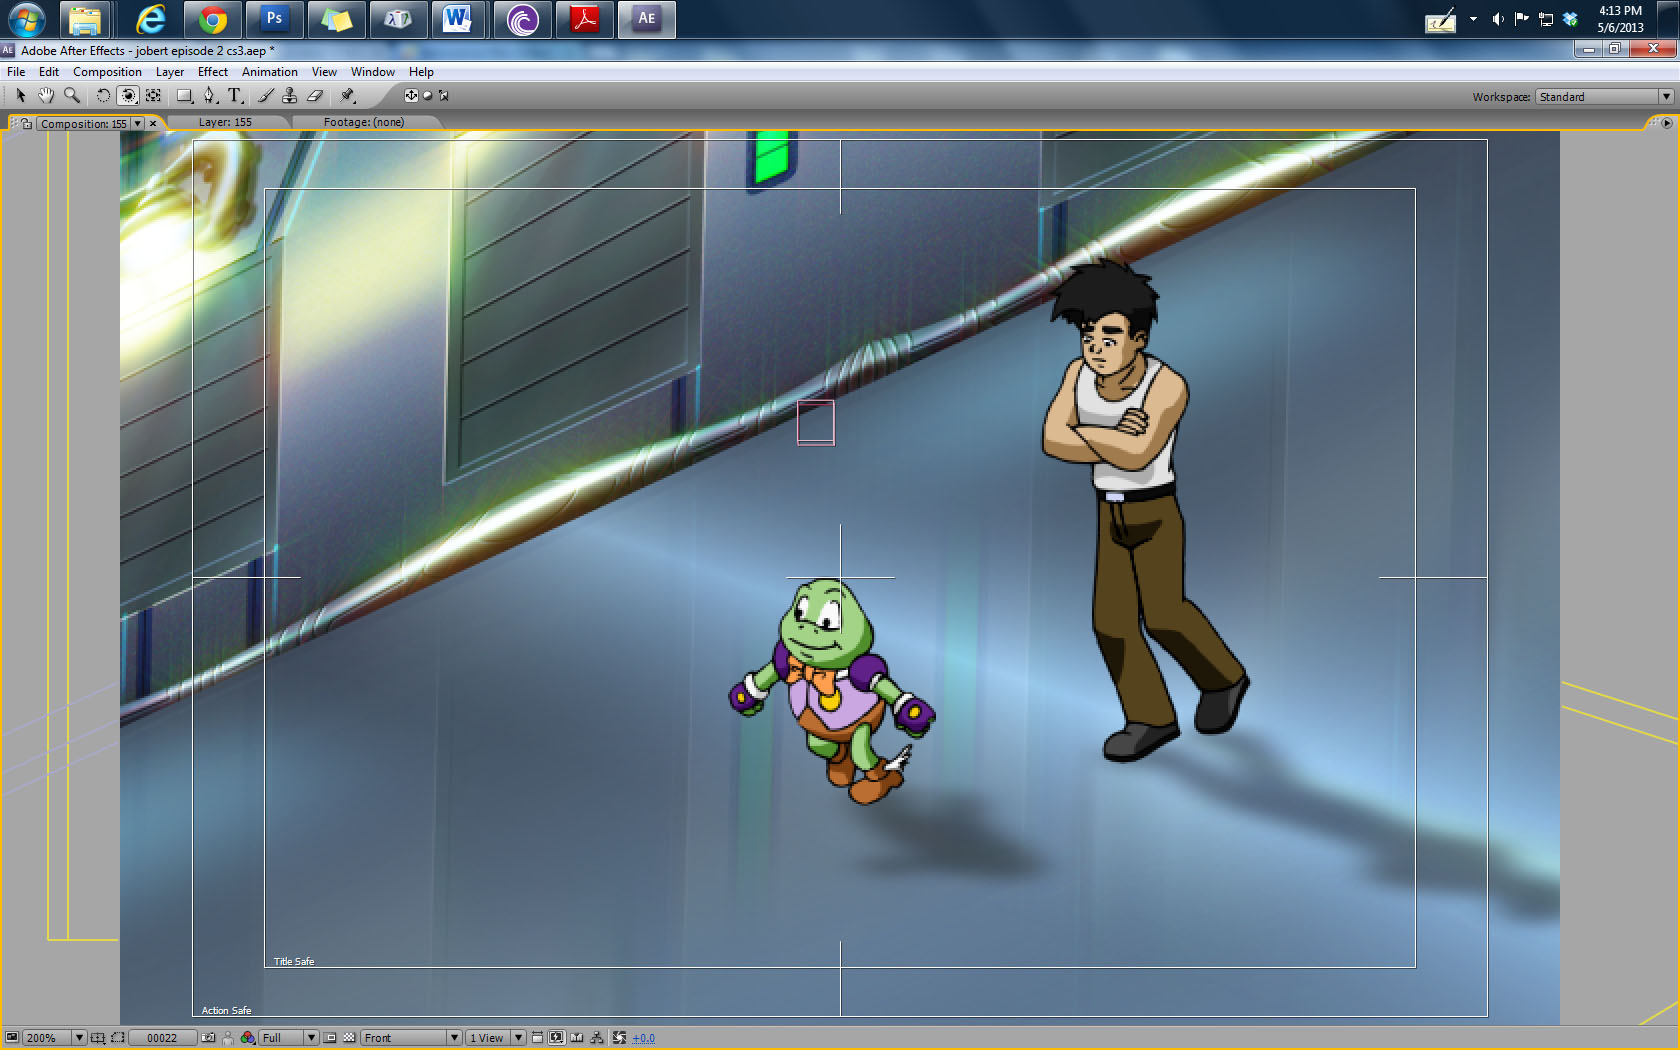
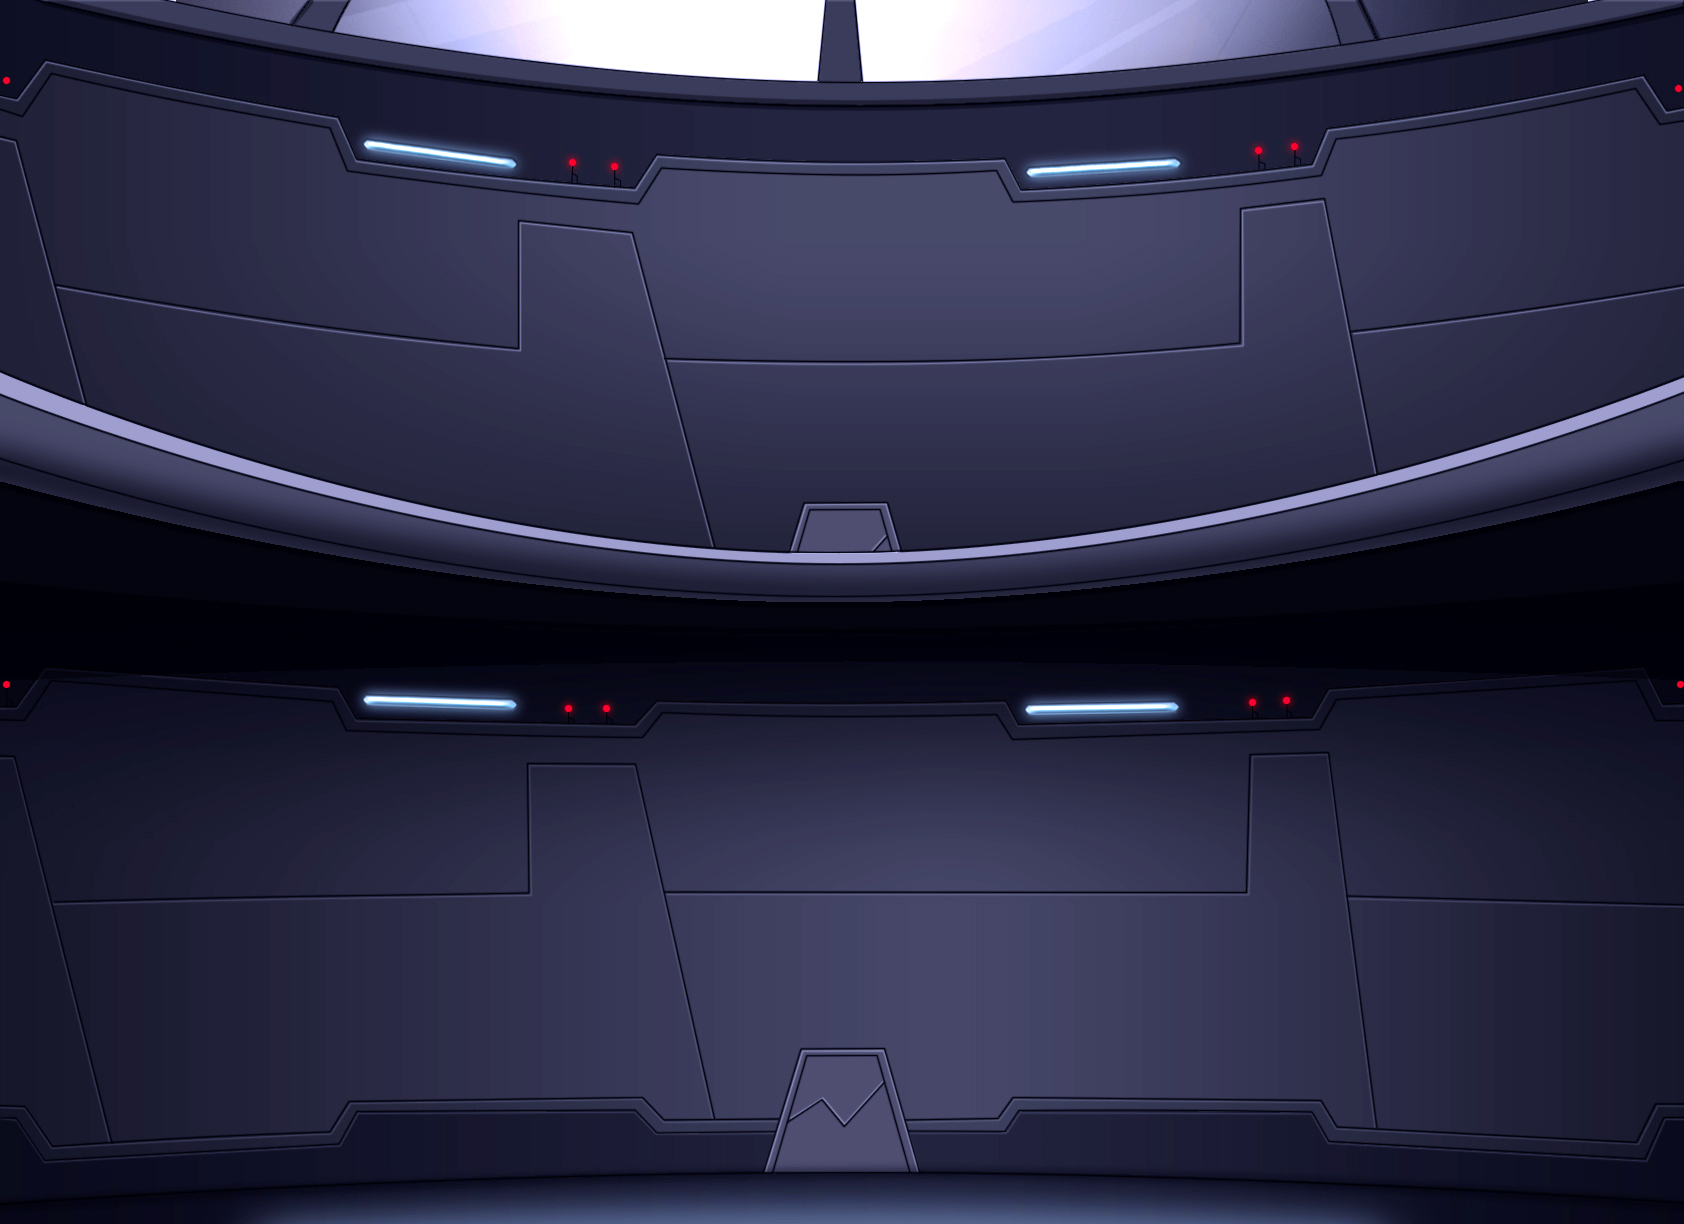
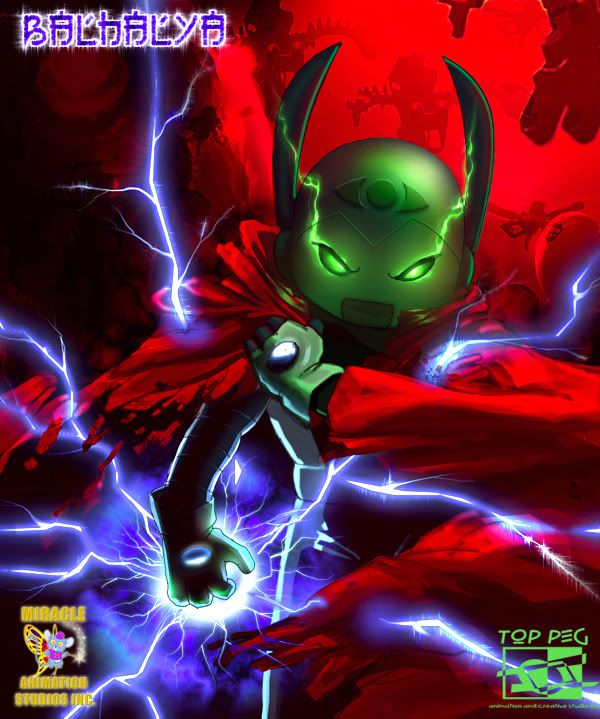
The first picture is the composited scene with Jobert and Frogee Mercury talking and walking in a hallway. The problem was the background artist only did the hallway the length of the screen, the background should be moving while the 2 characters are walking. In the second picture, the compositor converted the floor and walls into 3D planes, and mirrored the edges, effects were added to create an illusion of a long hallway.
Export
Once the compositing is completed, the final step is to render the scene as a movie or an image sequence. Generally, the compositor will be the same person to do the rendering.
Even with 2 powerful computers, rendering is time-consuming. It would take about 15 hours to render one episode in Standard Definition. We have not yet rendered one full episode in HD yet, so we are not sure how many hours it will take to render.
Post-Production
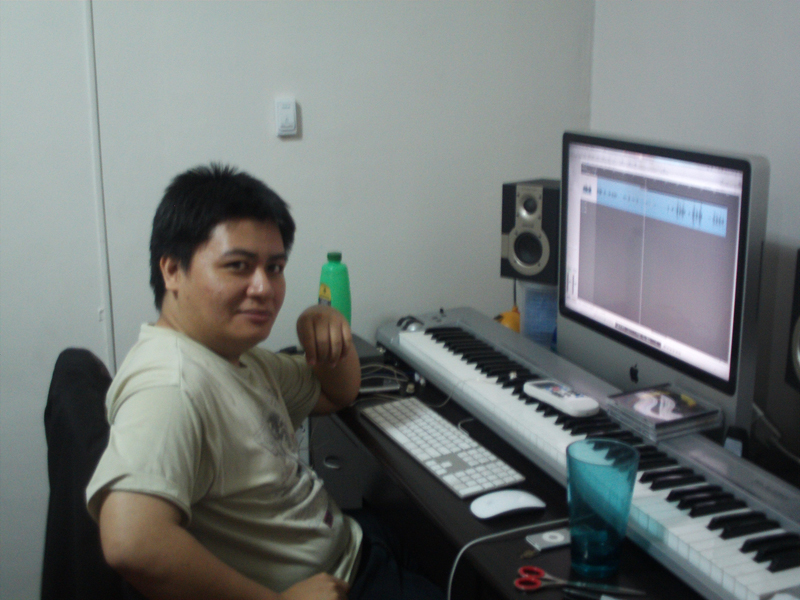
Musical Score and Sound Effects
A musical score is an original music written specifically to accompany a film. The score forms part of the film’s soundtrack, which also usually includes dialogue and sound effects, and comprises a number of orchestral, instrumental or choral pieces called cues which are timed to begin and end at specific points during the film in order to enhance the dramatic narrative and the emotional impact of the scene in question.
Sound effects or audio effects are artificially created or enhanced sounds, or sound processes used to emphasize artistic or other content or films, television shows, live performance, animation, video games, music, or other media.
When we did our first teaser trailer for Jobert, we found a small recording studio with Chet Tiongson as our Scorer. He did a great job with the teaser trailer. When he did the first episode though, Alstaire found it inferior from the scoring of the teaser. Maybe because an episode was longer, and it was harder to do multiple musics for different scenes. Chet was also limited in his sound effects, we were expecting him to build the sound effects because he had a sound booth. Anyway, we told Chet about this, and he fixed it a bit. But we still weren’t satisfied with what he delivered.
We then found another Scorer based in Davao, Charles Fournier, he did episode 2 and 8, the score was better but he also lacked sound effects. Alstaire suggested some sites where he could get better effects and Charles tried to add more, but we all felt it was still lacking. When the final edit was done, Alstaire just added the extra sounds needed to make it better. Alstaire even added a music loop in one transformation scene and it really added drama to the scene.
For our third episode, Diwa de Leon added good music, but the sound effects are a bit lacking. So we downloaded more sound effects as production went on, so we can fill in the missing sound effects in Post Production.
Editing
Editing is choosing segments of the animation production footage, sound effects, and sound recordings in the post-production process that will be in the final output.
After rendering an episode into an image sequence in compositing, we then edit it with the sound and music so it will render much faster to the chosen media. We had to shorten, cut and speed up some scenes to have better pacing for an episode. We also put cuts for commercial breaks and add the intro and credits.
Problems Encountered During Compositing and Editing
In our case, due to our low budget, there is a lack of workforce; our director is also the one handling the compositing and editing. So all the problems mentioned below are also his responsibility to fix-up. Hence, even in the last stages of production we still experienced delays. In our case, we prefer to complete all the episodes and the other collaterals before sending it to the broker/s for review by the distributors.
1) New Compositors and Editors
The new compositors and editors (newbies) lack knowledge and feel of the story are prone to mistakes in their job, so the director had to redo some scenes, especially those that needed effects.
2) Special Effects Missing or Does Not Match with Earlier Finished Episodes
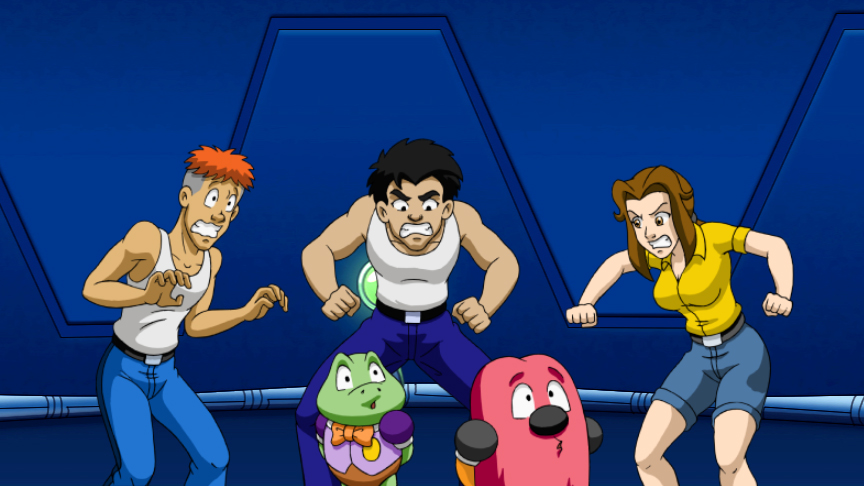
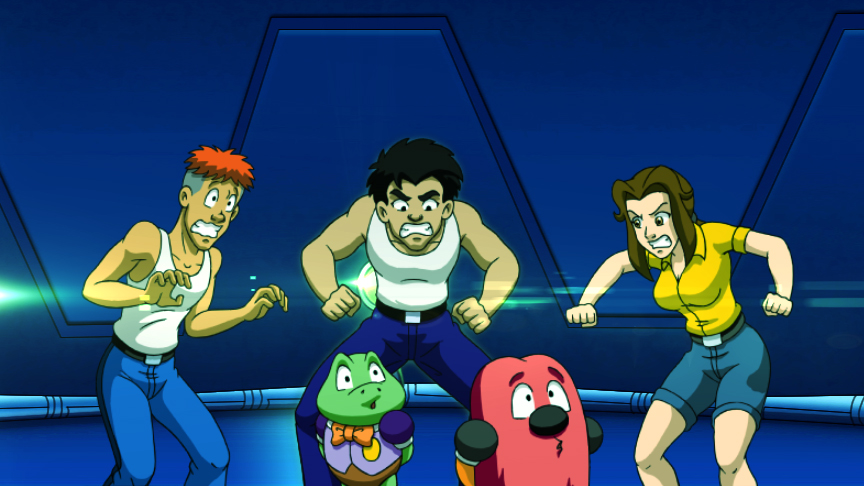
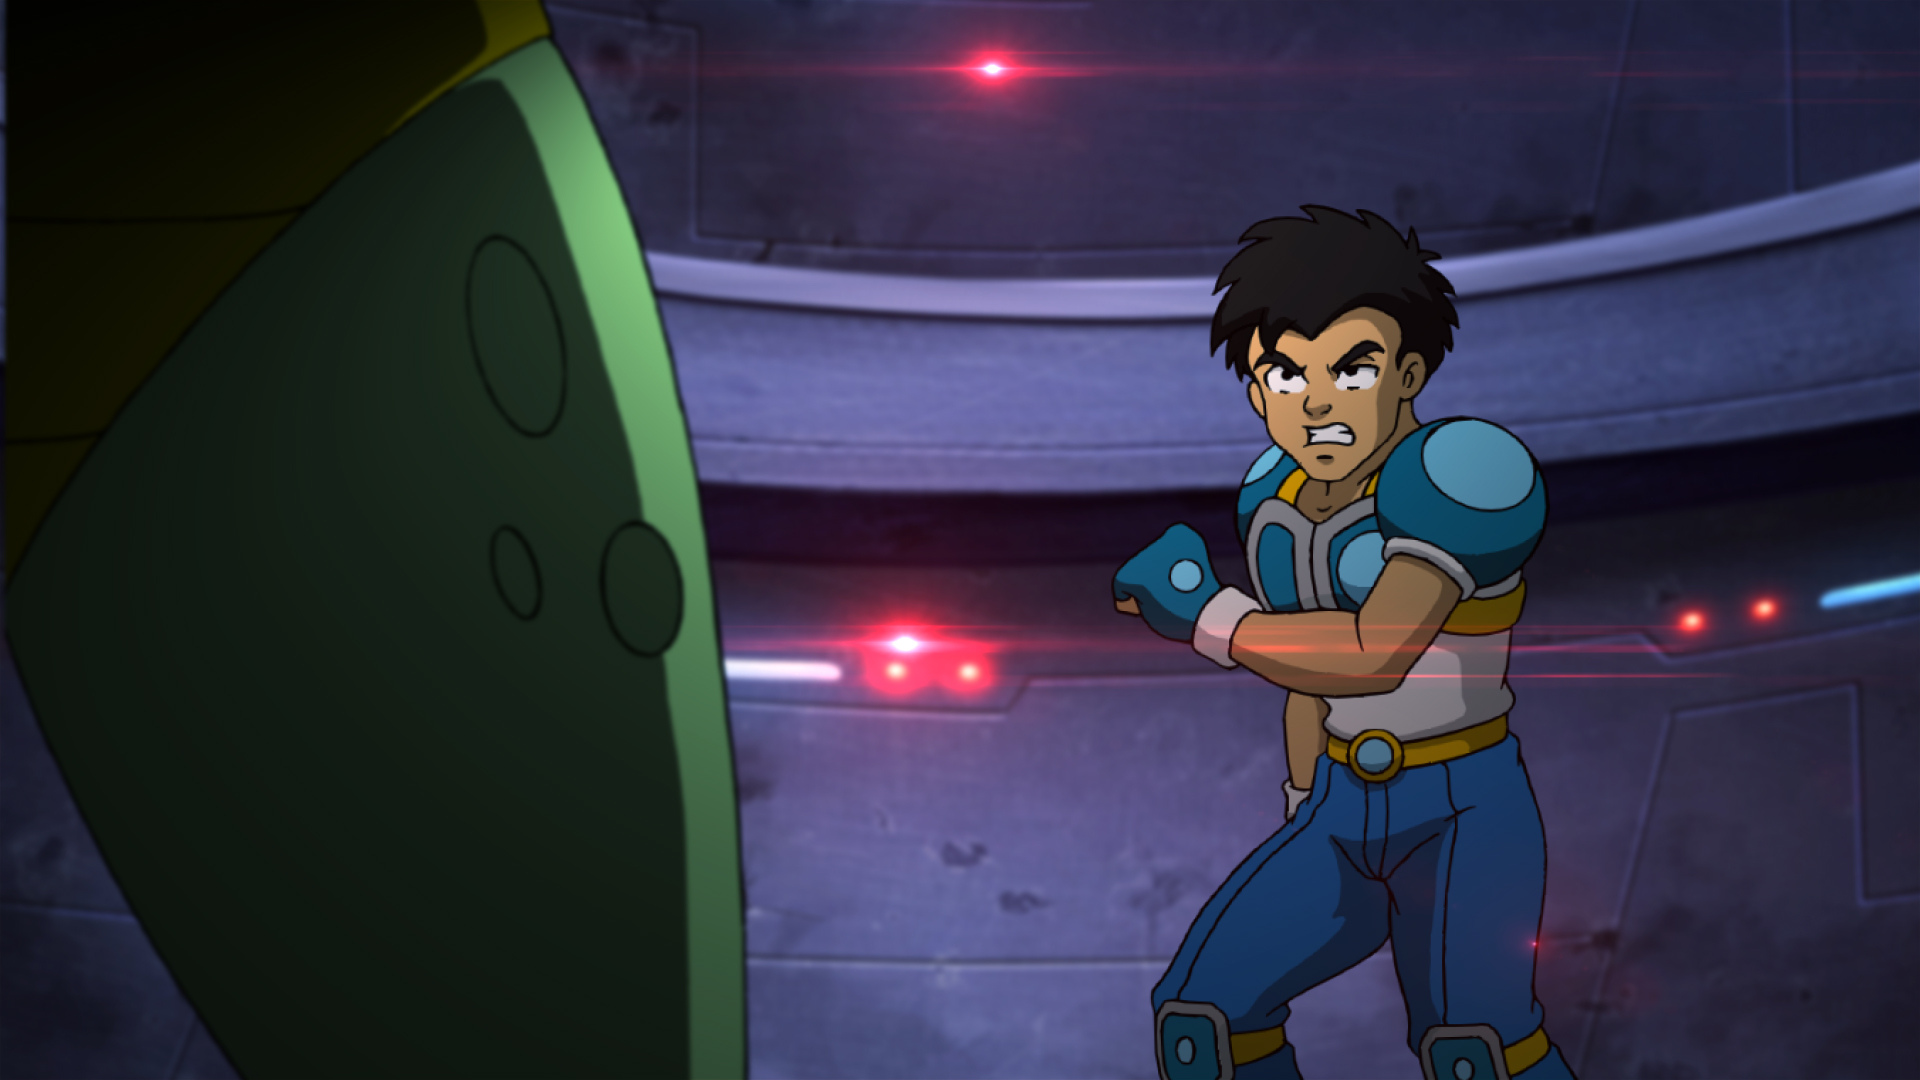
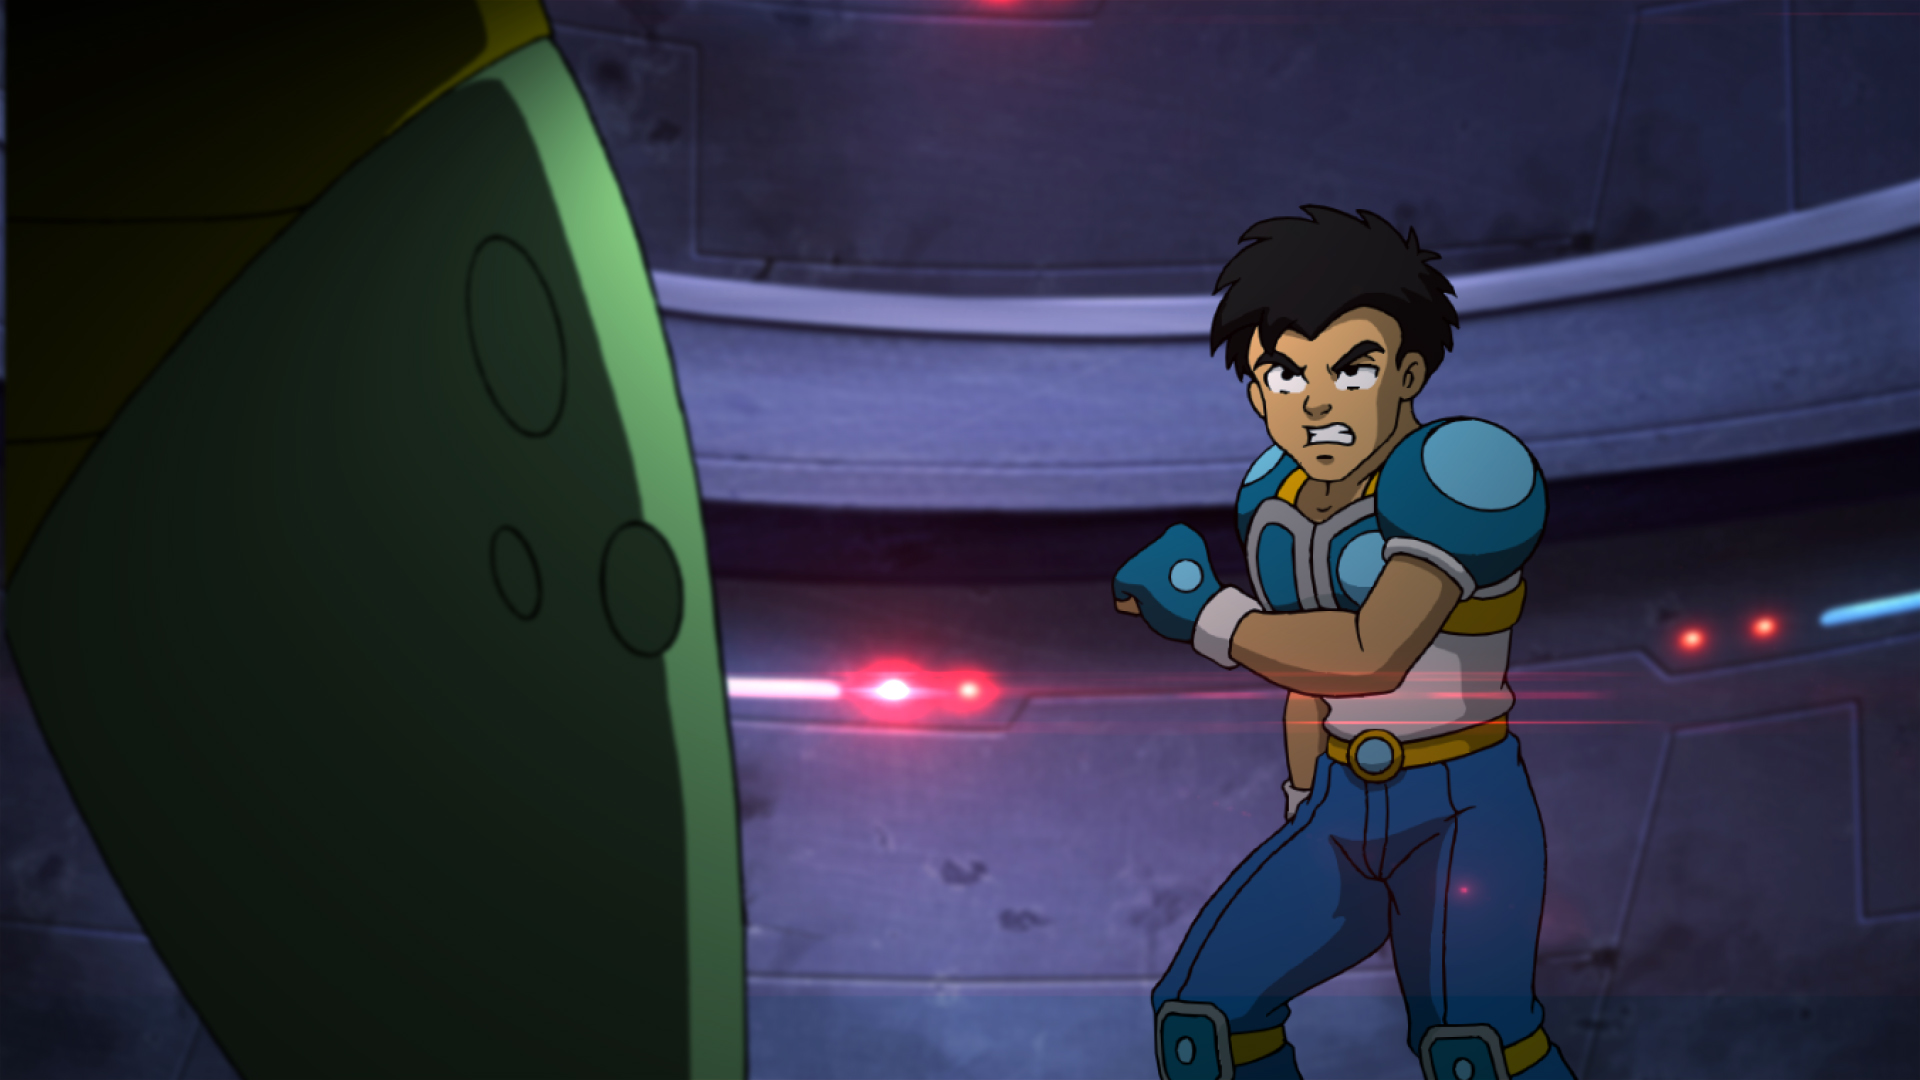
The latter episodes employed new and better special effects because of the newer software and technology. So we had to fix-up the special effects from the earlier finished episodes to catch-up with the newer episodes. The newbies also lacked the experience and skill in compositing and special effects, so what they did was somewhat lacking, so those had to be redone too. As seen below, the software wherein the gun was fired automatically created the shadows in the background and the hand.
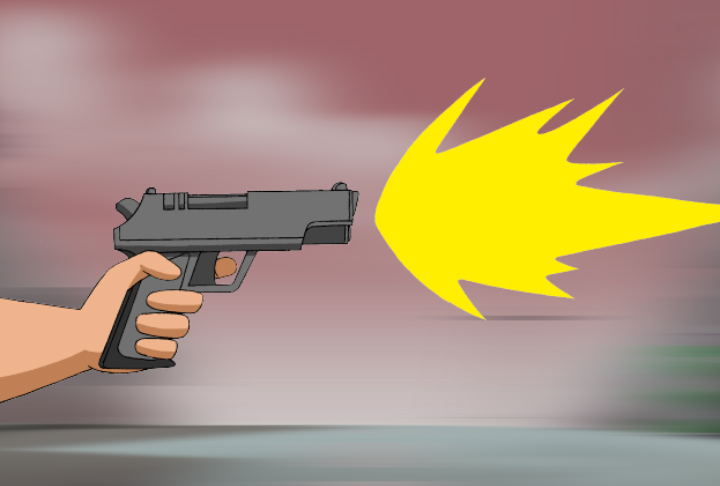
Episode 1 – Special Effects Original
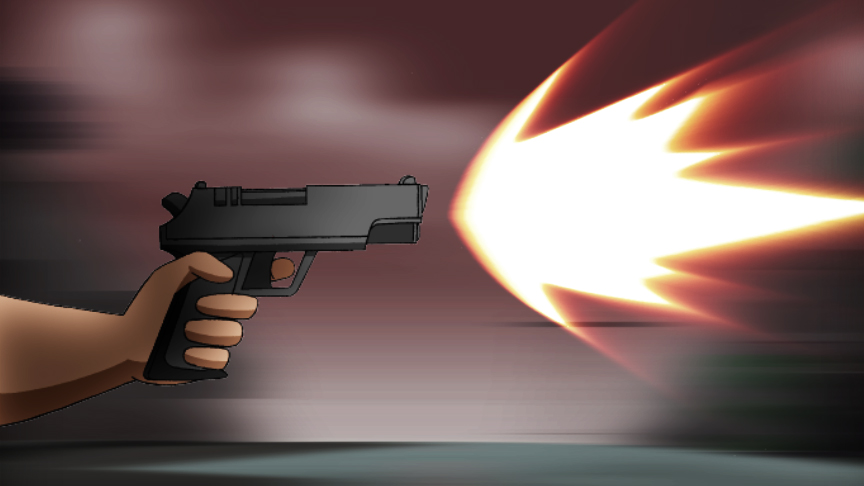
Episode 1 – Special Effects Correction
3) Color Grading
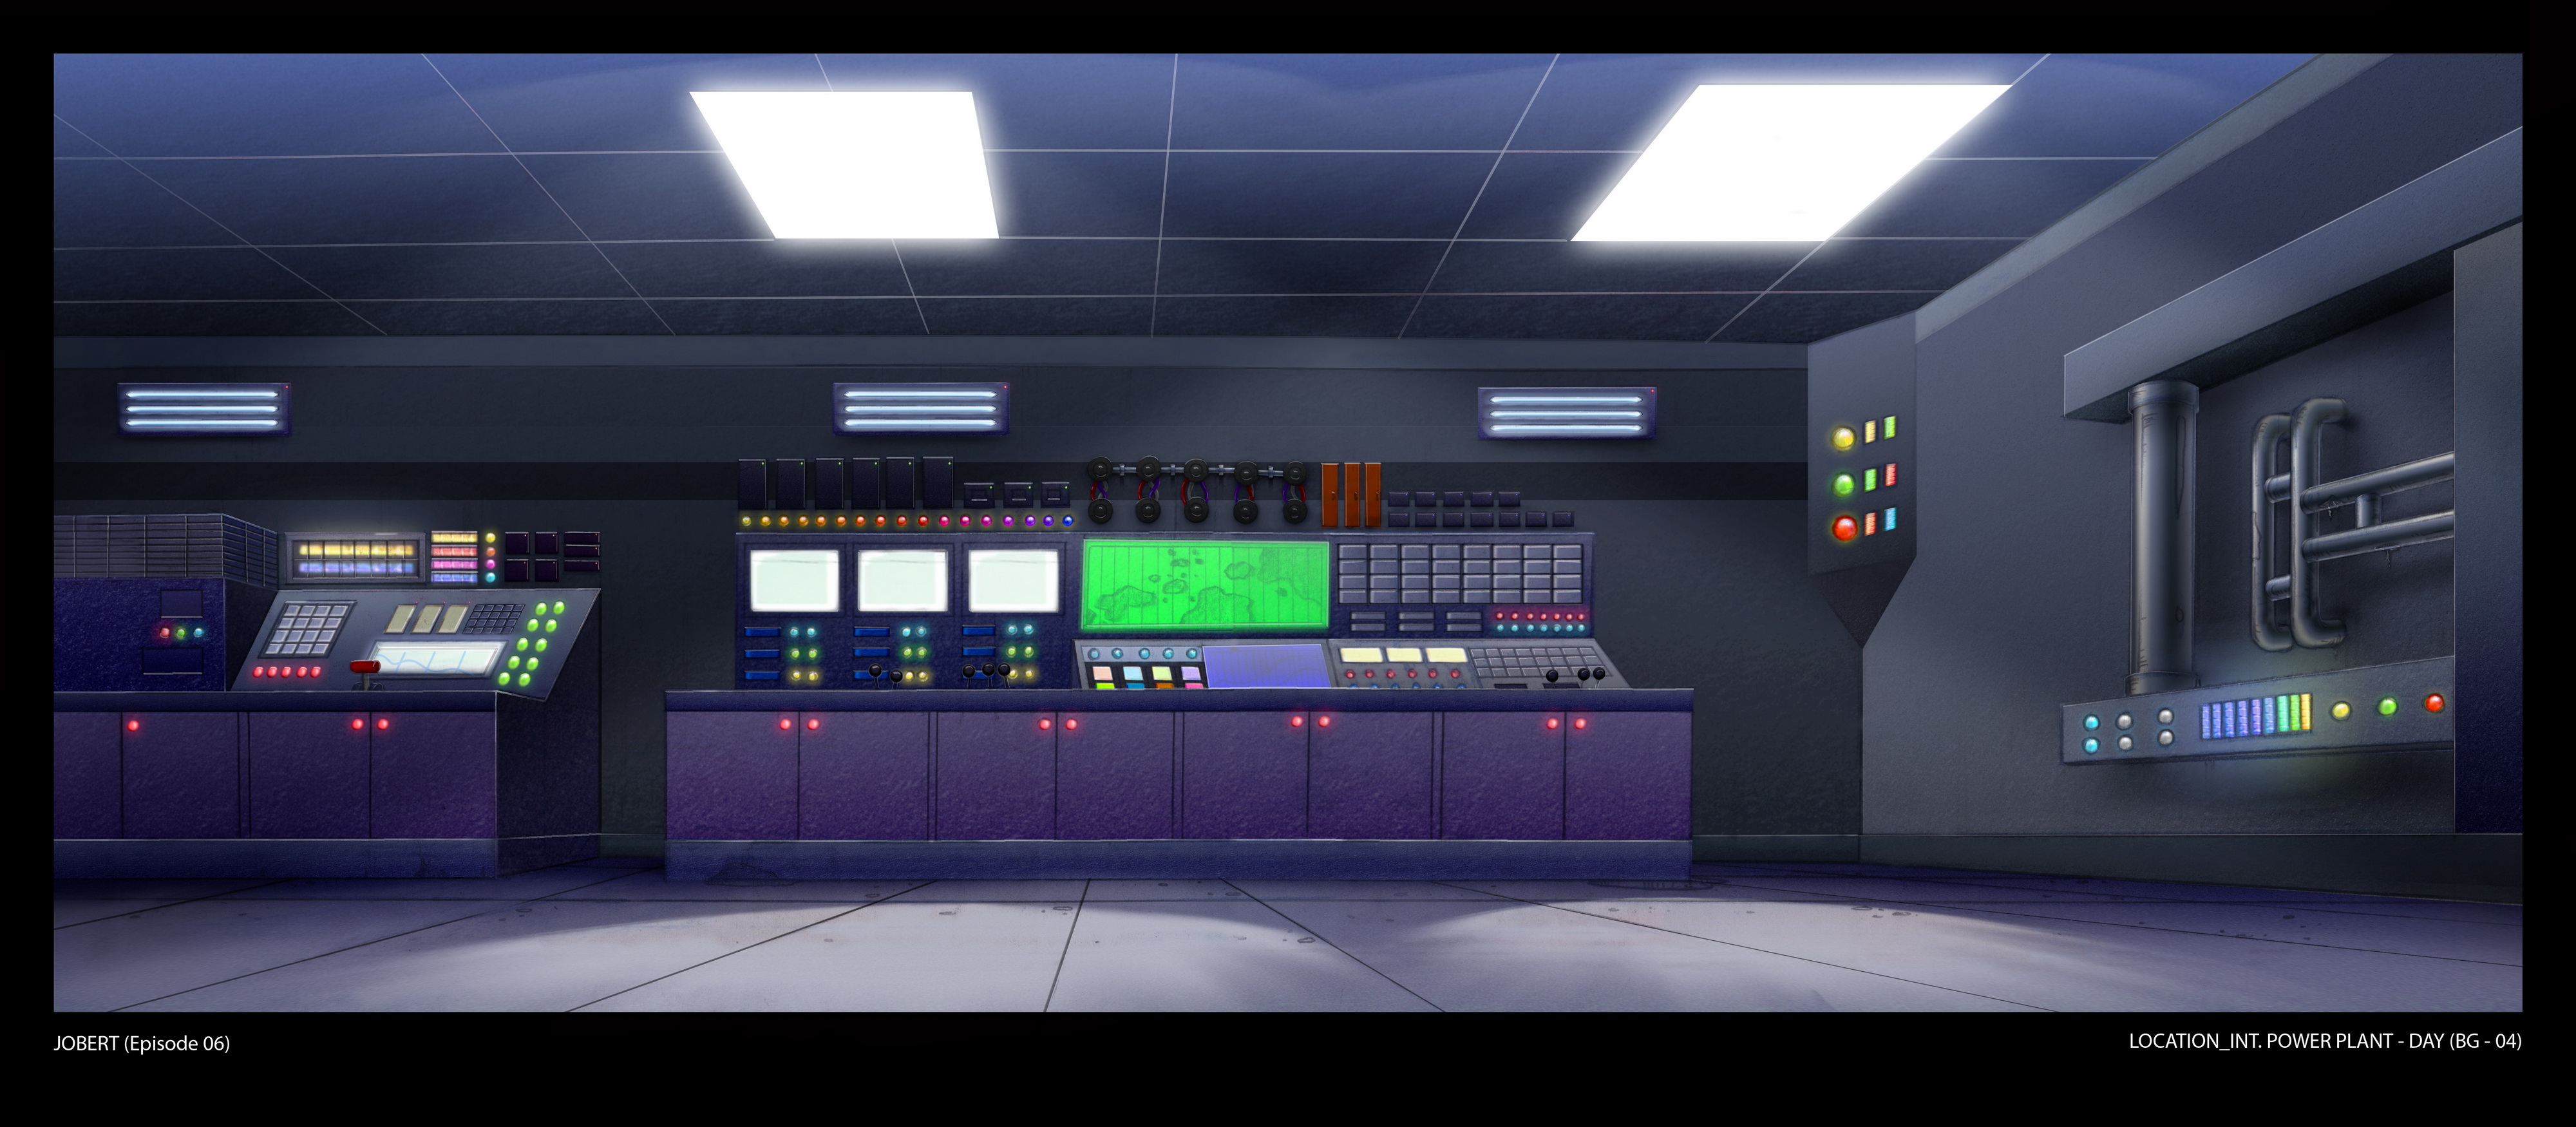
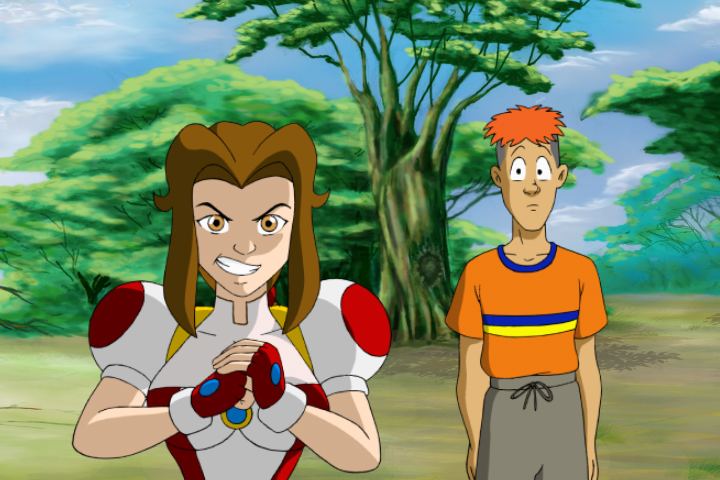
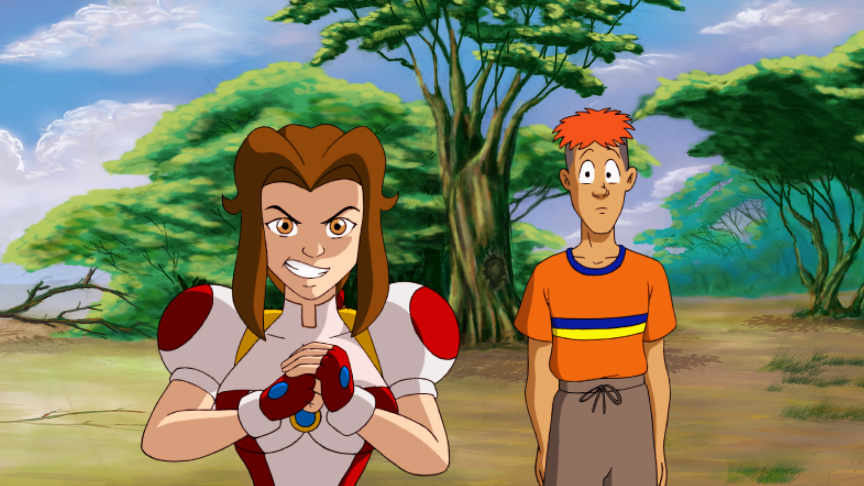
The director noticed the color correction and grading being done with the current Anime shows, it had a very nice stylized look. So he applied it to the later episodes and it looked great; so he had to apply the same grading to the earlier finished episodes. The color correction adds the needed atmosphere to the scene. For samples episode 3 and 7 (the original ones), even though the character/s are in a room it still a bit bright but with the color correction and fx the rooms are a bit darker. Color and FX additions are also added to break the monotony of similar flat colors in the next scenes. At episode 4, the director added more yellows to create the atmosphere of a hot and sunny day. Adding colors such as blue for shade, red for fire, and green for an alien environment are subtle effects but it makes the animation a whole lot better.
Ep.3 – Original HD
Ep.3 – HD with Color Correction and FX
Ep. 4 – Standard Definition
Ep. 4 – HD with Color Correction
Ep.7 – Standard Definition
Ep.7 – HD with Color Correction and FX
4) Wrong or Mismatched Colors from Digital Ink and Paint
We discovered mistakes in Digital Paint usually only in a single frame out of a scene. Those were usually overlooked in checking, and since we had some changes with the production staff, a few errors came up during the final episodes. Usually, it was a wrong color used or color bleeding into where it shouldn’t be. The director usually corrects this inside the compositing software, but for the new compositors, they do it the long way. They go back into the digital paint software and edit it, which could have gone faster had they asked help or advice from a senior artist. Below are samples of mistakes in Digital Ink and Paint, which are not noticeable in compositing at first glance.
 Inner Mouth Should Be Darker
Inner Mouth Should be Darker/Eyes Should Be Yellow
The character’s inner mouth is lightly colored (pink) by the Digital Ink and Paint (DIP) artist, not noticeable in itself, but if put against the character’s body shadows (darker) the mouth will look like its lighted from the inside.

Correct Color
Color Bleeding on Face
The color of the character’s armor bled into his face, due to a gap in the cleanup line. This was only for one frame, and when you play the scene, it isn’t noticeable to some artists, but there will be a flash of color when seen on television. These mistakes have to be fixed back at the Digital Ink and Paint before we can bring it back to Compositing.
5) Wrong Registration of Body Parts
We also discovered wrong registration of arms and mouths to the body of some semi-finished animations. In animation, parts that are moving are separated to lessen the work of the assistant animators. The problem comes from scanning when the paper holes on the animation paper get torn a bit; since we use a peg bar on the scanner to hold the paper in place, it sometimes gets misaligned when scanning. The artists in the Digital Ink and Paint usually corrects this but some artists forget to do this. Some compositors also miss this error, because they are focused more on the special effects (FX) and staging of the scene. For this problem, we have to go back to Digital Paint to correct the scenes.
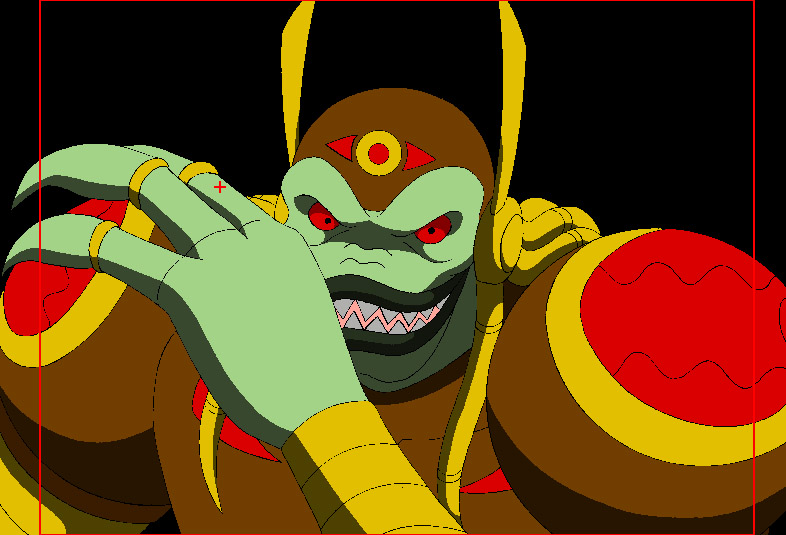
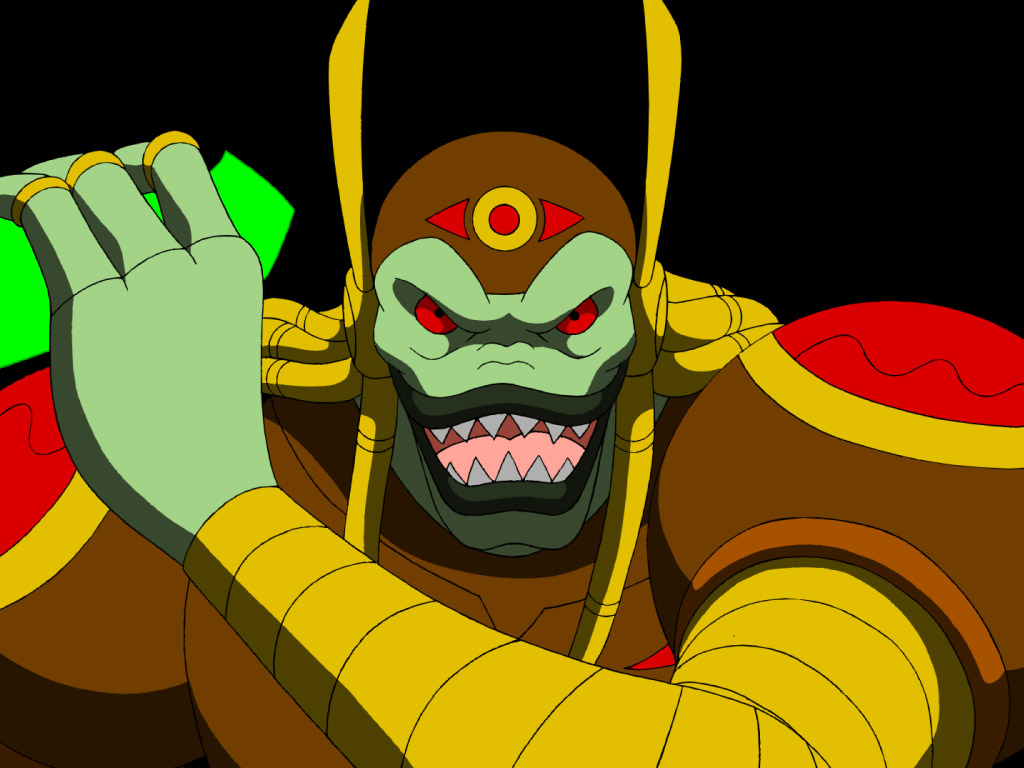
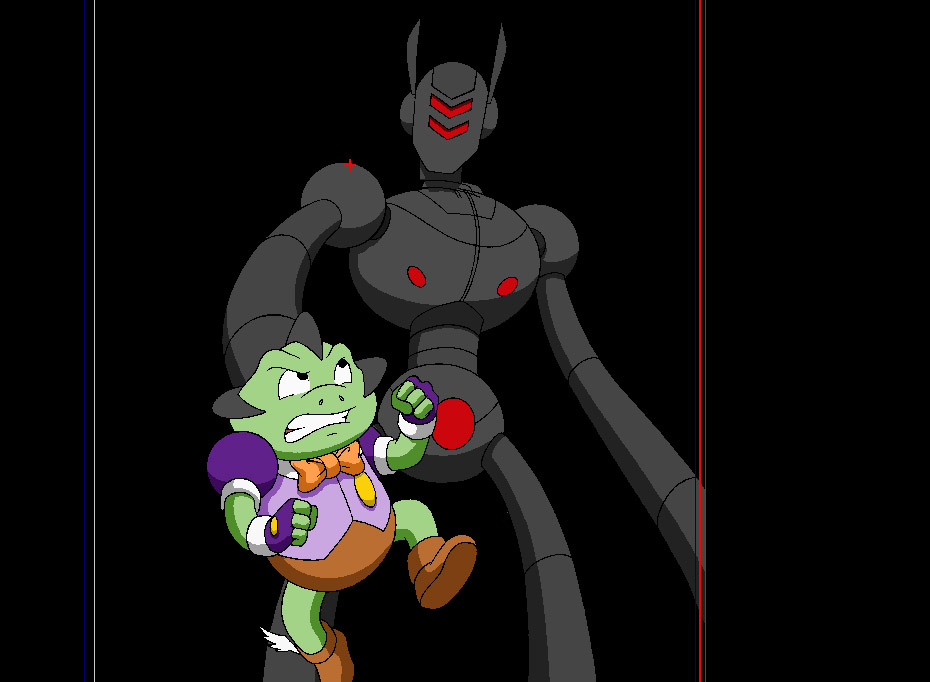 Robot Head not Registered to the Body
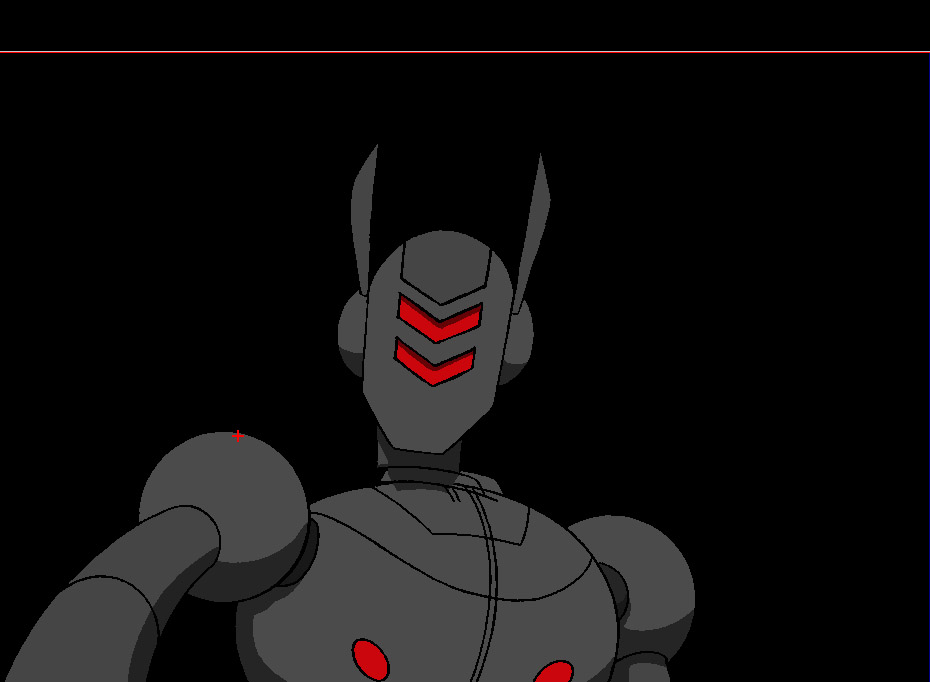
Close-Up Robot Head
The robot head is a sample of wrong registration. In the scene, the head is not aligned with the body. Maybe this is due to a mistake in scanning. The X-sheet artist should have moved the head to properly connect to the body. These kinds of mistakes go back again to the Digital Ink and Paint artists who do the X-sheets.
Missing Mouth
The missing mouth is only one frame which is not noticeable during playback, but the director felt that there was something wrong when he saw a kind of FLASH and played it slowly.
6) Missing Backgrounds
We had some freelance layout artists who did a poor job on the backgrounds. Some artists even submitted the incomplete set of backgrounds, so we had to redo some or reuse backgrounds that were close to the storyboard. The director instructed the compositors to use backgrounds from different episodes since we don’t have a resident background artist anymore. Some compositors made poor choices or were just lazy in finding the background that fits the scene; so the director had to correct these in editing.
7) Low Resolution from Digital Ink and Paint
There were a few scenes that were rendered from Digital Paint with very low resolution and were very pixelated when we were trying to convert the earlier episodes to high-definition (HD) for the television screen. We had to re-render these scenes using a higher resolution. The process of converting the standard definition (SD) to high definition (HD) takes up the most time in compositing as there will be many adjustments in sizing, mirroring, lighting etc.
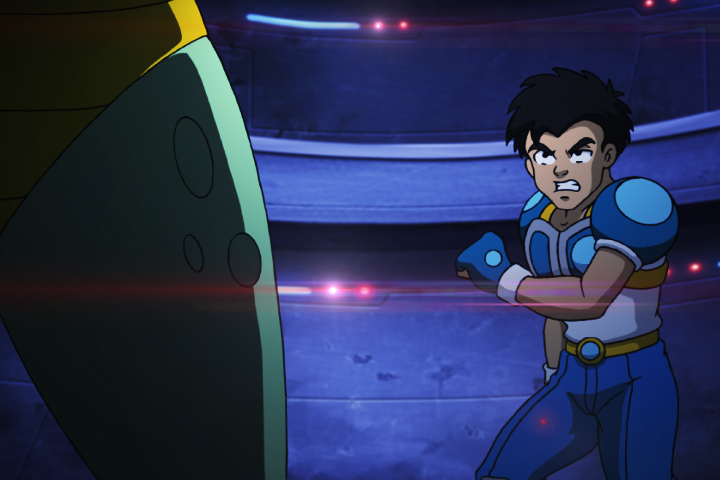 Standard Definition

High Definition (Not yet edited or adjusted)
Size Difference Between SD and HD
![]()
Pixel Difference
The Standard Definition (SD), is used by Standard Box-type televisions, and the High Definition (HD) is used by the new LCD, LED and Plasma televisions. At first glance, it looks like that the only difference is the SD is like a square screen which is tighter and the HD is a rectangular screen. There is more to it than just that, the first thing that differs is the screen size, if we place the SD and HD pictures together, you can see a sizeable difference in size. This is to accommodate the bigger screens available in the LCD and LED televisions. If we use the standard definition (SD) video in a high definition (HD) television, the pictures will look darker and the edges will look pixelated, as shown in the Pixel Difference picture.
![]()
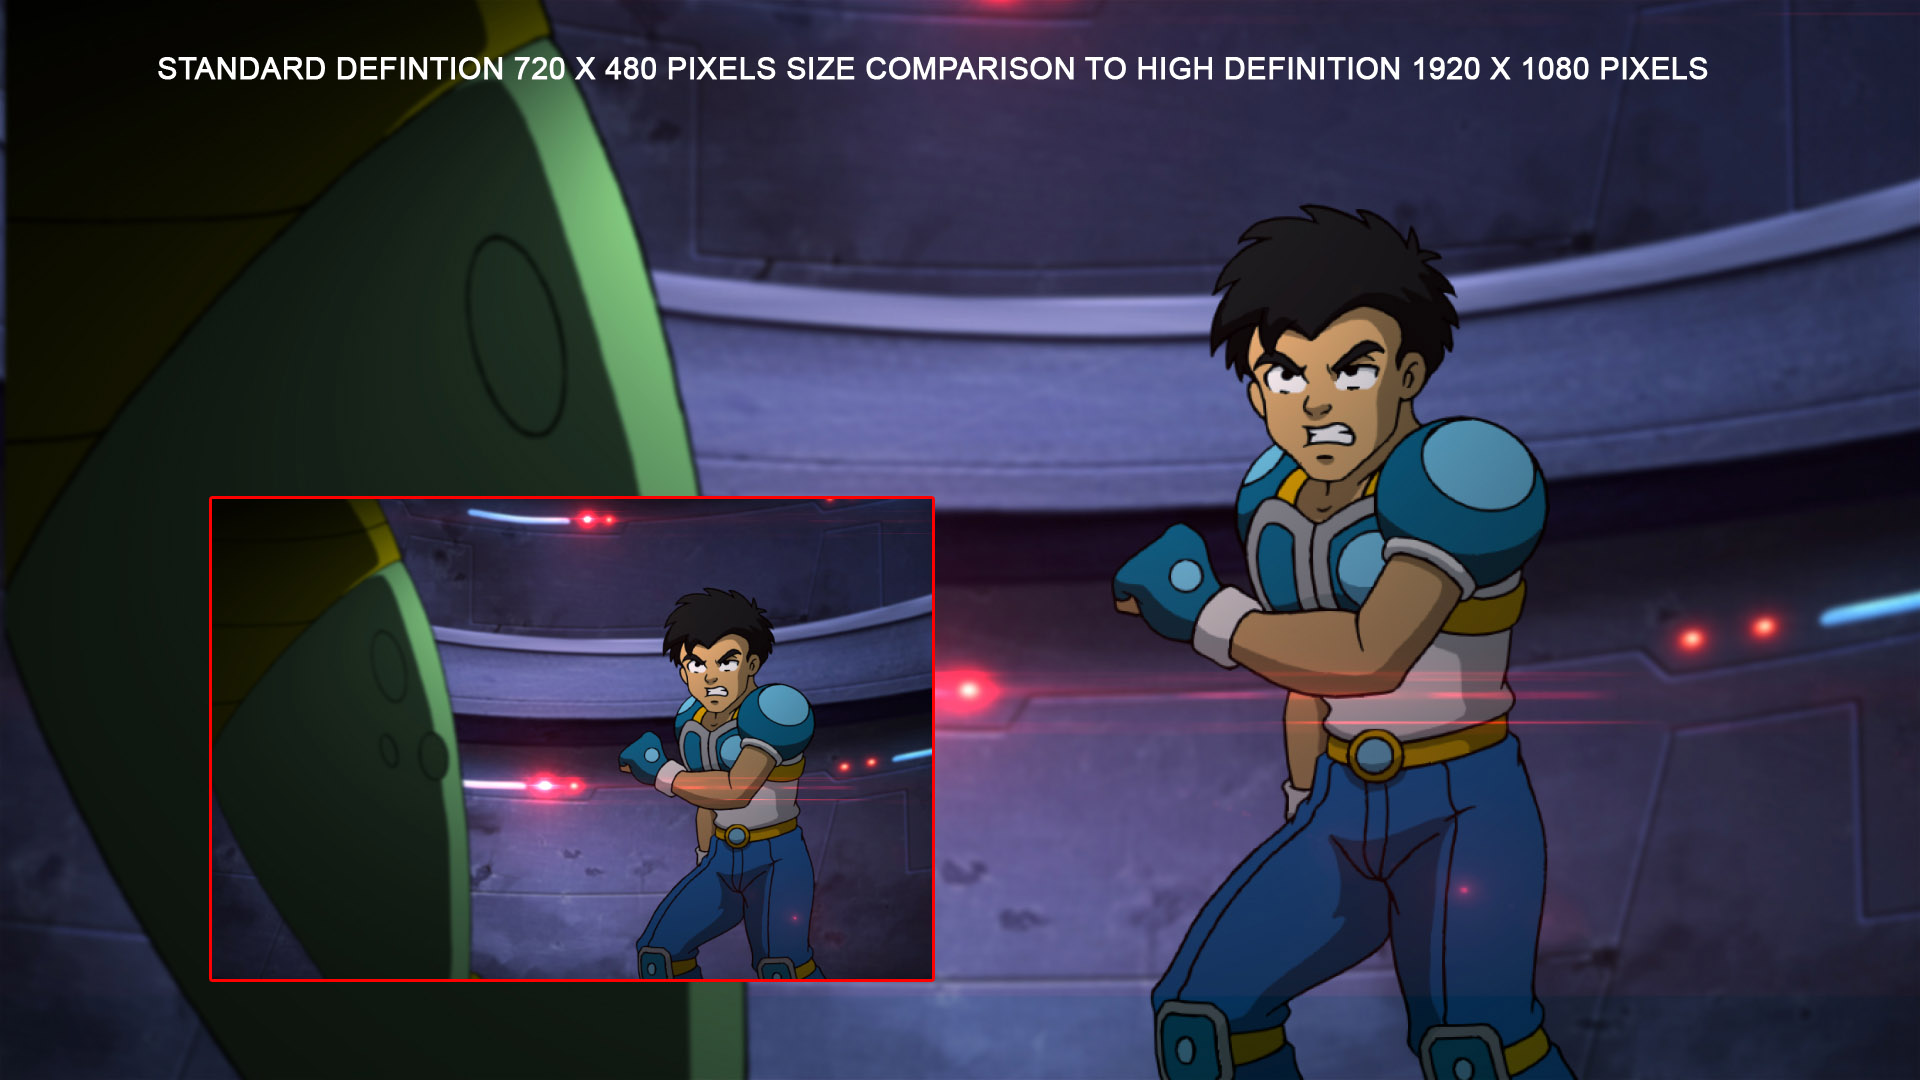
Ratio Difference
Stretched Image to Screen
Another thing that differs between SD and HD is the Pixel Aspect Ratio, which is the ratio of the width of a pixel compared to its height. An SD picture has a 4:3 ratio that is why it looks a bit square, while an HD picture has a 16:9 ratio which has a cinematic widescreen look. If we place a SD video in a HDTV, the SD video will stretch, it can be corrected from the TV but what will happen is that black bars will appear on both sides (as seen in Ratio Difference – the black bars are converted to red for demonstration purposes). The effect of these is that you can see more of the background on both sides of the image. If stretch to the big screen the image will be a bit distorted. We also did not try to fill in the sides so as to accommodate the standard definition as well. When a HD image is viewed in a SD, it can also stretch vertically, but the viewers can set the TV where it doesn’t stretch but the sides are just cut. That is why it is important that the animation can be seen both in SD and HD versions.
7A) Process of Converting Standard Definition (SD) to High Definition (HD)
The process of converting SD to HD has not been explained thoroughly in the previous examples. If one looks closer the HD converted scenes, it has subtle differences such as the background is stretched, the background is sometimes a bit blurred, the characters are smaller or lighter/darker, etc. from the SD versions. The conversion is very time consuming as there will be lots of adjustments, enhancements, corrections, etc. that the director will do before the scene is approved. There are hundreds of scenes per episode, and only two scenes will be illustrated below.
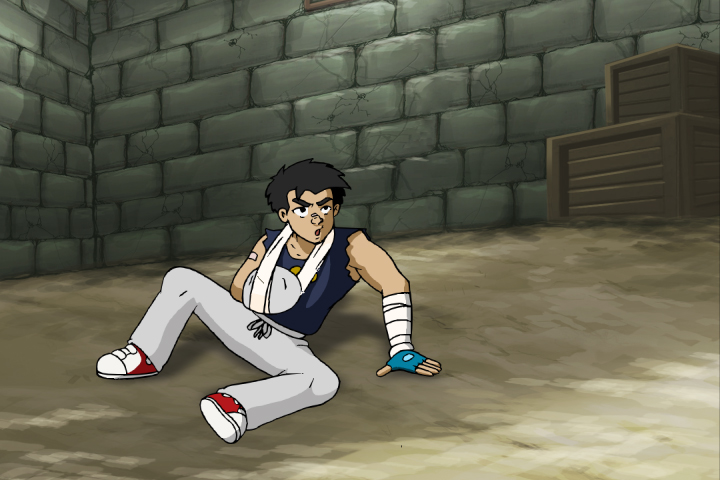
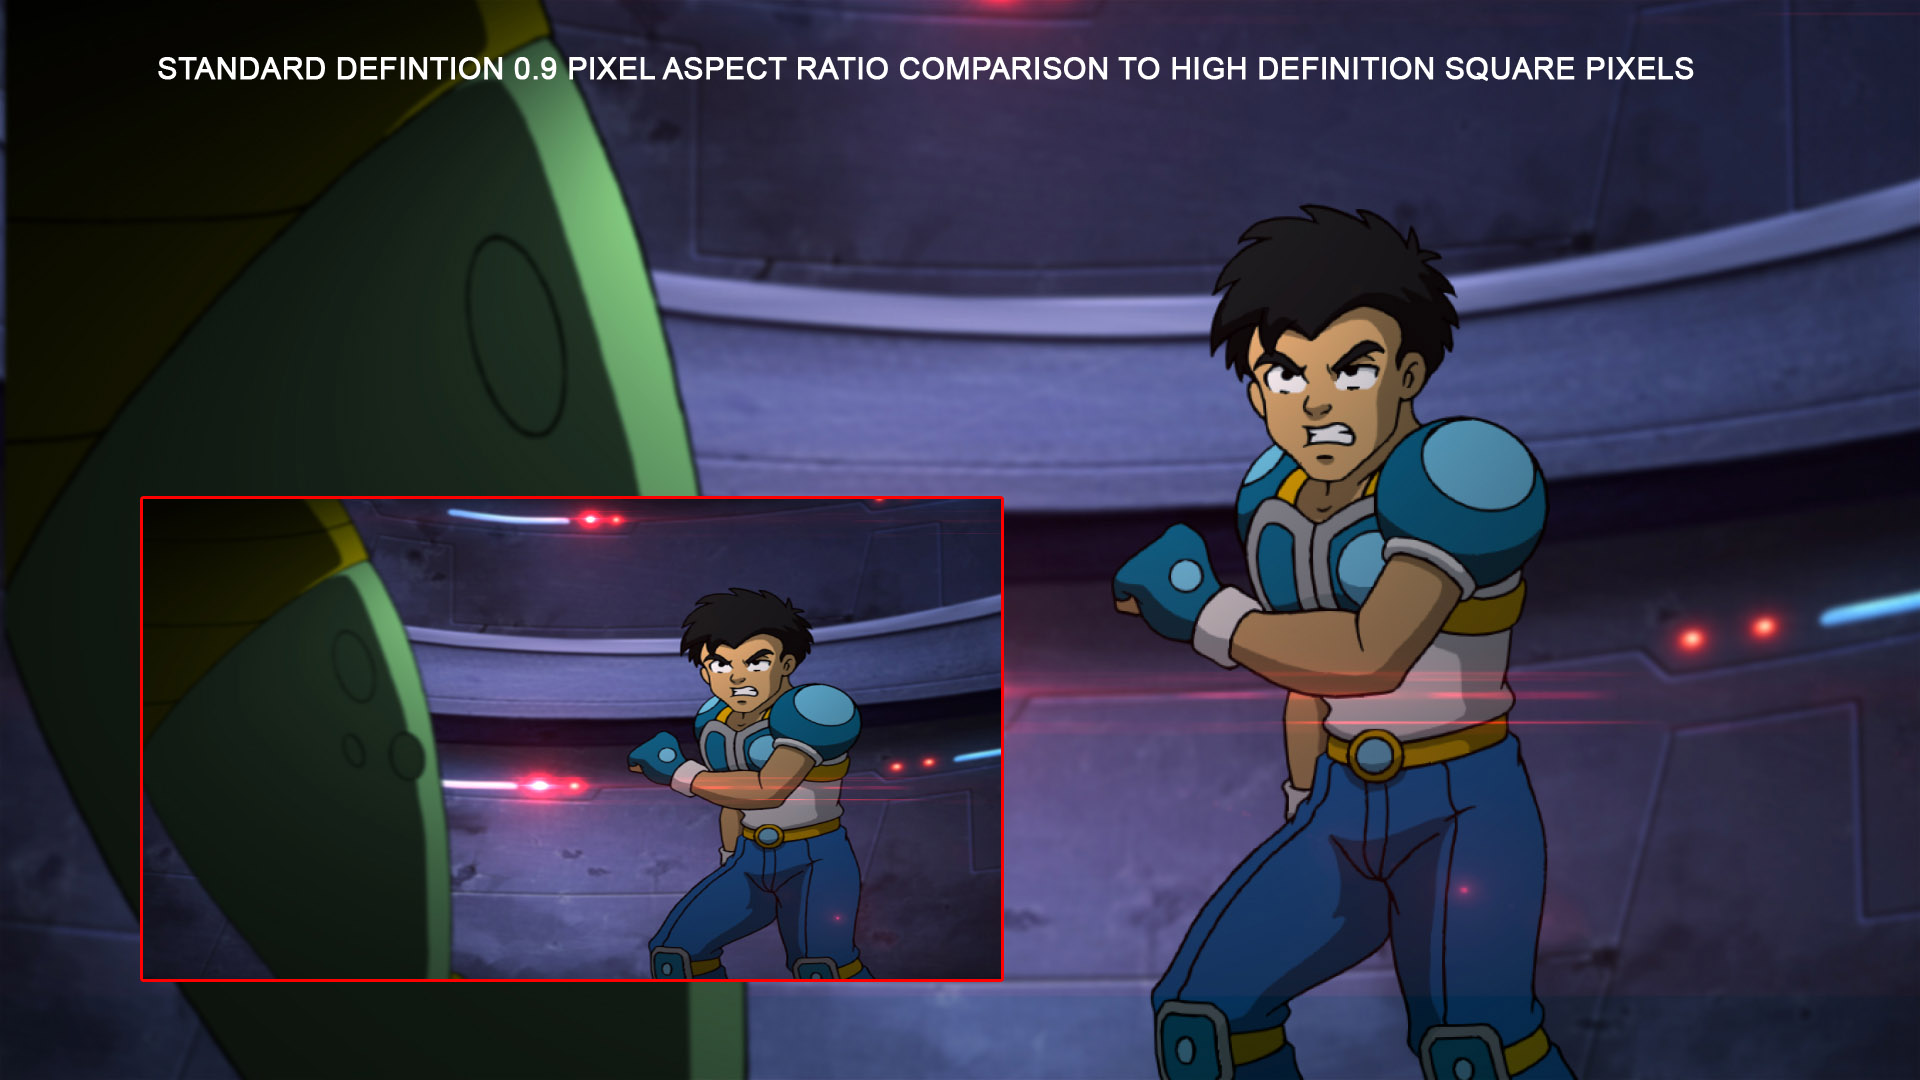
If the background (BG) is too small for the HD screen, this is how the director fixes it.
 1) Here is the original composited scene, no special effects (FX), just a plain scene put together, which is better as the director gets to convert it to HD before adding the FX.
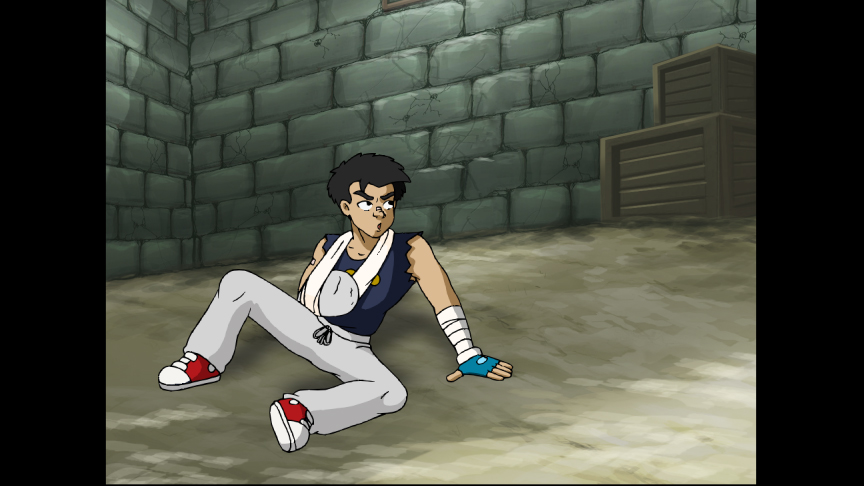
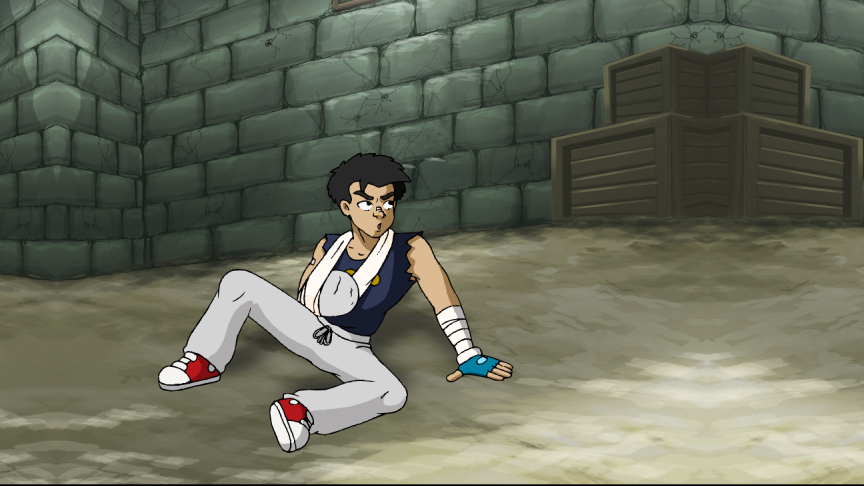
2) The director converts the scene to HD and resizes the elements (render a new Digital Ink and Paint (DIP) to have a better image), as you can see the BG is now shorter horizontally.
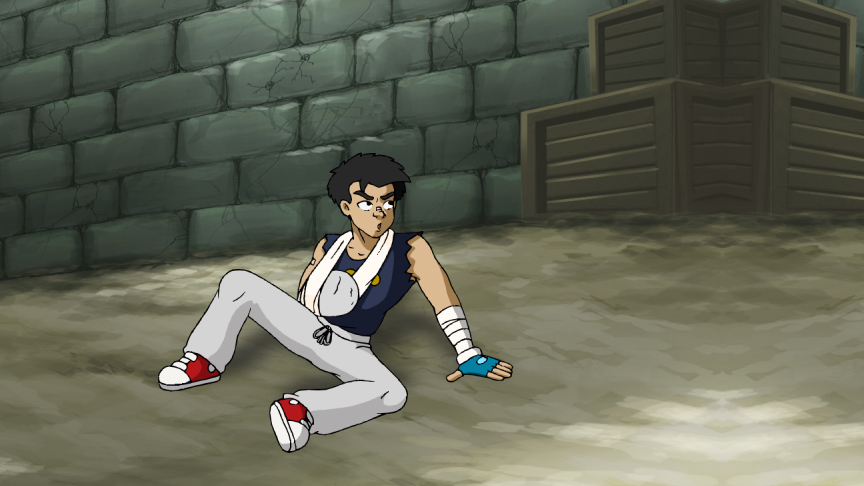
3) The director applies a mirror effect on the BG to lengthen the edges, but it distorts the edges quite noticeably.
4) The director enlarges it a bit to hide the awkward areas, but it can’t cover all of it…in this case the crates on the right.
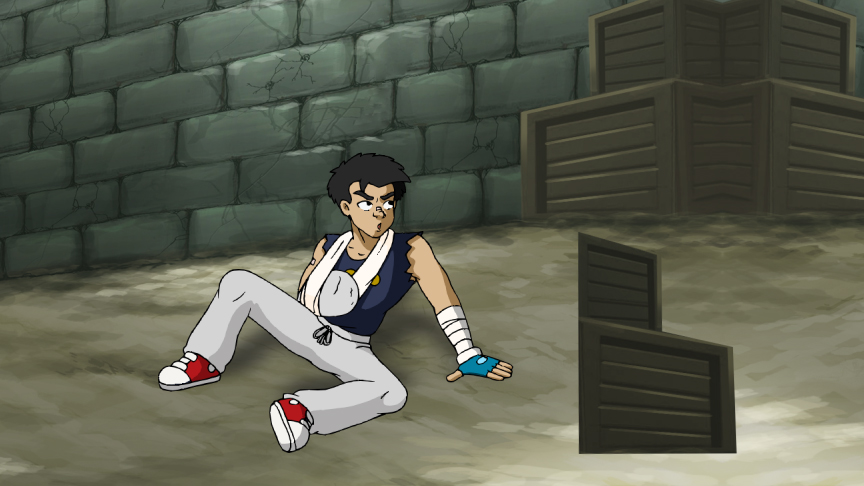
5) The director then duplicates the BG and cut the crate using a mask, flip it and darken it a bit. He will use this to cover the awkward image of conjoined crates.
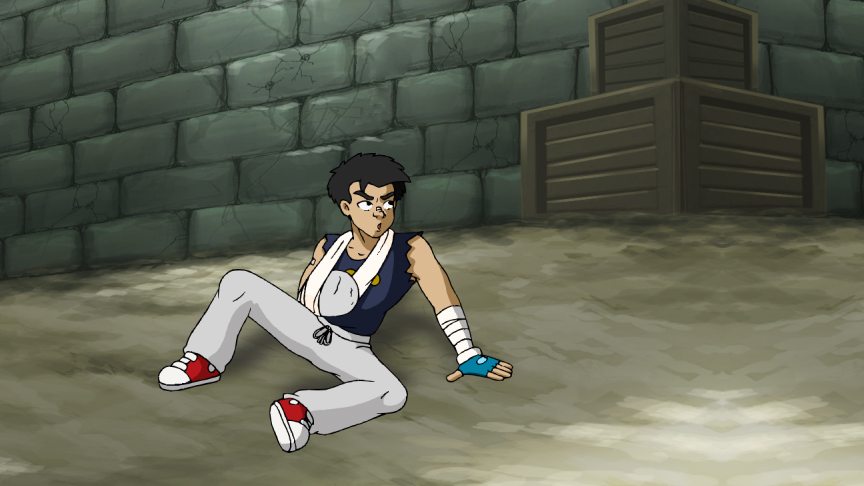
6) He will put it in place and extend the mask to show some bricks which is also a mirror of the wall.
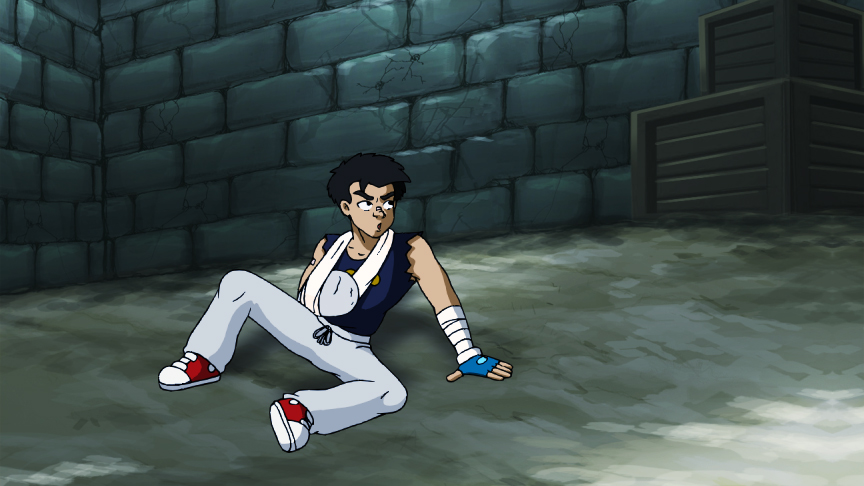
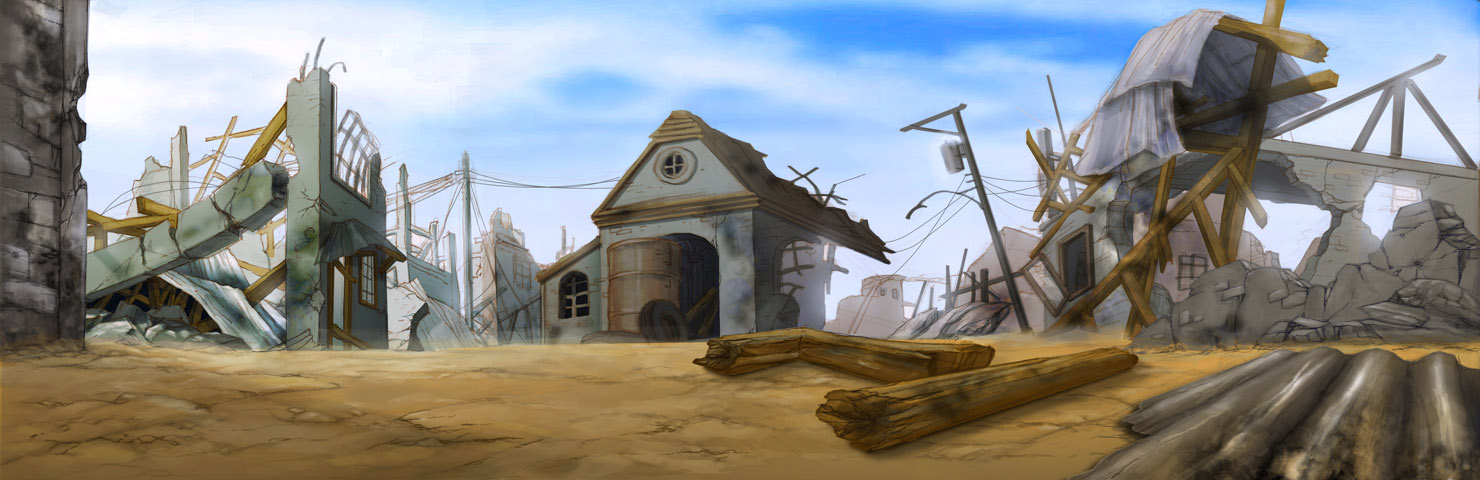
7) He now adjusts the BG a bit more to see which will best cover the adjustments he made. He also adds some color correction to make it look that Jobert is inside the abandoned warehouse.
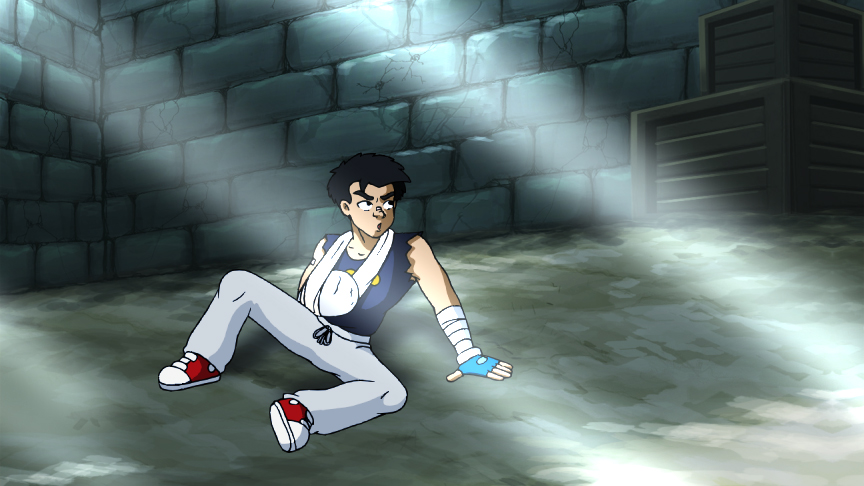
8) He now adds some light effects to match the light glows on the ground which was done by the BG artist. This is now the completed scene converted to HD.
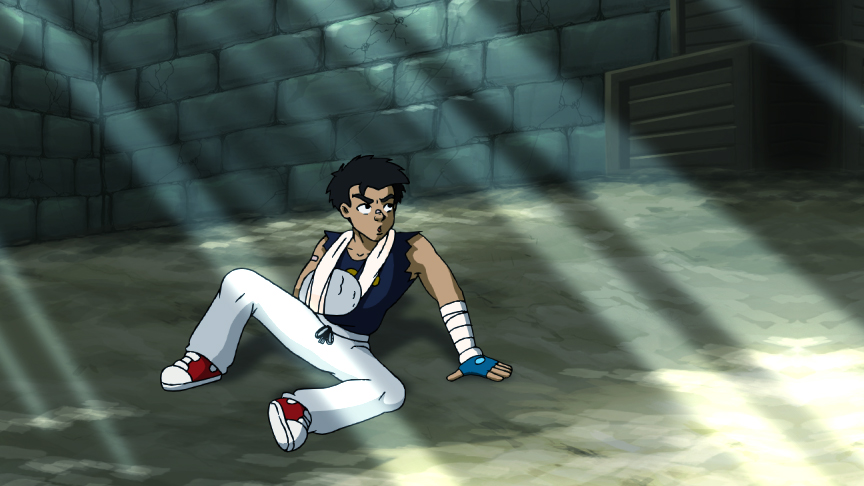
In another scene, the sequence in applying the FX to a finished scene plus conversion to HD is illustrated below.
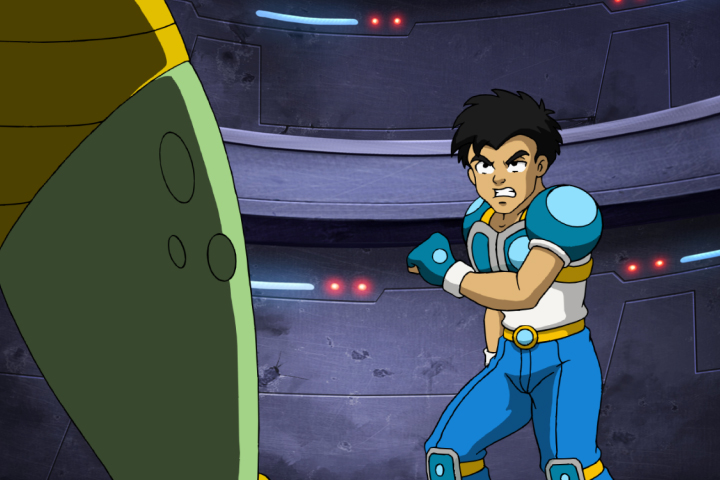
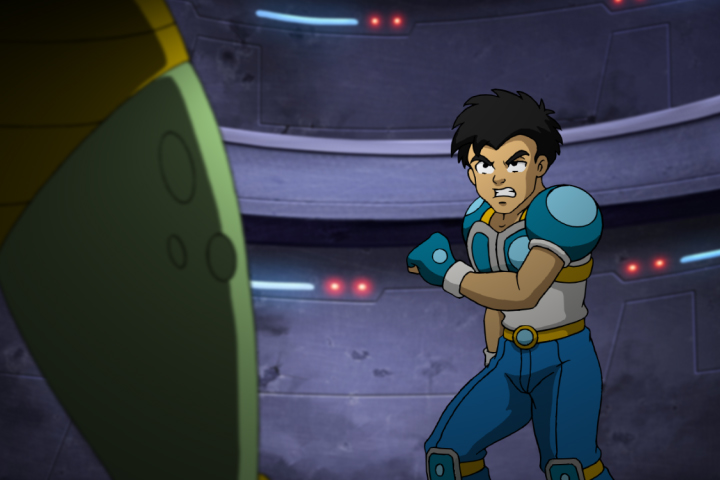
1)The original composited work of artists, no fx, just the BG and animation placed together at standard definition.

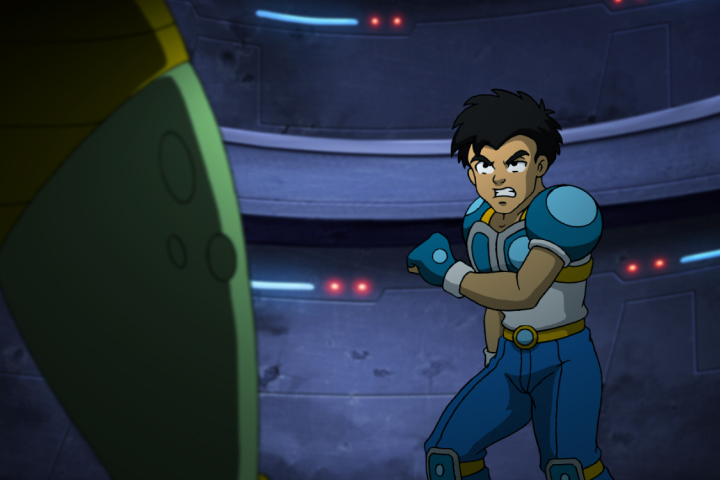
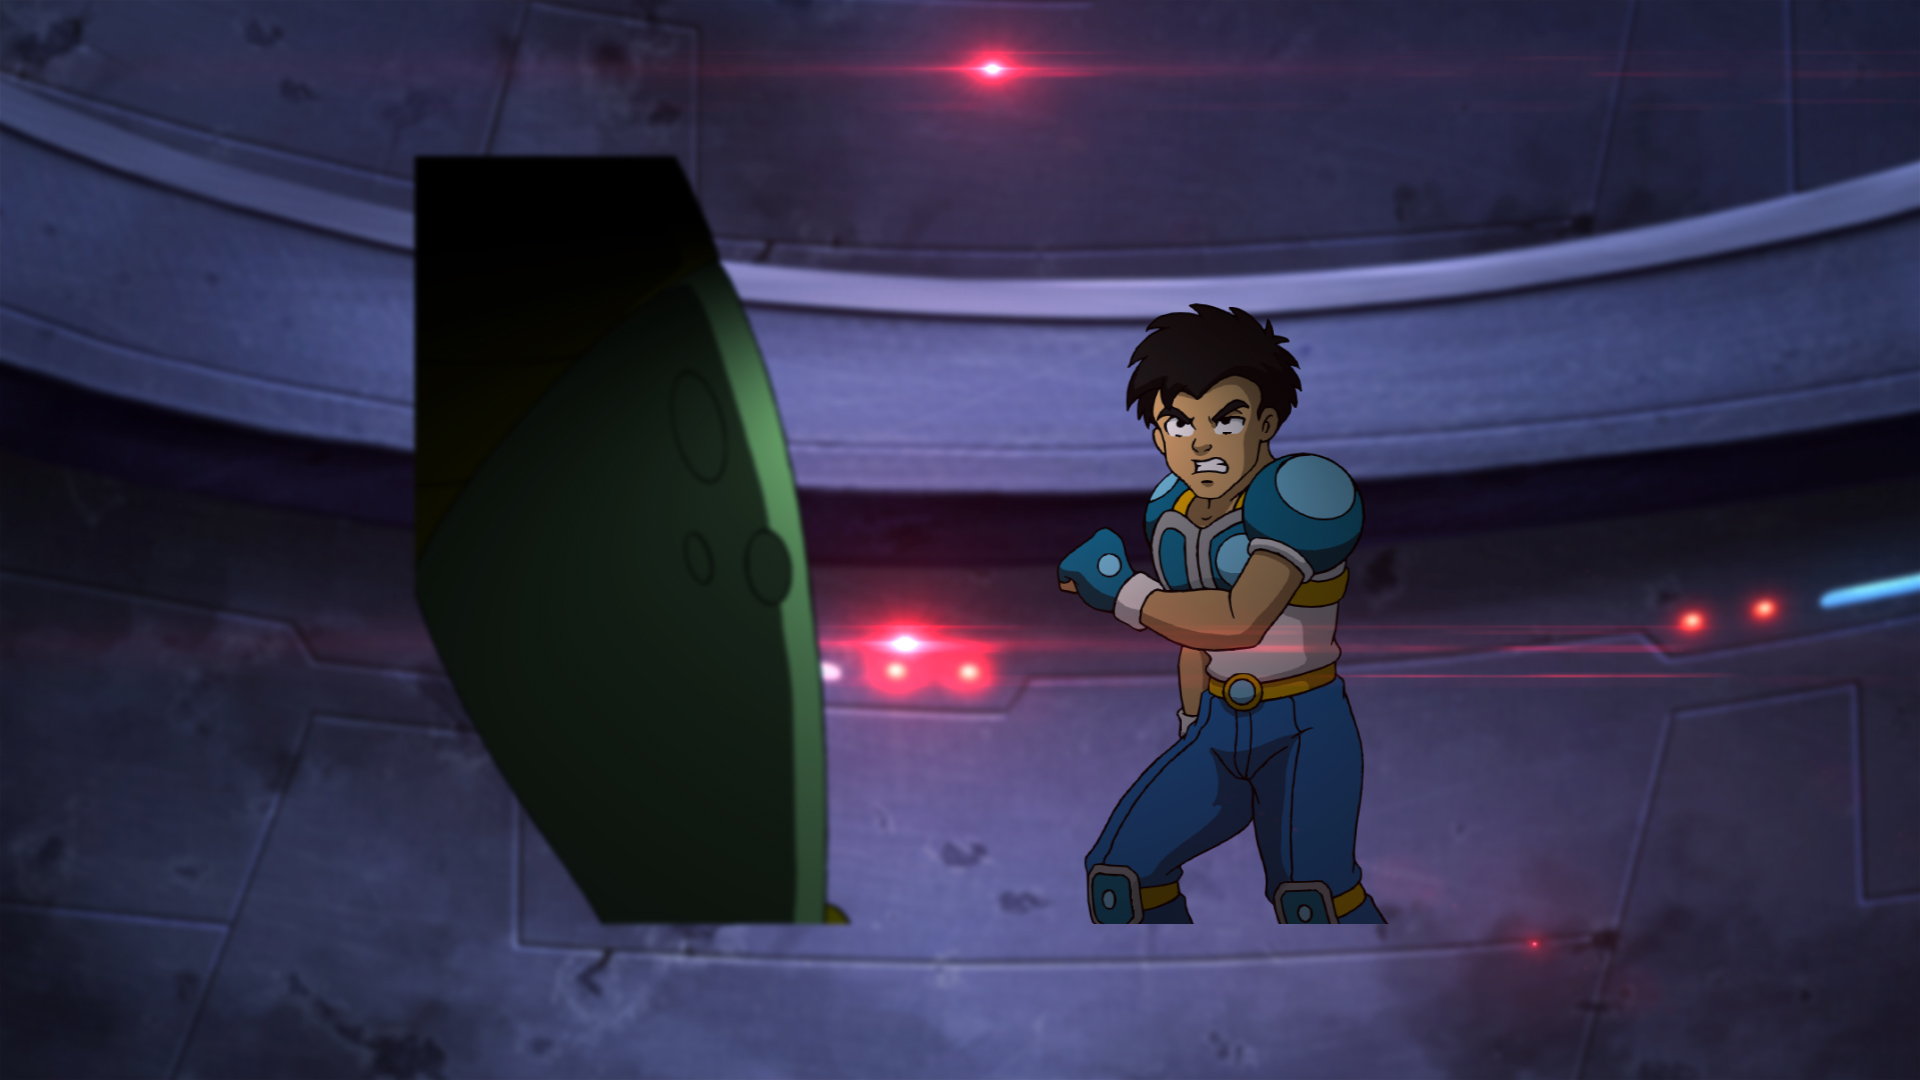
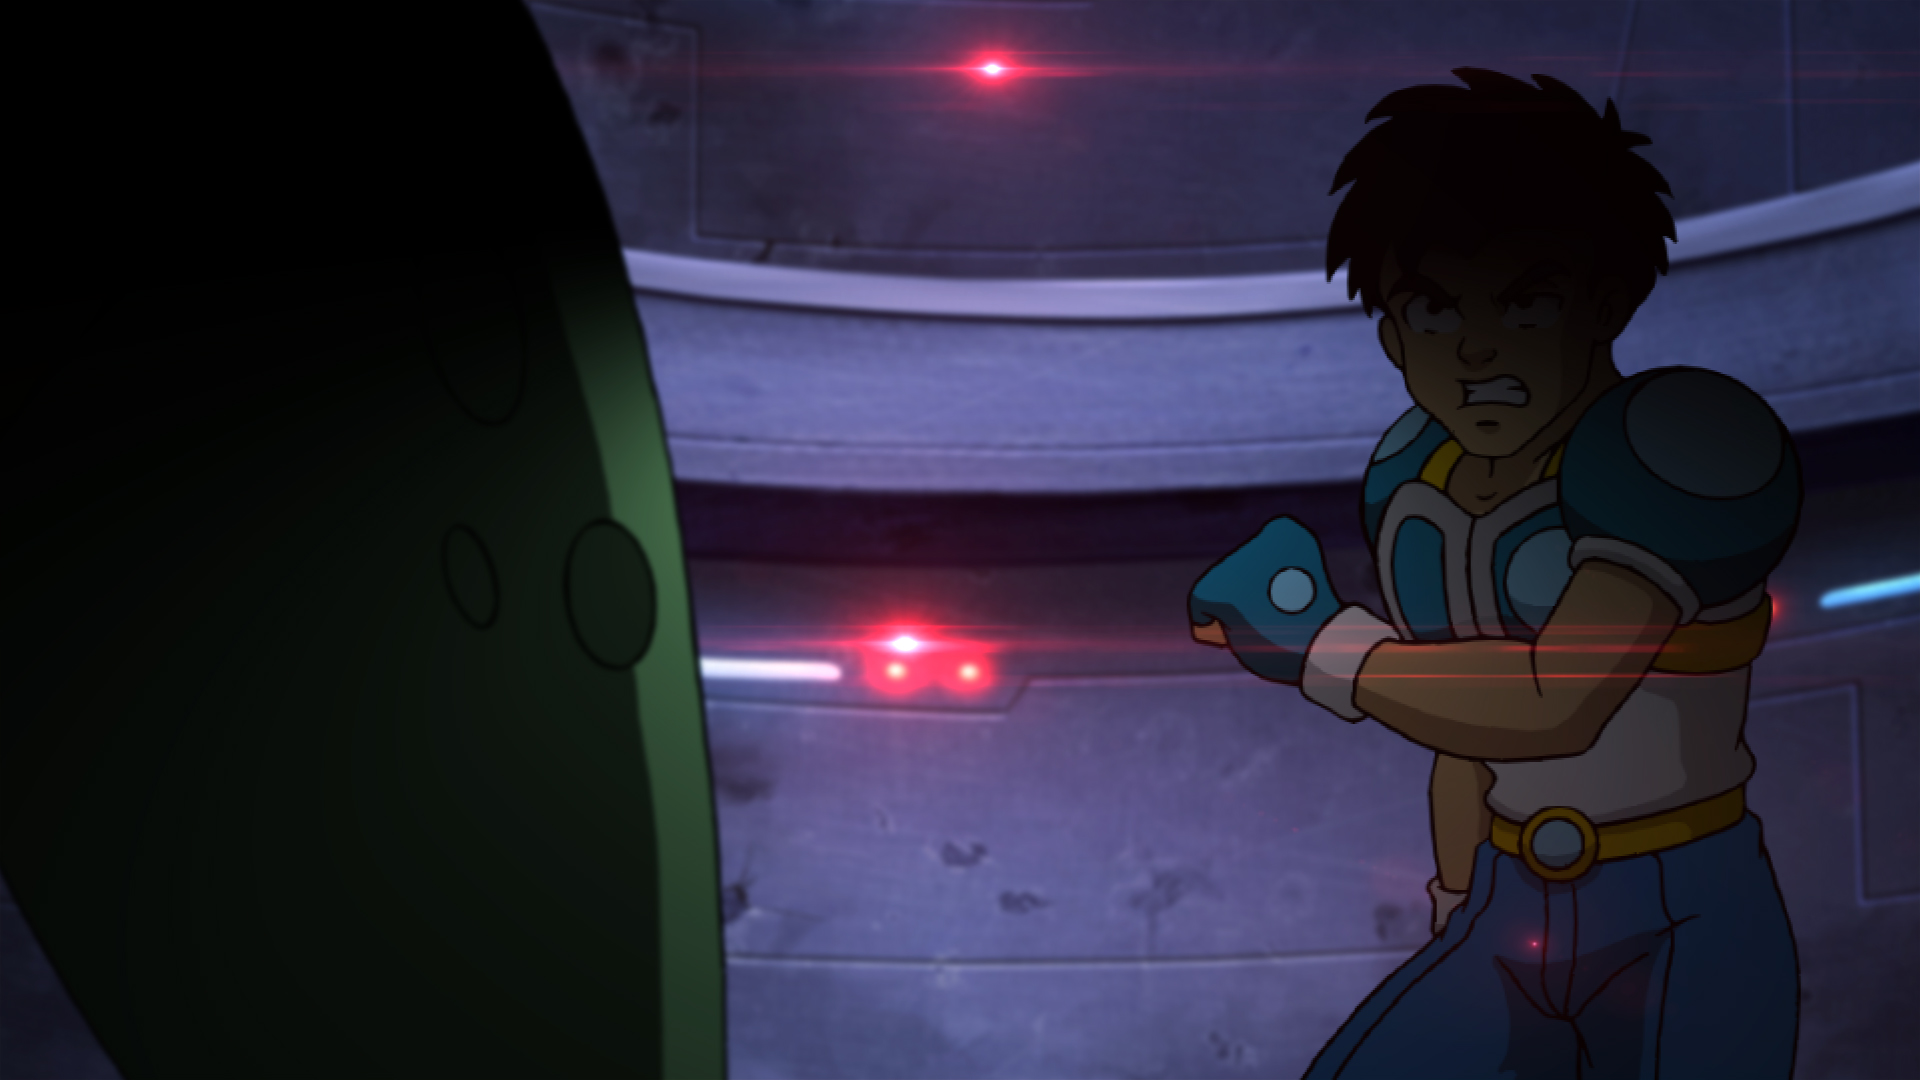
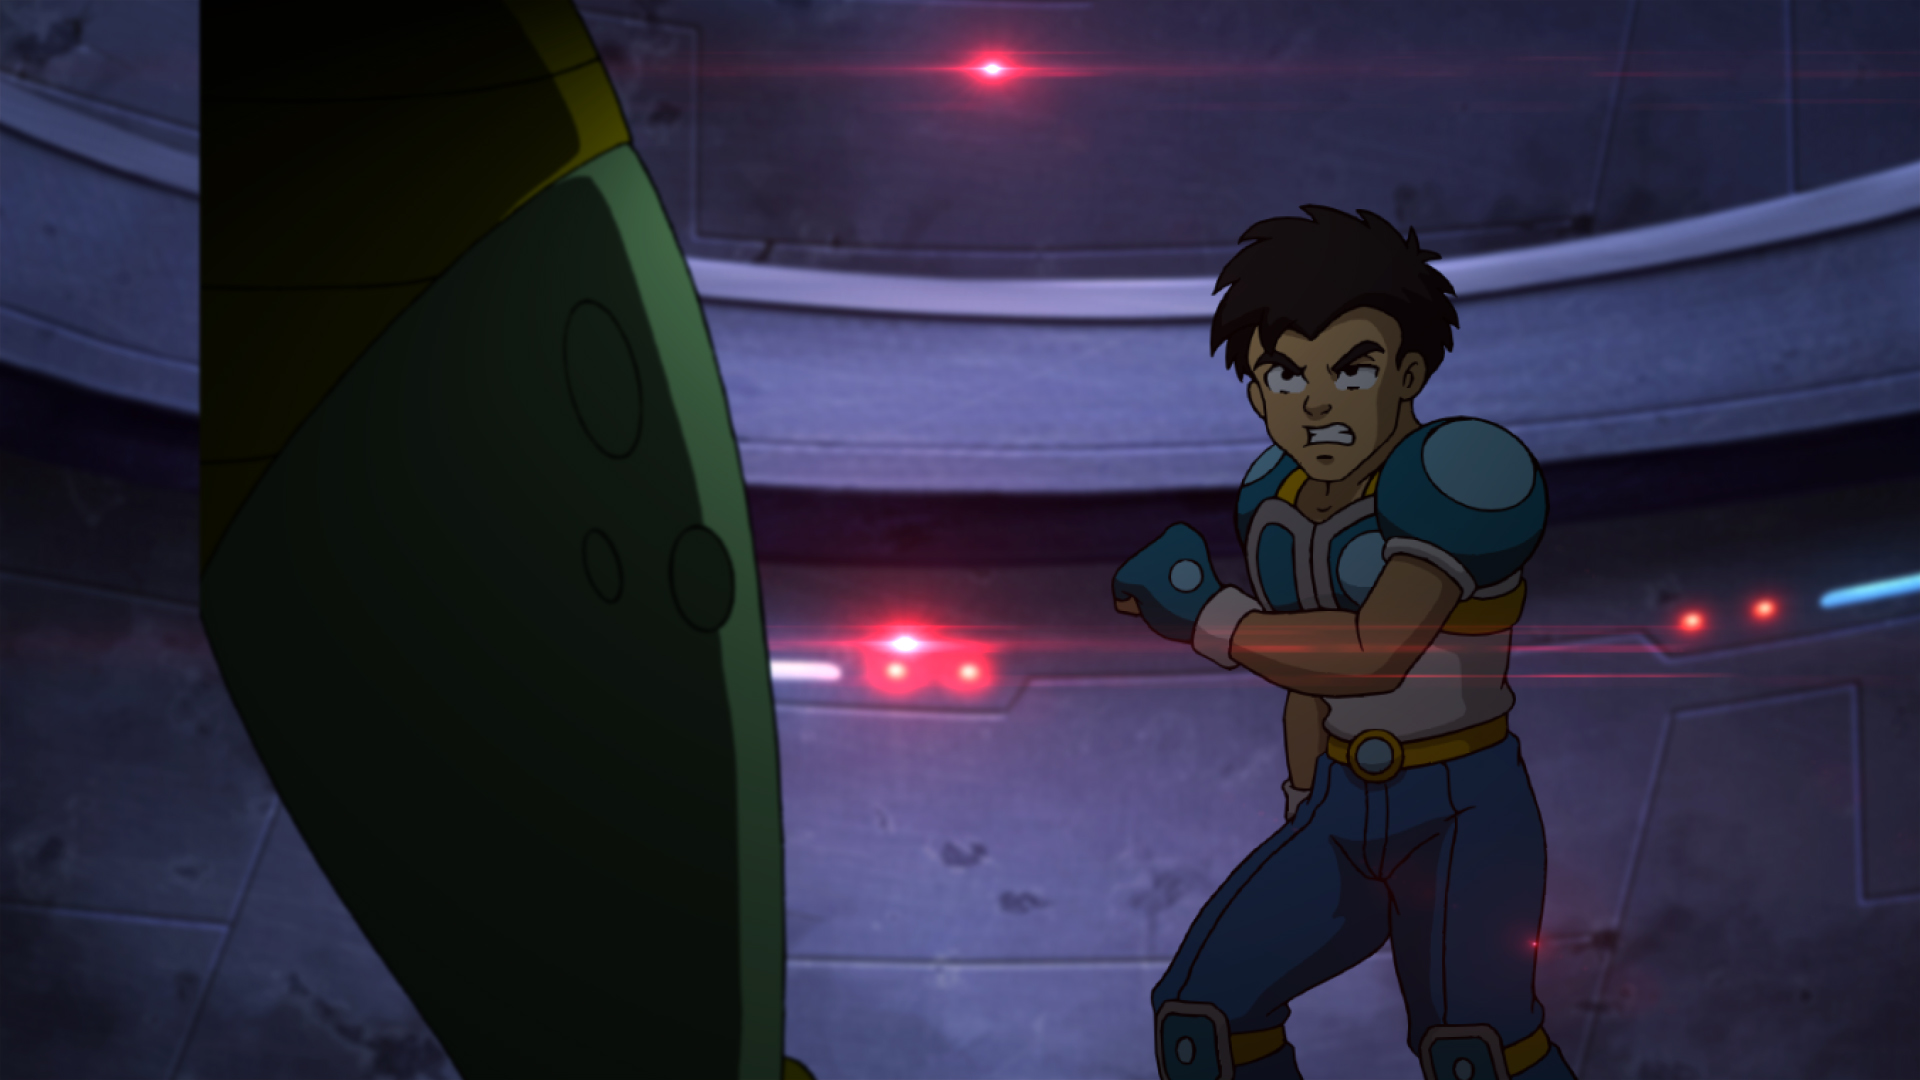
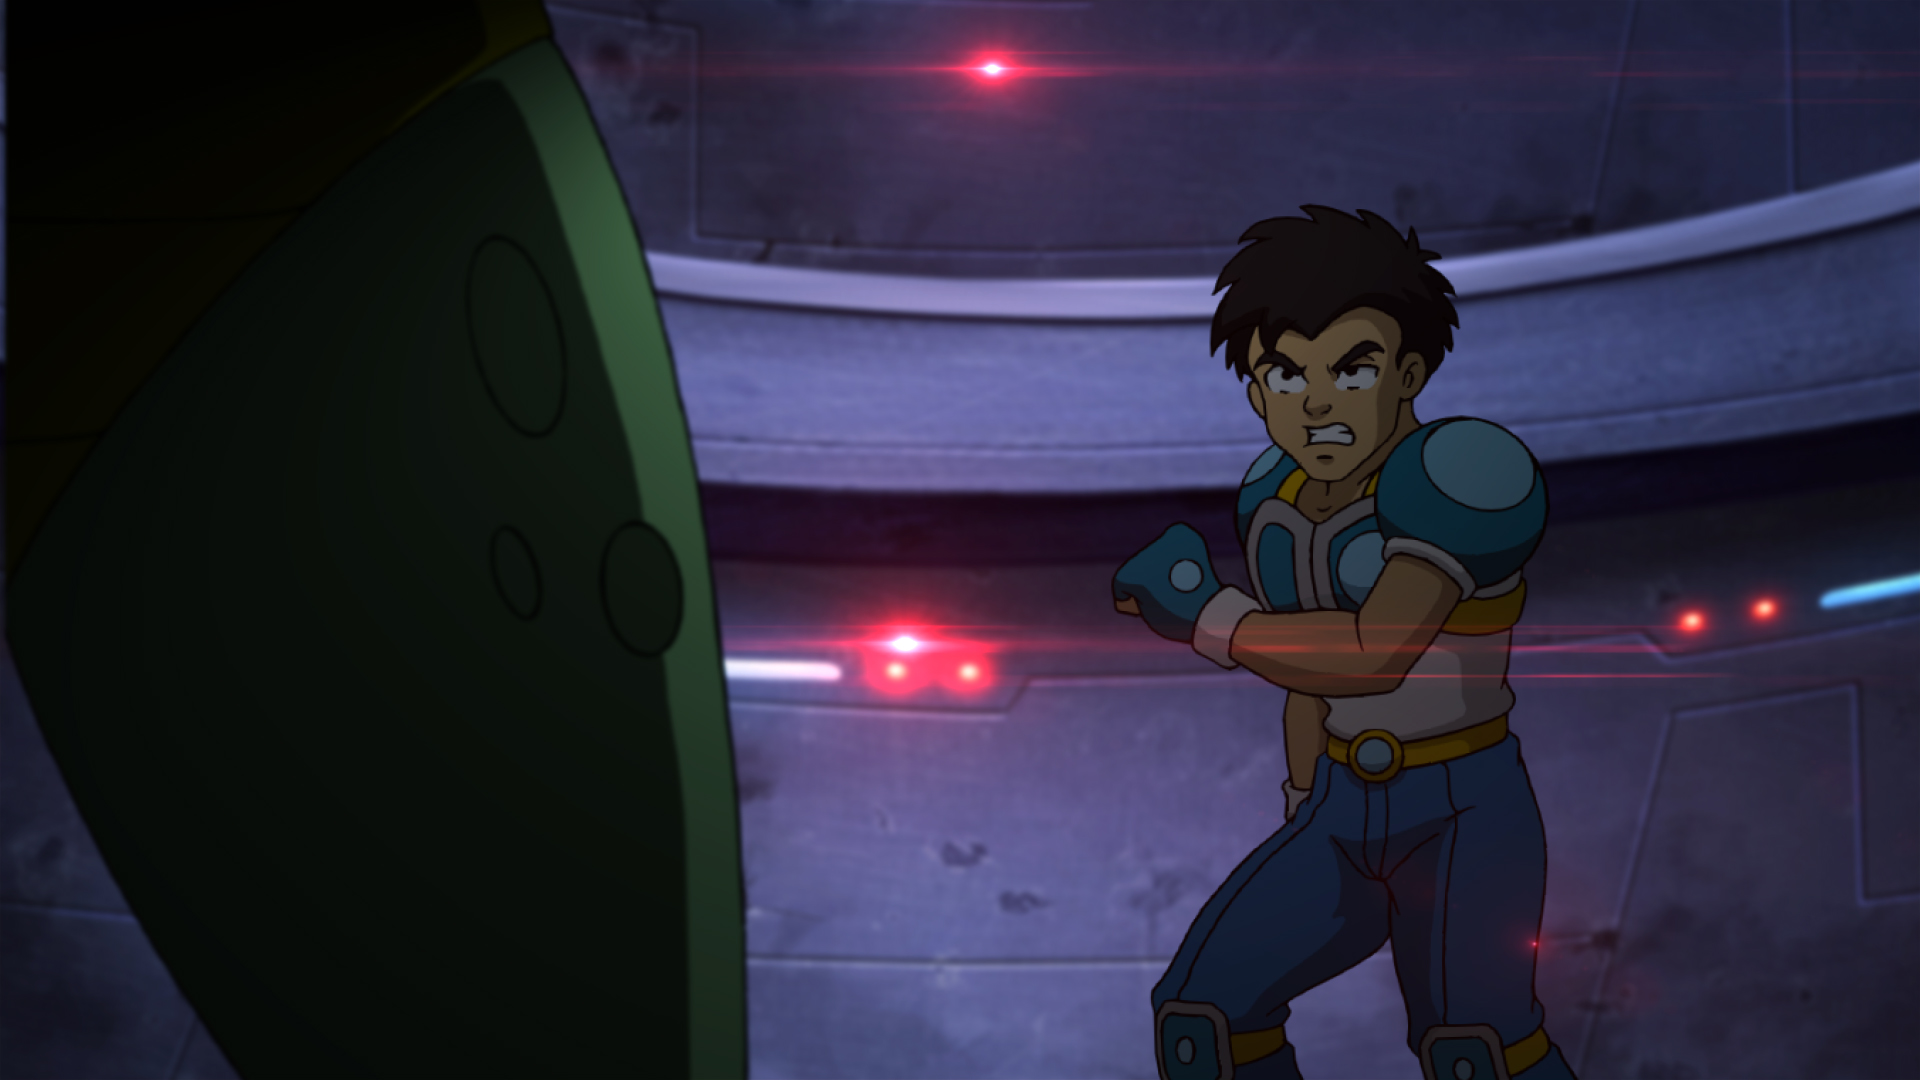
2) The director added a blur to the background and also to Balhalya in the foreground, to better focus on Jobert and to create more depth in the scene.
3) He added a light to simulate a dark interior, it also adds focus to Jobert and creates a suspenseful atmosphere.
4) He added Color Correction here, increasing the blues and decreasing the reds but very slightly; to stimulate the reflection of the color of the walls to the characters.
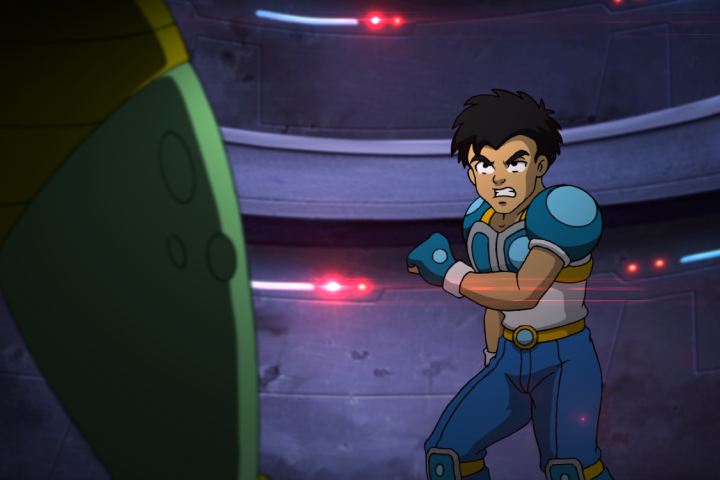
5) He added some Lens Flare FX to make the lights at the back look a bit real, and to make the shot seem like it was taken by a movie camera. This was how he fixed the scenes for Jobert for the past episodes, now aside from this, he converted them to HD, but for newer episodes, he was able to have the compositors start at the HD size.

6) This is the sequence in converting the SD scenes into HD…first he converts the project from SD which has a screen size of 720 x 480 to HD which has a screen size of 1920 x 1080. As you can see the screen is way bigger than the elements from the original scene.
![]()
7) You will also notice that the elements have stretched slightly. This is because the pixel aspect ratio of SD is 0.9, which means that each pixel is a rectangle, while the HD pixel aspect ratio is 1.0 or a square pixel. He has to adjust or interpret the elements so that it matches the screen ratio.
8) He increases the size of the BG and Animation to its maximum size at 100%, he had the BG artists and the DIP artists render at a high resolution…usually DIP renders at 1024 x 768 and BGs at 2500 x 2000…this is so when the director resizes them to a smaller size, the lines will look darker. As you can see here, the BG has almost covered the screen but the animation is still small, but he still needs to adjust both to match the original composition.
9) He first resizes the BG slightly to fill up the gaps.
10) Then he makes the DIP artist render the animation at a higher resolution, from 1024 x 768 and double it to 2048 x 1536. When done, the director just replaces the original animation with a new render. As you can see here, the animation is now bigger. It is darker because the light FX is now too weak for the bigger file.
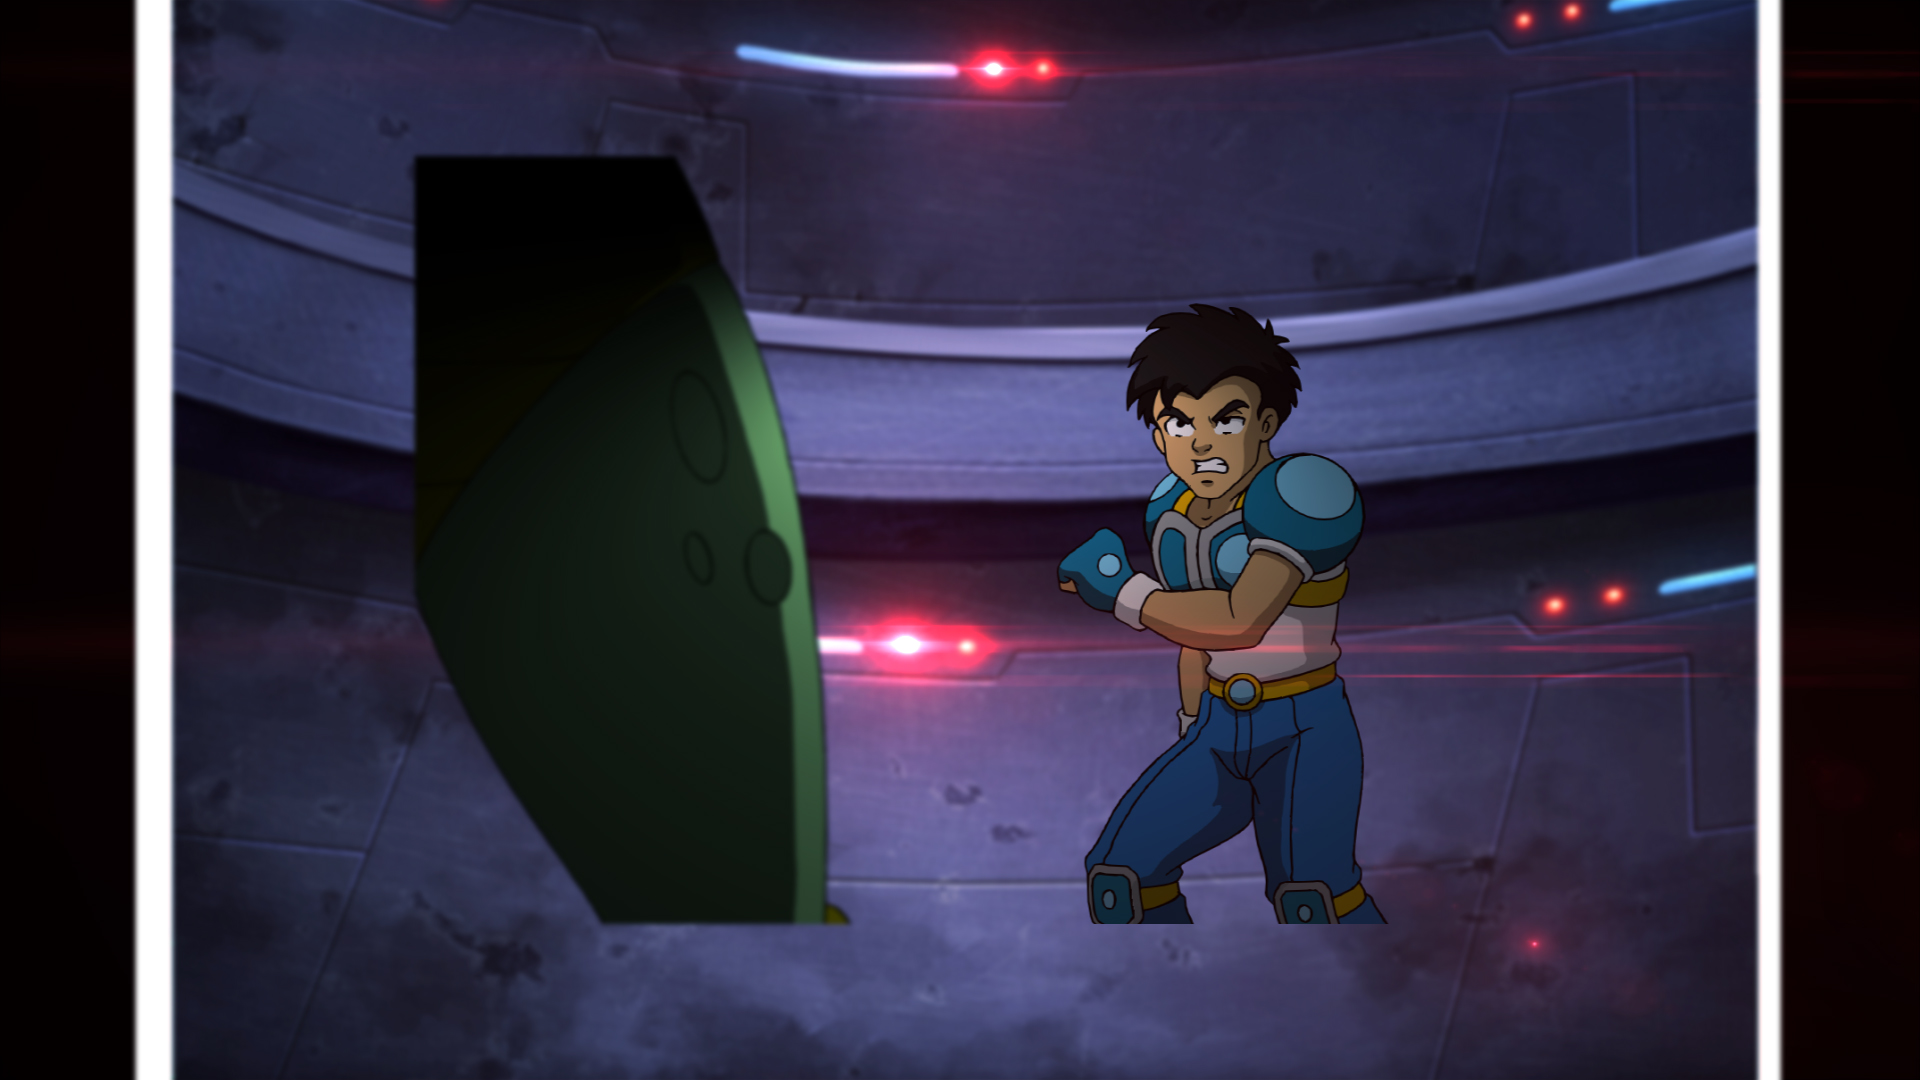
11) He now resizes the animation to match the wider screen. The original body of Balhalya was cut since it was for SD screen only.
12) To fix this, he resizes Balhalya a bit and moves him to the left. But still matching the feel of the scene.
13) He then increases the amount of the lighting FX to closely match the original effect.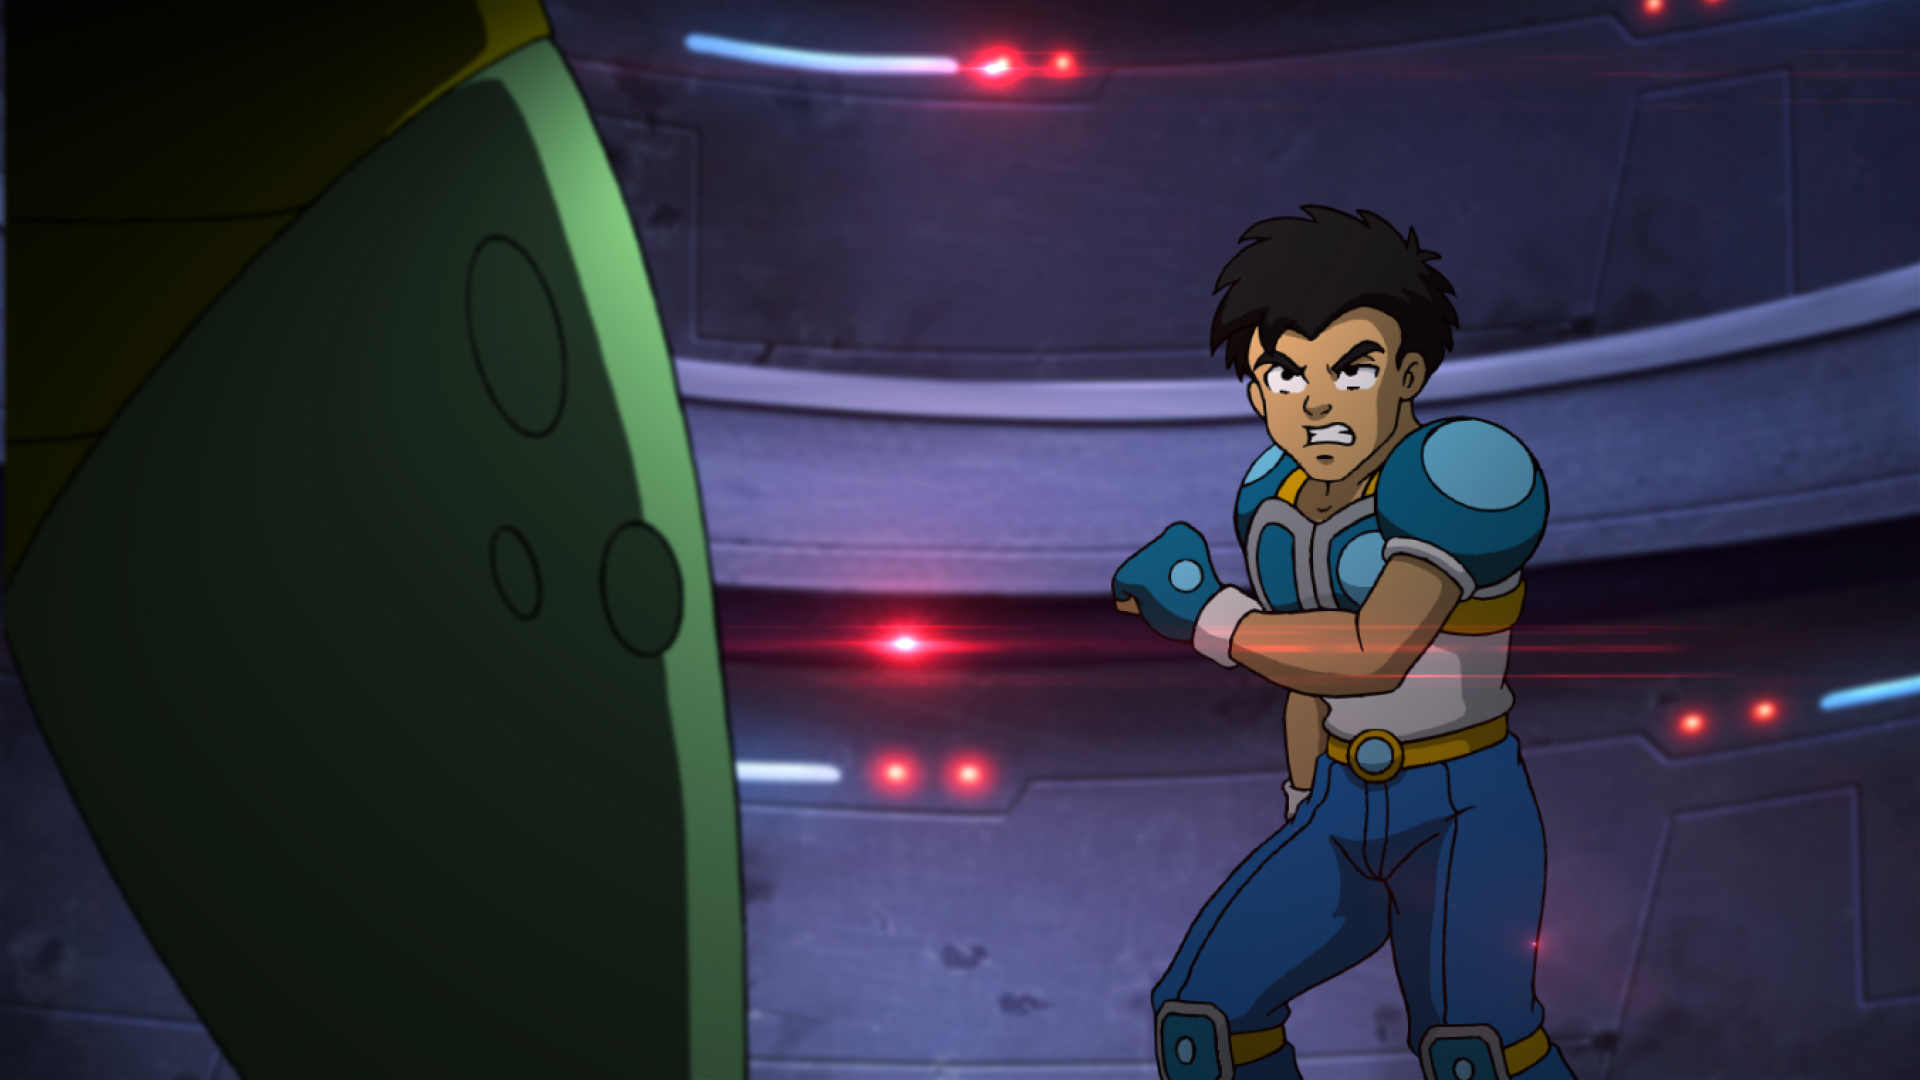
14) He also moved the BG to match the original composition.
15) And finally, he moved the Lens Flare FX to its correct position which is right on top of the lights in the BG. This is the completed HD scene.
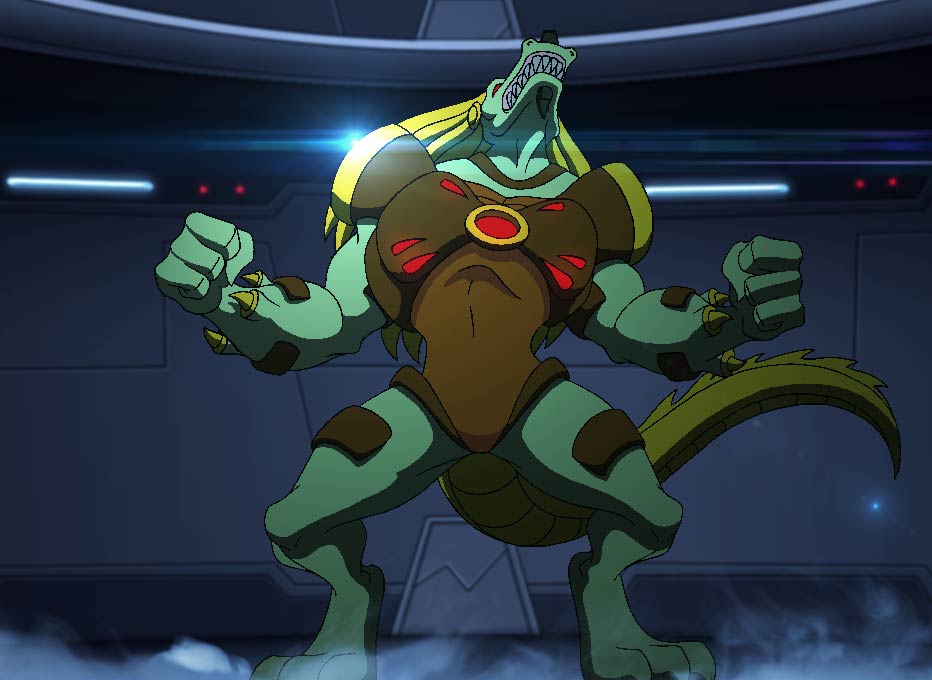
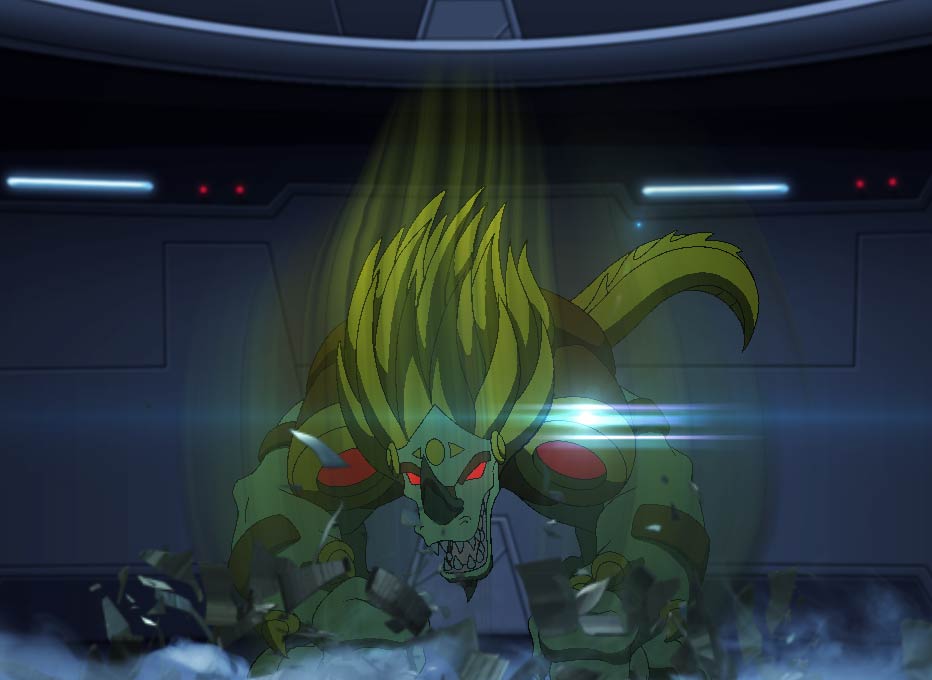
8) Missing 3D Animation and Effects
There were some scenes that used old 3D models of some ships and droids, that have since been updated. Examples were the Manta ship and the Battle Droids. The director wasn’t able to inform these updates to the new compositors who still used the old models. The director already corrected these in checking, but due to the number of scenes, he missed one or two and he gets surprised when he encounters these errors again in editing.
9) Corrupted Files
Some 3D files were corrupted when the director checked the compositing of some episodes. Usually, this happens when copying files from one computer to another. It is usually the 3D effects and characters that are affected. Examples are the Frogee ship, the new Battle Droids and Krystel’s wings. The director had to fix some of these in compositing or re-render most of it using the original 3D software the original artists used. It is a good thing, that the director can still contact some of the original artists, who have since moved to other jobs or countries.
10) High-Definition Conversion Needs Better Computers/Hardware Malfunction
With better effects and high-definition, one needs better computers to apply them. We have two high-end computers that can handle the job, although these are also out-dated already. Other compositors have had a hard time opening scenes with the newer special effects, so compositing gets done at a slower pace.
11) Voice-Over Does Not Synch with Animation
In sound editing, when placing the sound dialogue with the composited scenes, there were animation parts that did not sync with the voice. Usually, the problem comes from the X-sheet. The mouths were not rendered with the animation. The director had to go back and re-render these animations and replace them back in compositing.
12) Lack of Sound Effects
Adding subtle sound effects is one of the most difficult tasks in editing our project. We already have gone through 3 different sound editing people, and they usually have the major sound and music effects but lacks some of the small detail effects such as a phone ring, steps and punching sounds. The director has already collected sounds from the Internet through the years and have given these to the sound guys to use if they need it, but they hardly use them. So the director is already adding some of these subtle sounds in editing before we send the episodes for scoring to the sound people.
Final Output
This will be the final format of the video, whether DVD, Blu-ray or maybe just Video File. We will just prepare the file and render it according to the needs of the distributor. For viewing purposes, we have rendered it in Standard Definition.
Timeline for Production
Note: The timeline for production explained and illustrated here is with the assumption that the Pre-Production (storyboard, model sheets, voice over and X-sheets) is already completed, is based on the traditional method of animation and according to the right budget.
How do we compute the Timeline for our Animation Production?
We start with the given details…we will be doing 13-episodes with a running time of 22 minutes per episode. Since we can’t make each episode exactly 22 minutes, we will just peg that time as the maximum time limit.
Since animation is computed in footages and frames, we will first convert the minutes into the said units (feet and frames). Note: Animators compute their scenes by feet and frames while Clean-Up and In-betweeners (CU/IB) artists, Digital Ink and Paint (DIP) artists compute their work by each frame done. The formulas are: 1 minute is equal to 60 seconds, 1 second is equal to 24 frames or drawings or it could be less than this number ( example for limited movement of animation shows), 1 foot is equal to 16 frames. So based on the formulas 22 minutes is 1,980 feet (22 minutes x 60 seconds x 24 frames divided by 16 (frames/foot) or 31,680 frames but since the animation for television is done with each frame held for 2 frames ( since its not a movie, wherein the audience can see on the big screen – if the movements are fluid or not) , we divide the total frames in half, so for the total frames to be Cleaned-Up and In-Betweened and Painted is 15,840 frames or drawings.
In animation, frames are translated to drawings. And one frame of animation can be a number of drawings for a scene. For example a scene of a character talking; that is one drawing of the character per frame. Another example of a scene: 5 characters are riding bicycles across town, here you will be drawing 5 characters on bicycles plus the crowd around the town in one frame. If the characters on their bicycles are moving, the crowd can just be still drawing, but if the characters on their bicycles are standing (stationary); you will have to add movement to the crowd to stimulate life. All the people in the scene will look like statues if you don’t add movement. So a single frame of animation can be one drawing or a number of drawings, so budgeting animation with numerous scenes and characters will be difficult.
In television, animation cost is lowered by adding holds or pauses in a scene. A hold or pause is shooting a frame for more than 4 frames, this will come out as the character pausing; when you hold a character for more than 24 frames, the character will look like a robot. There can be a few seconds in a scene when the drawing is held for 24 frames, which can lower the cost a bit. Combine all of these scenes with few seconds pauses in an episode; the total cost can be lowered some more.
Japanese animation or anime has used this technique (long pauses) considerably and consistently that it is associated with anime. In Japanese animation, some scenes have little or no movement at all. To balance this lack of motion, their drawings are much more detailed than the Western style of animation. Shadows and highlights have numerous layers, and the character costumes and eyes are much more detailed. they also apply camera movements, dynamic camera shots, special effects and great cinematography. Our director has even seen a scene where the character’s back was shown for 5 seconds with the camera panning. That is 5 seconds without any animation at all. For more technical details about the timing, pausing and framing just research the Internet, one good site is McAnim8.
Based on our director’s 18 years experience in the industry, an average Animator can finish about 40 feet of Animation per week. And Clean-Up and In-between Artists can finish 100 frames of animation a week. Also, a 22-minute Animation usually has about 300 scenes as an average, which also means 300 backgrounds per episode (although the director usually tries to lessen the backgrounds to 2/3 of the average required backgrounds). Given the formulas and averages, this will be used to compute the average output of Layout and Background Artists. Layout Artists can finish about 20 scenes per week and Background Artists can finish 10 backgrounds per week. A good Compositor can finish 20 scenes a week.
Now that we know the average work to be done, we can now make our timeline.
Weekly Allotted Artists
Averages Time Total Needed
Layout 20 scenes 2 weeks 40 scenes 7.5
Animation 40 feet 3 weeks 120 feet 16.5
CU/IB 100 pieces 4 weeks 400 pieces 39.6
Backgrounds 10 pieces 3 weeks 30 pieces 10
DIP 500 pieces 3 weeks 1,500 pieces 10.56
Compositing 40 scenes 2 weeks 80 scenes 3.75
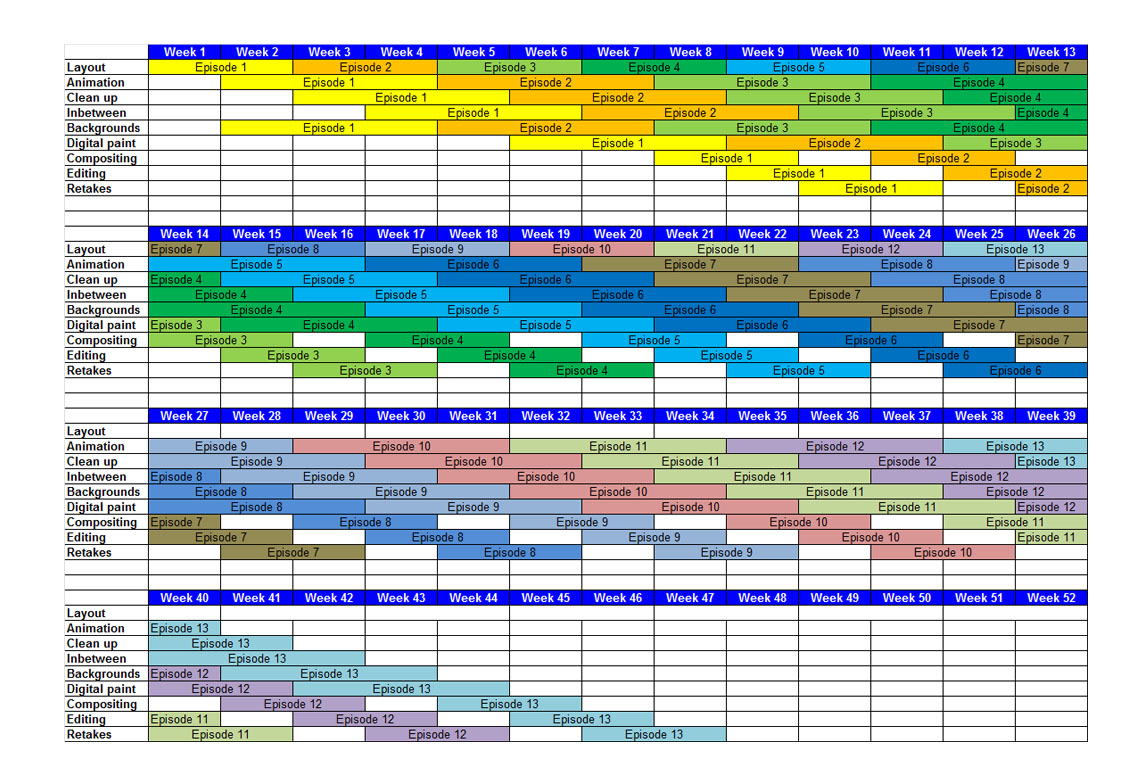
If we will estimate that 1 episode is to be done in a month, with overlapping works …We need about 8 Layout Artists, 17 Animators, 40 CU/IB Artists, 10 Background Artists, 11 Digital Ink and Paint Artists and 4 Compositors to finish 1 episode in 5 to 6 weeks. We haven’t even included Editing and Retakes which can take about 2 weeks each. We can safely say that we can finish 13 episodes in 13 months if all the artists are present. Our main problem was the studio cannot accommodate that many artists and we are below the normal budget. So we depended on freelance artists to do the work, but we competed with other studios for the good artists. And not all artists are Average, there are few who are Above Average – who could double the output but are usually busy in other studios and there are a Lot of Below Average Artists that can only do half the output of Average Artists. So the quality of the artists is a big factor on how the timeline will be planned.
Timeline Based on Traditional Animation
Timeline Based on Tradigital Animation
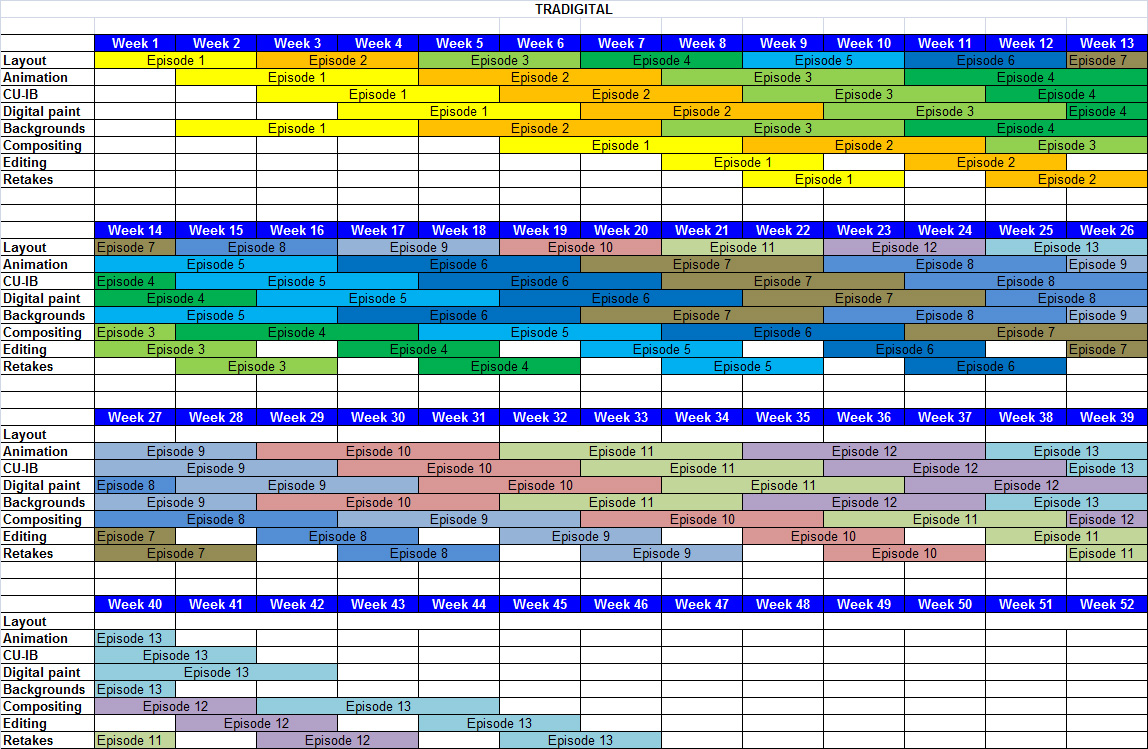
Based on the timelines charts, we only have a difference of 2 weeks, because it is hard to quantify other aspects of production that were removed from the Traditional to the Tradigital production. The two methods will be compared in the production process of Animation, Clean-Up and In-between (CU/IB) and Digital Ink and Paint (DIP).
Animation
Traditional
Animators animate using pencil and paper. A 3-second scene at 24 frames per second has 72 frames of animation which can be lessened to 36 frames if each frame is hot twice. An animator has to test his scene by shooting each drawing with a camera connected to a computer ( a line test), after this he can sequence it correctly and play to see if the action is what he intended it to be. If he is not satisfied, he can redraw some parts or all of it, and line test it again until he gets the effect he wants. The animator then hands his animation to the production coordinator who then submits it to the director for checking. The director watches the line test and approves the scene, which the production coordinator then gives it to the Clean-Up and In-between.
Tradigital
Animators animate directly into a computer using a tablet. He uses the same number of frames as in the Traditional method. An animator, after finishing his scene in the computer, he can automatically playback his scene without transferring to another machine. He can make adjustments and play it back while seating on his chair. The time to transfer to a line test machine and shooting each drawing with a camera has been eliminated. The animator can now send this file to the production coordinator instantaneously via the network. The director can now play the scene sent via the network and approves it which is sent to the Clean-Up and In-Between Department. There is a notable difference in time from standing and waiting in line for other animators doing the line testing (shoot his drawings per page, adjust exposure sheet and play it) In our case, we only have 2 line test machines, we did not include the time saved in the timelines as it is hard to quantify the time saved. There will be a lot of savings in the paper, erasers, and pencils as this will no longer be used in the Tradigital method.
Clean-Up and In-Between
Traditional
Clean-Up Artists trace the work of the animators using pencil and paper. Using a copier, they make copies of the model sheets as guides. The In-between Artists draws the in-between drawings between the cleaned up drawing using pencil and paper. They have to duplicate the line quality of the clean-up artists so it is consistent. Both clean-up and in-between artists should be careful to lessen erasures so that when the drawings are scanned, there will be less dirt and smudges seen. Finished drawings are then scanned into the computer for digital ink and paint.
Tradigital
Clean-up Artists trace the work of animators directly in a computer using a tablet. They bring out the models digitally to use as guides save a lot of time as opposed to using a model guidebook, photocopying it and lining up to photocopy it. In-between artists draw the in-between drawings between the cleaned-up drawings using a tablet. The artists can pick a line thickness in the software they are using so that all drawings are consistent. They don’t need to erase or redo any drawing on paper, as everything is edited on the computer. Finished files are now sent directly to digital ink and paint (No need for scanning).
Digital Ink and Paint (DIP)
Traditional
DIP artists clean (erase) the scanned images of smudges, erasures, and dirt the scanner picked up in the computer. The drawings are converted to Raster image by a DIP software. (When you zoom up a Raster or Bitmap image, you will see that the image is made up of small squares or pixels.) Placing a color is just a point and click with the mouse; the line color is basically the pencil color when scanned.
Tradigital
When the Clean-up and In-between Artists trace the animations, the drawings are already in Vector, and it can be colored directly on the same software. (A Vector image is made up of lines that even when you zoom up, it is still a smooth line) These images retain its appearance regardless of size if one zooms in, while in the Raster image, once zoomed the images becomes more pixelated. The Vector images can close up on an eye then zooms out to a full shot of the person in front of his house, which would be very difficult to do for a Raster image.


[…] One blog was pretty helpful for what I was looking for and more: https://miracleanimationstudiosinc.com/2013/04/24/production-process-for-2d-animation/ […]
WOW…. was looking for something like this for some time now, and finally found it. Thank You
As a budding animator, this entire post helped me understand so much. Even with the mistakes that have happened, I am glad that they did. There is no better way to learn. Thank you for sharing your ups, downs, and all arounds with this project. I cannot wait to learn more!
For someone who wants to make a Anime Production this has truly helped a lot. I believe computer animation will go even further if the Artist is skilled enough
Thank you for this amazing insight! Are there others?
[…] Production Process for 2D Animation […]
This was a great article! Check out this short animation process overview!
[…] Production Process for 2D Animation. (2017). Miracle Animation Studios Inc.. Retrieved 4 July 2017, from https://miracleanimationstudiosinc.com/2013/04/24/production-process-for-2d-animation/ […]
Hello, can I used this as reference in my class, Im teaching animation for SHS. Thank you so much.